

Menu
This guide explains how to create a custom notification template in Clientility and attach it to an Event Type. These templates help you control what message is sent, who receives it, and when it goes out for events such as scheduled visits, reminders, updates, and completed appointments.

Click Settings from the main sidebar to access your account configuration options.
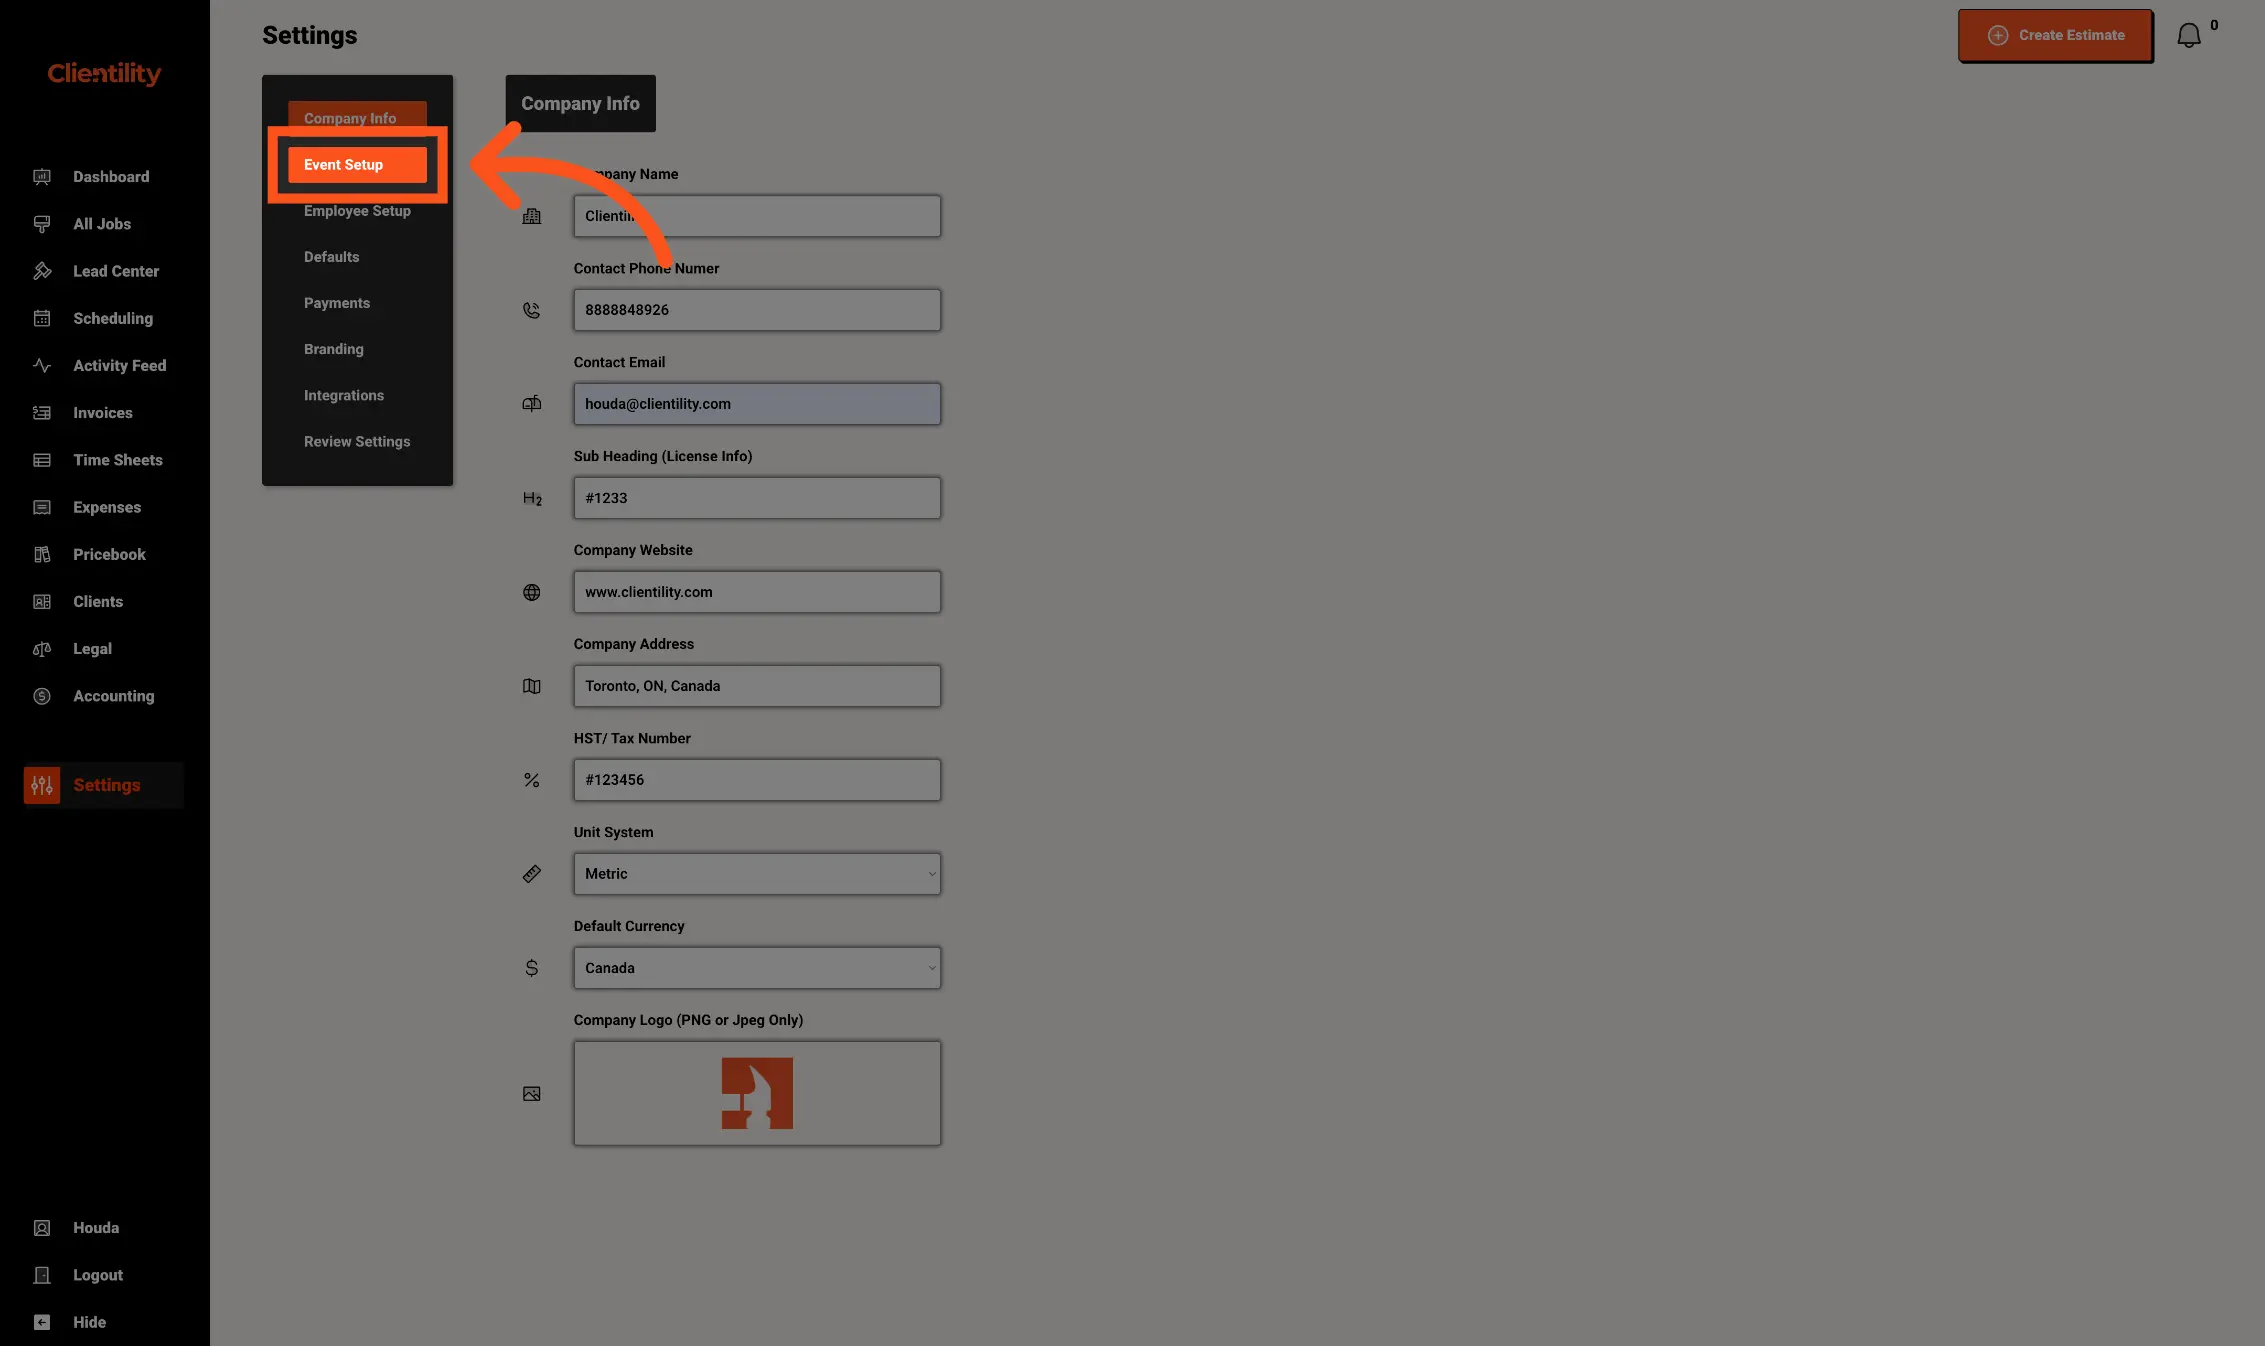
Click Event Setup to manage your notification templates.
This section is where you can create custom notifications that are sent to customers or employees.
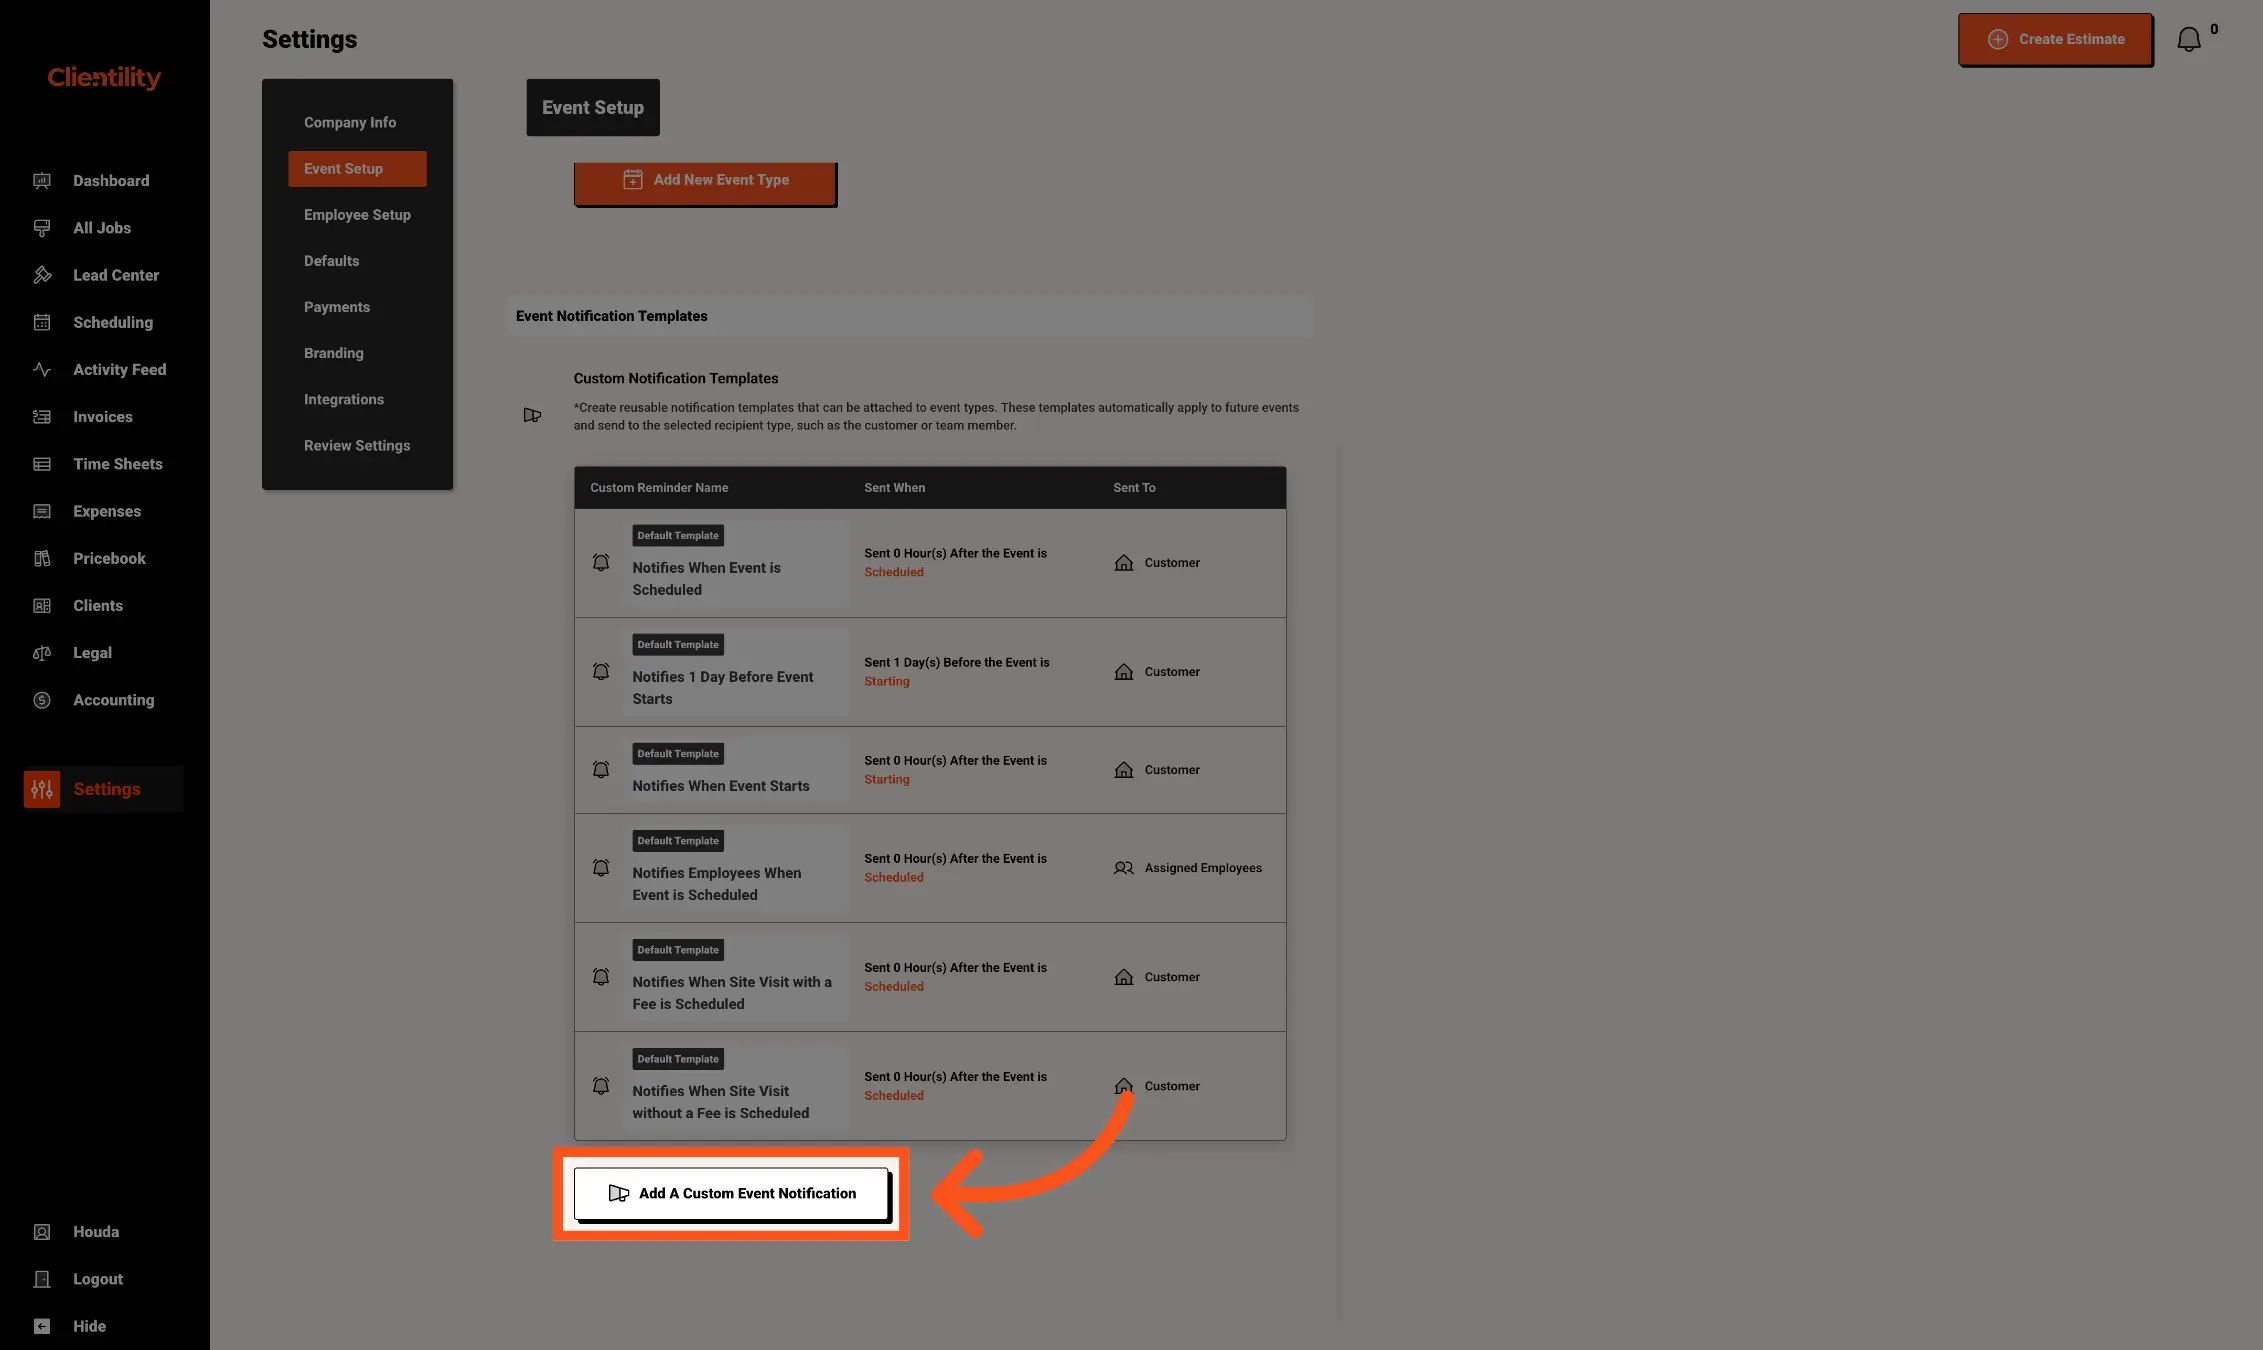
Scroll down to the Event Notification Templates section and click Add a Custom Event Notification.
This is where you can create your own notification template for events. Custom notifications let you choose what message is sent, when it should be sent, and whether it should go to the customer or assigned employees.
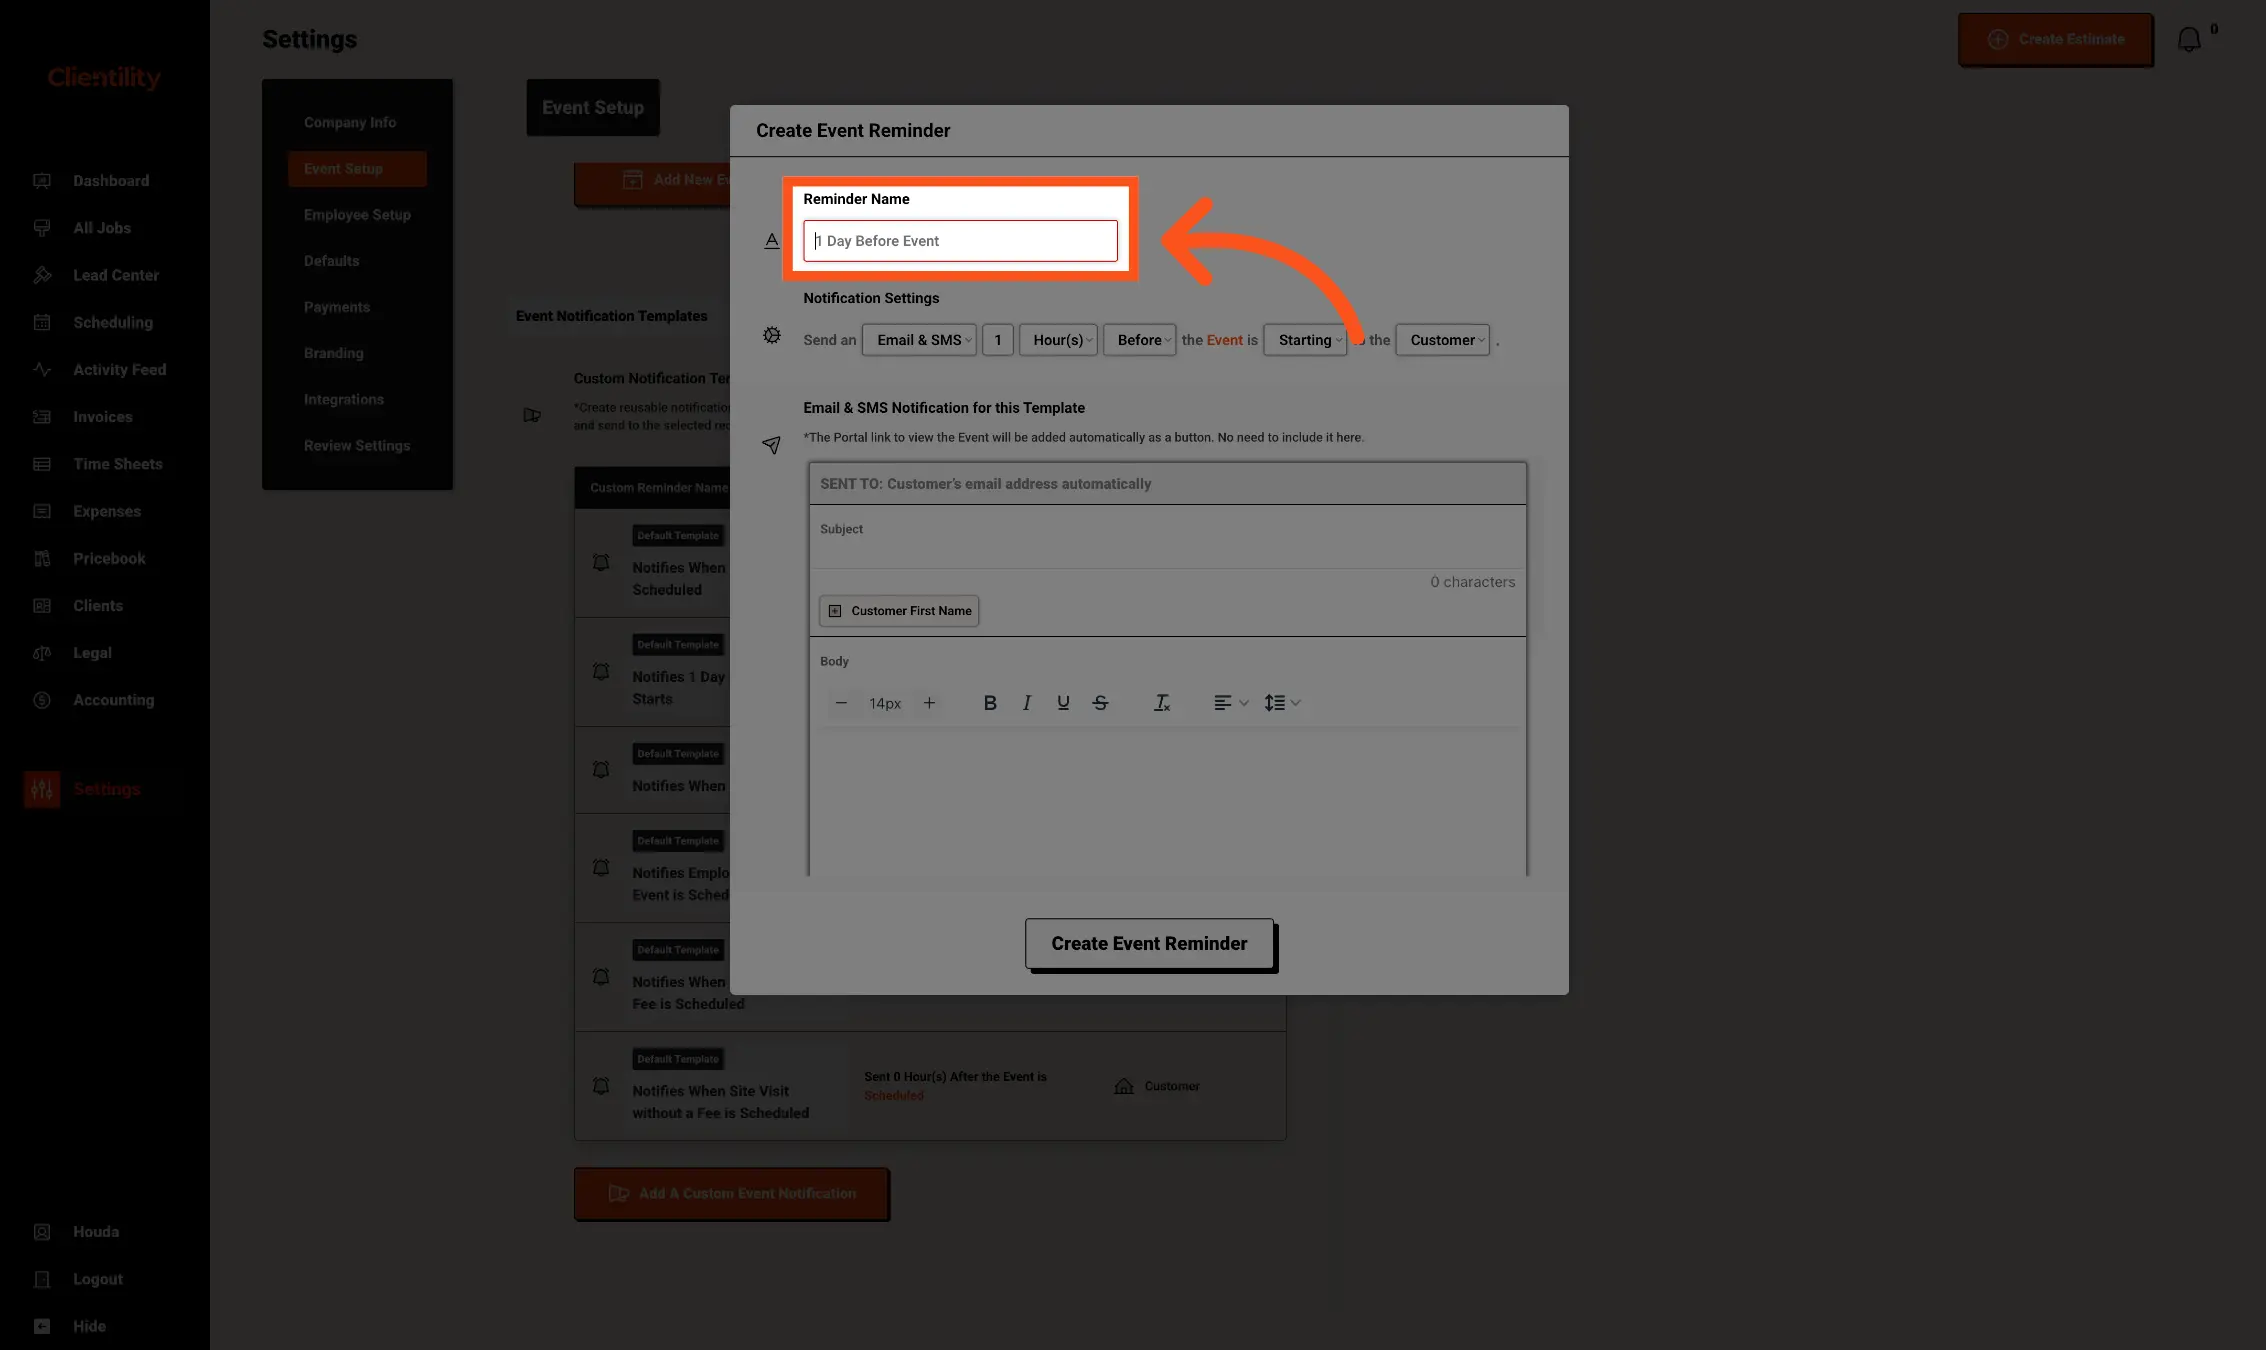
Enter a Reminder Name for your custom notification template.
This name is only used inside Clientility to help you identify the template later. Choose a clear name that explains when the notification will be sent, such as 1 Day Before Event or Reminder Before Event Starts.

Use the Notification Settings to choose how and when the notification should be sent.
You can select whether the notification is sent by Email/SMS or both, how long before or after the event it should go out, what event status should trigger it, such as Scheduled, Starting, or Completed, and whether it should be sent to the customer or the assigned employees.
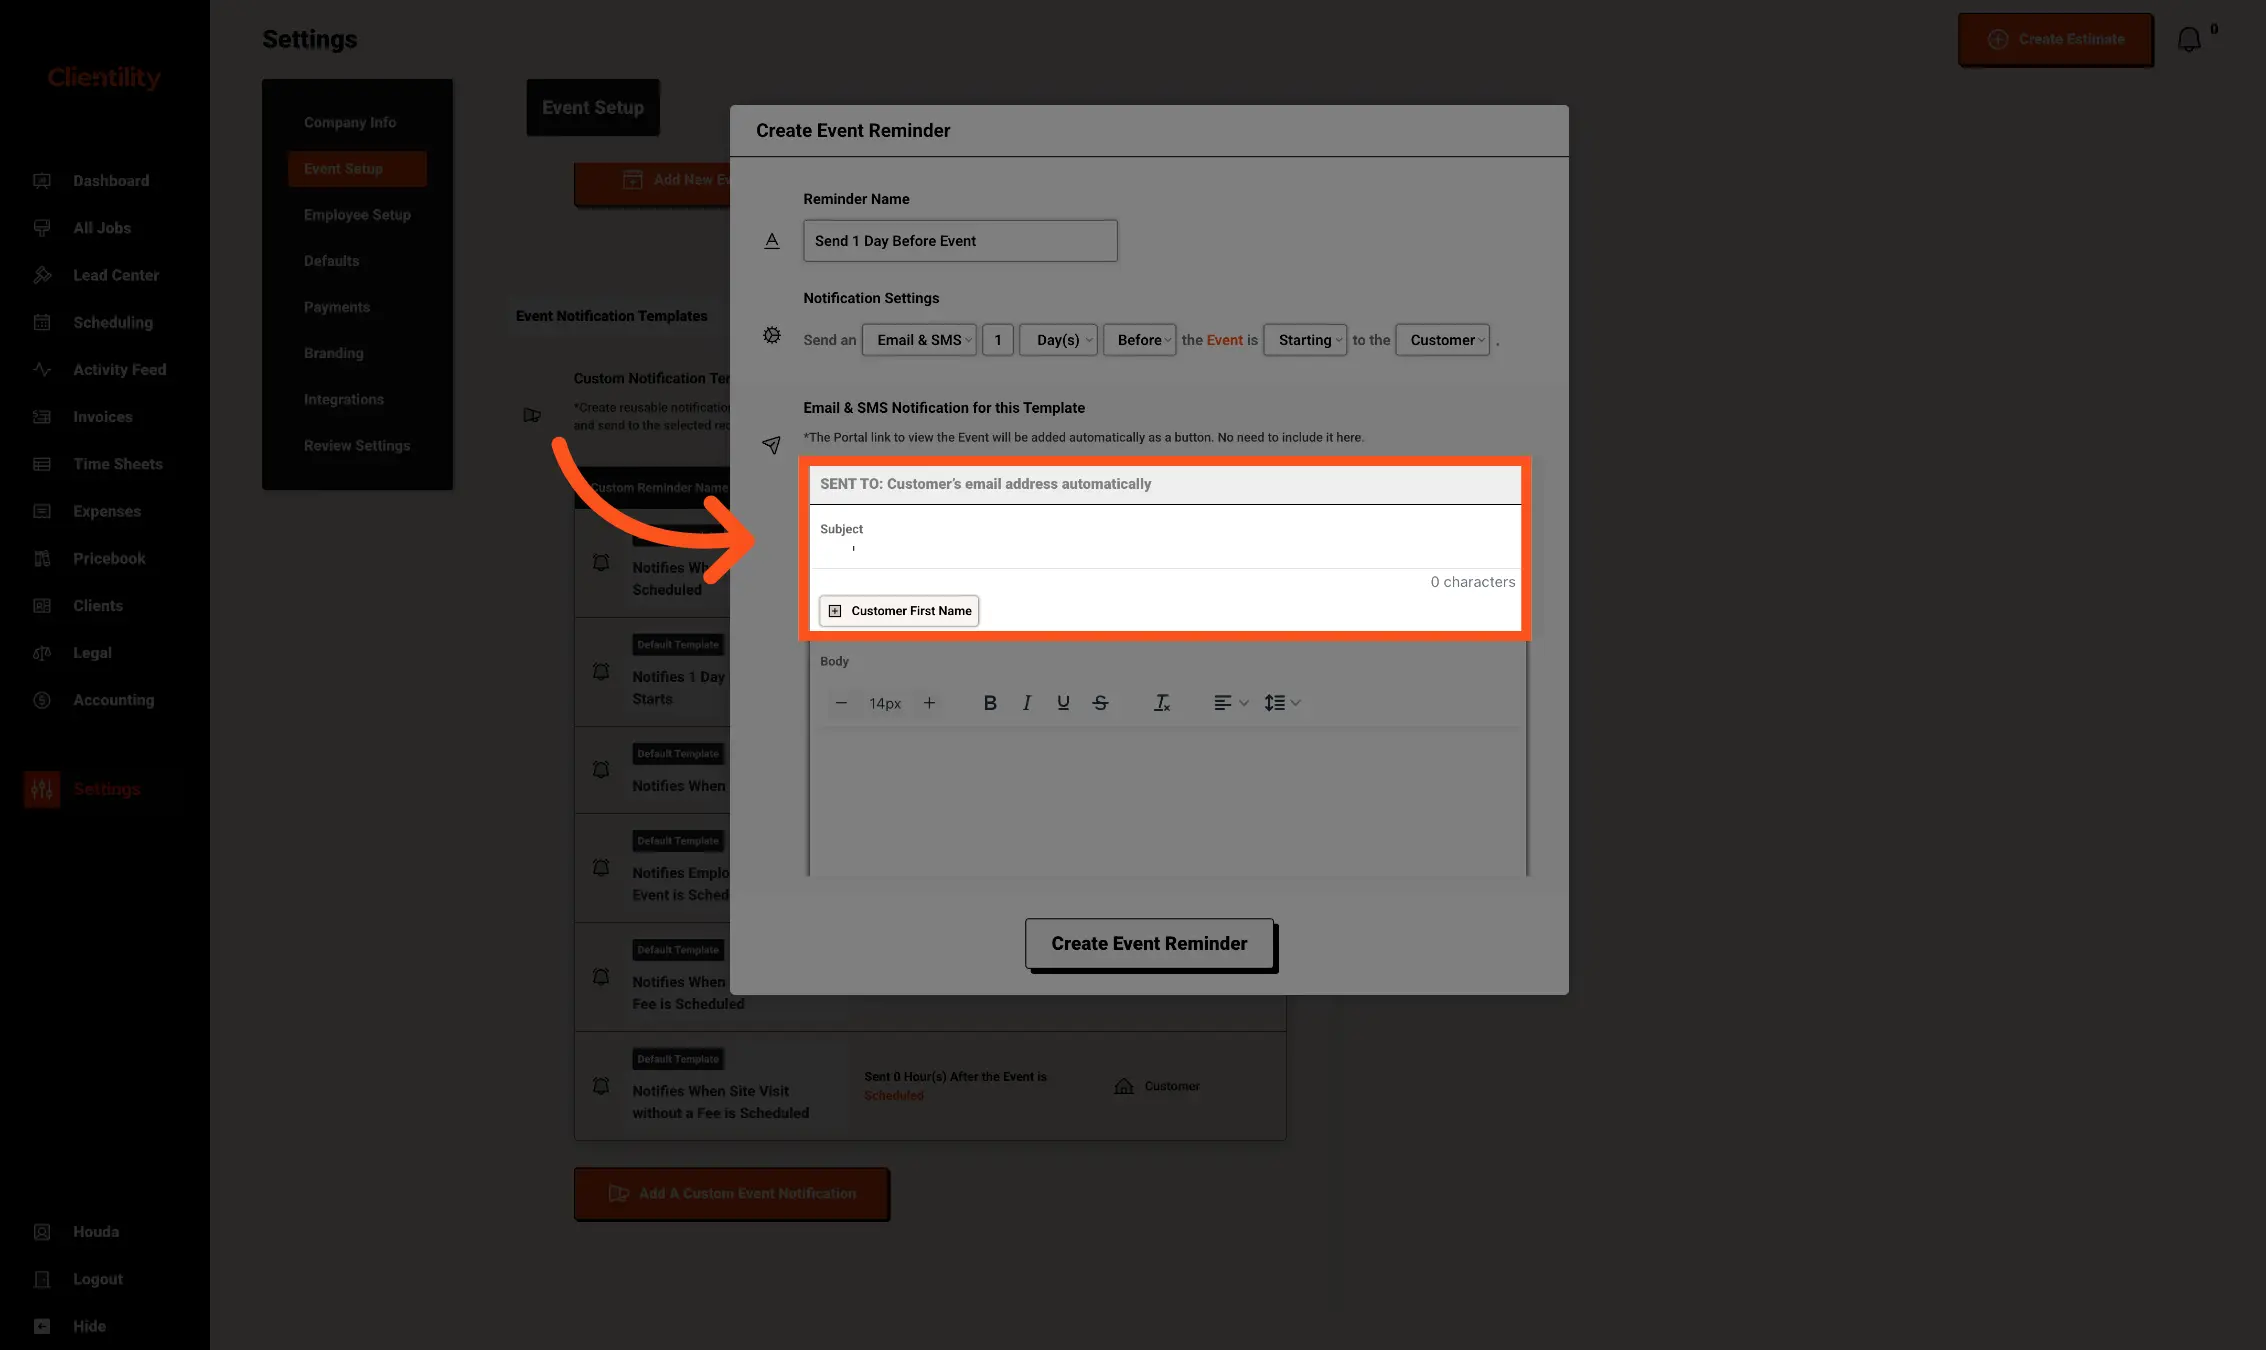
Enter the Subject for the notification email.
This is the subject line the customer will see when the notification is sent. You can also use dynamic fields, such as the customer’s first name, to personalize the message automatically.
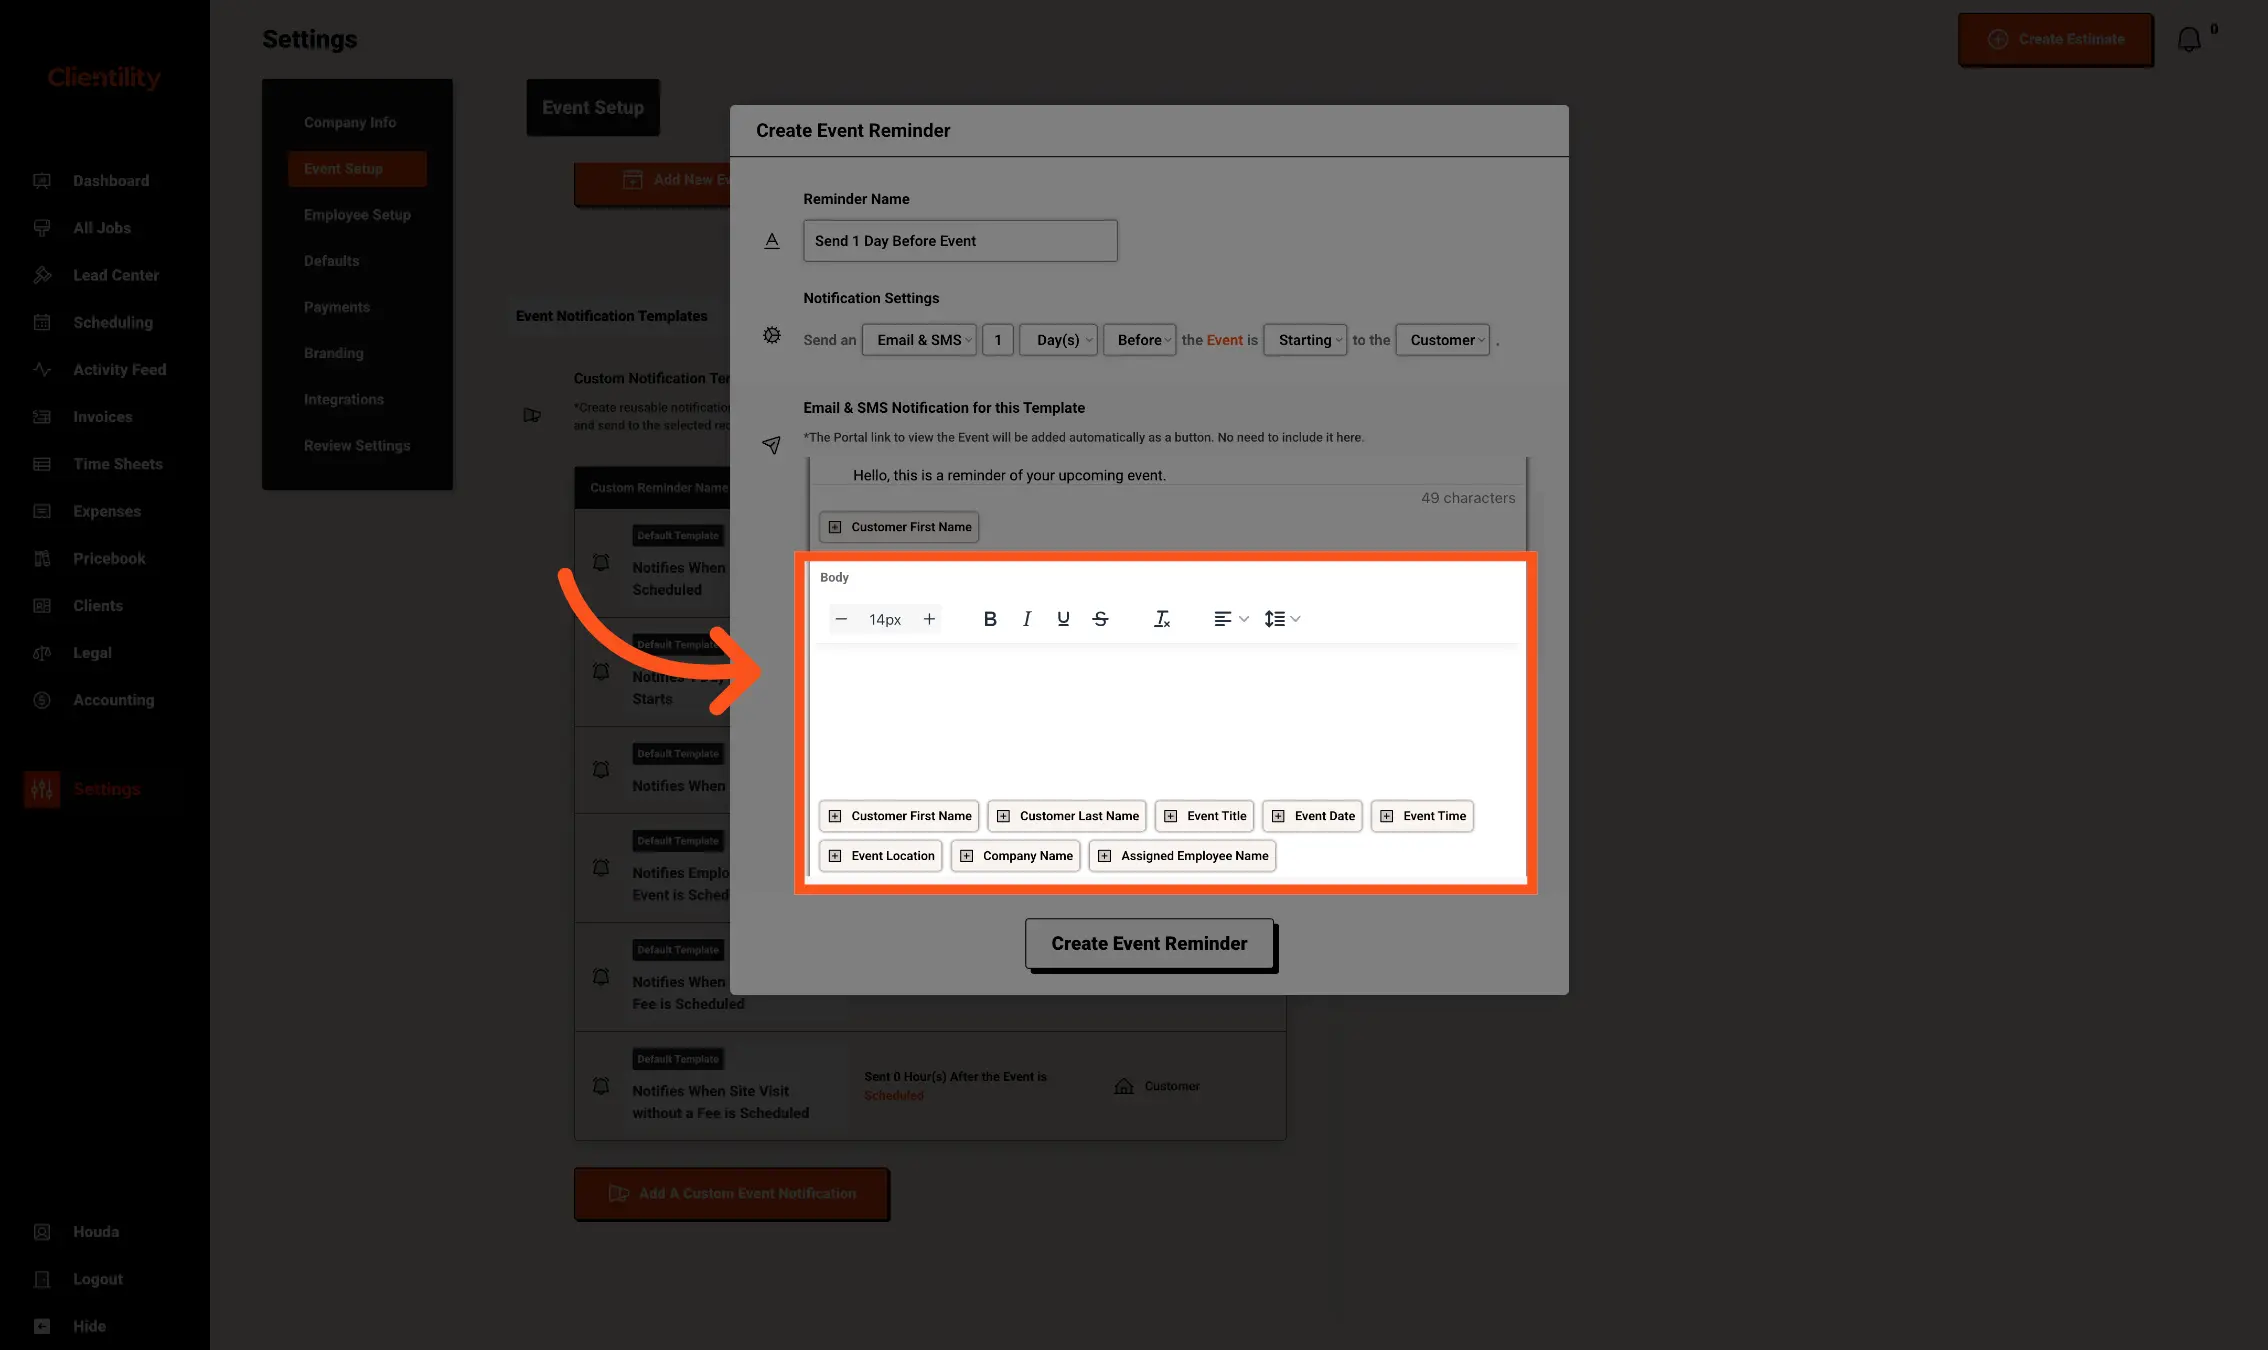
Enter the message you want to send in the Body section.
This is the main message the customer will receive. You can write your own text and use dynamic fields, such as the customer name, event title, event date, event time, event location, company name, or assigned employee name, to automatically personalize the notification before it is sent.
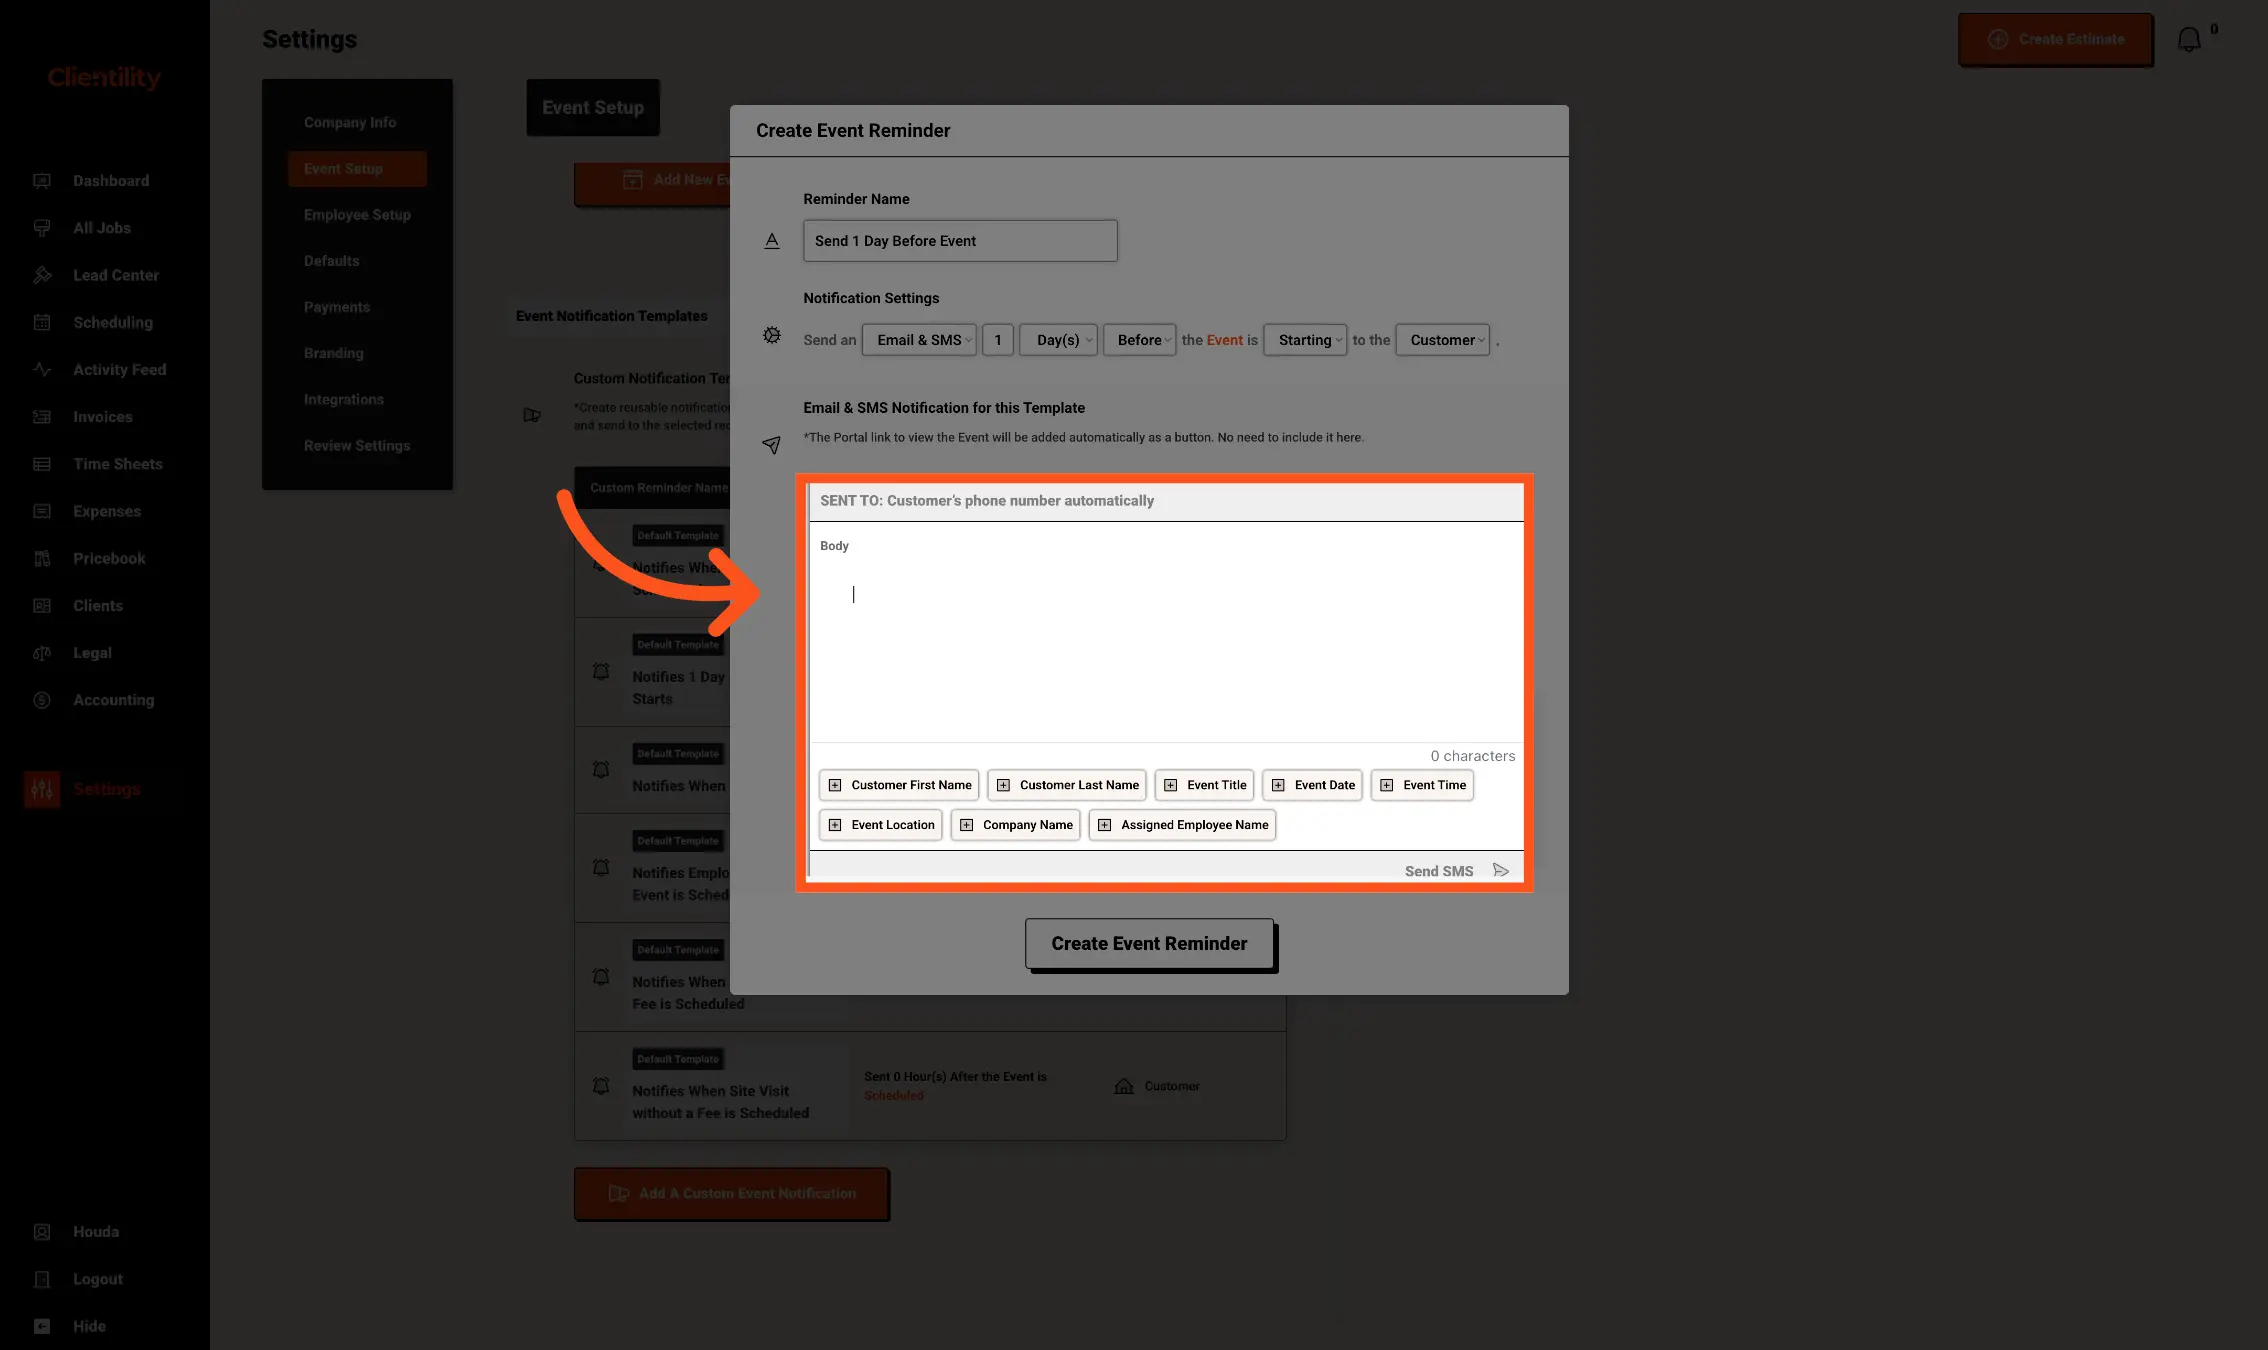
Enter the message you want to send by SMS.
This is the text message the customer will receive. You can write a short message and use dynamic fields, such as the customer name, event title, event date, event time, event location, company name, or assigned employee name, to personalize the SMS automatically.
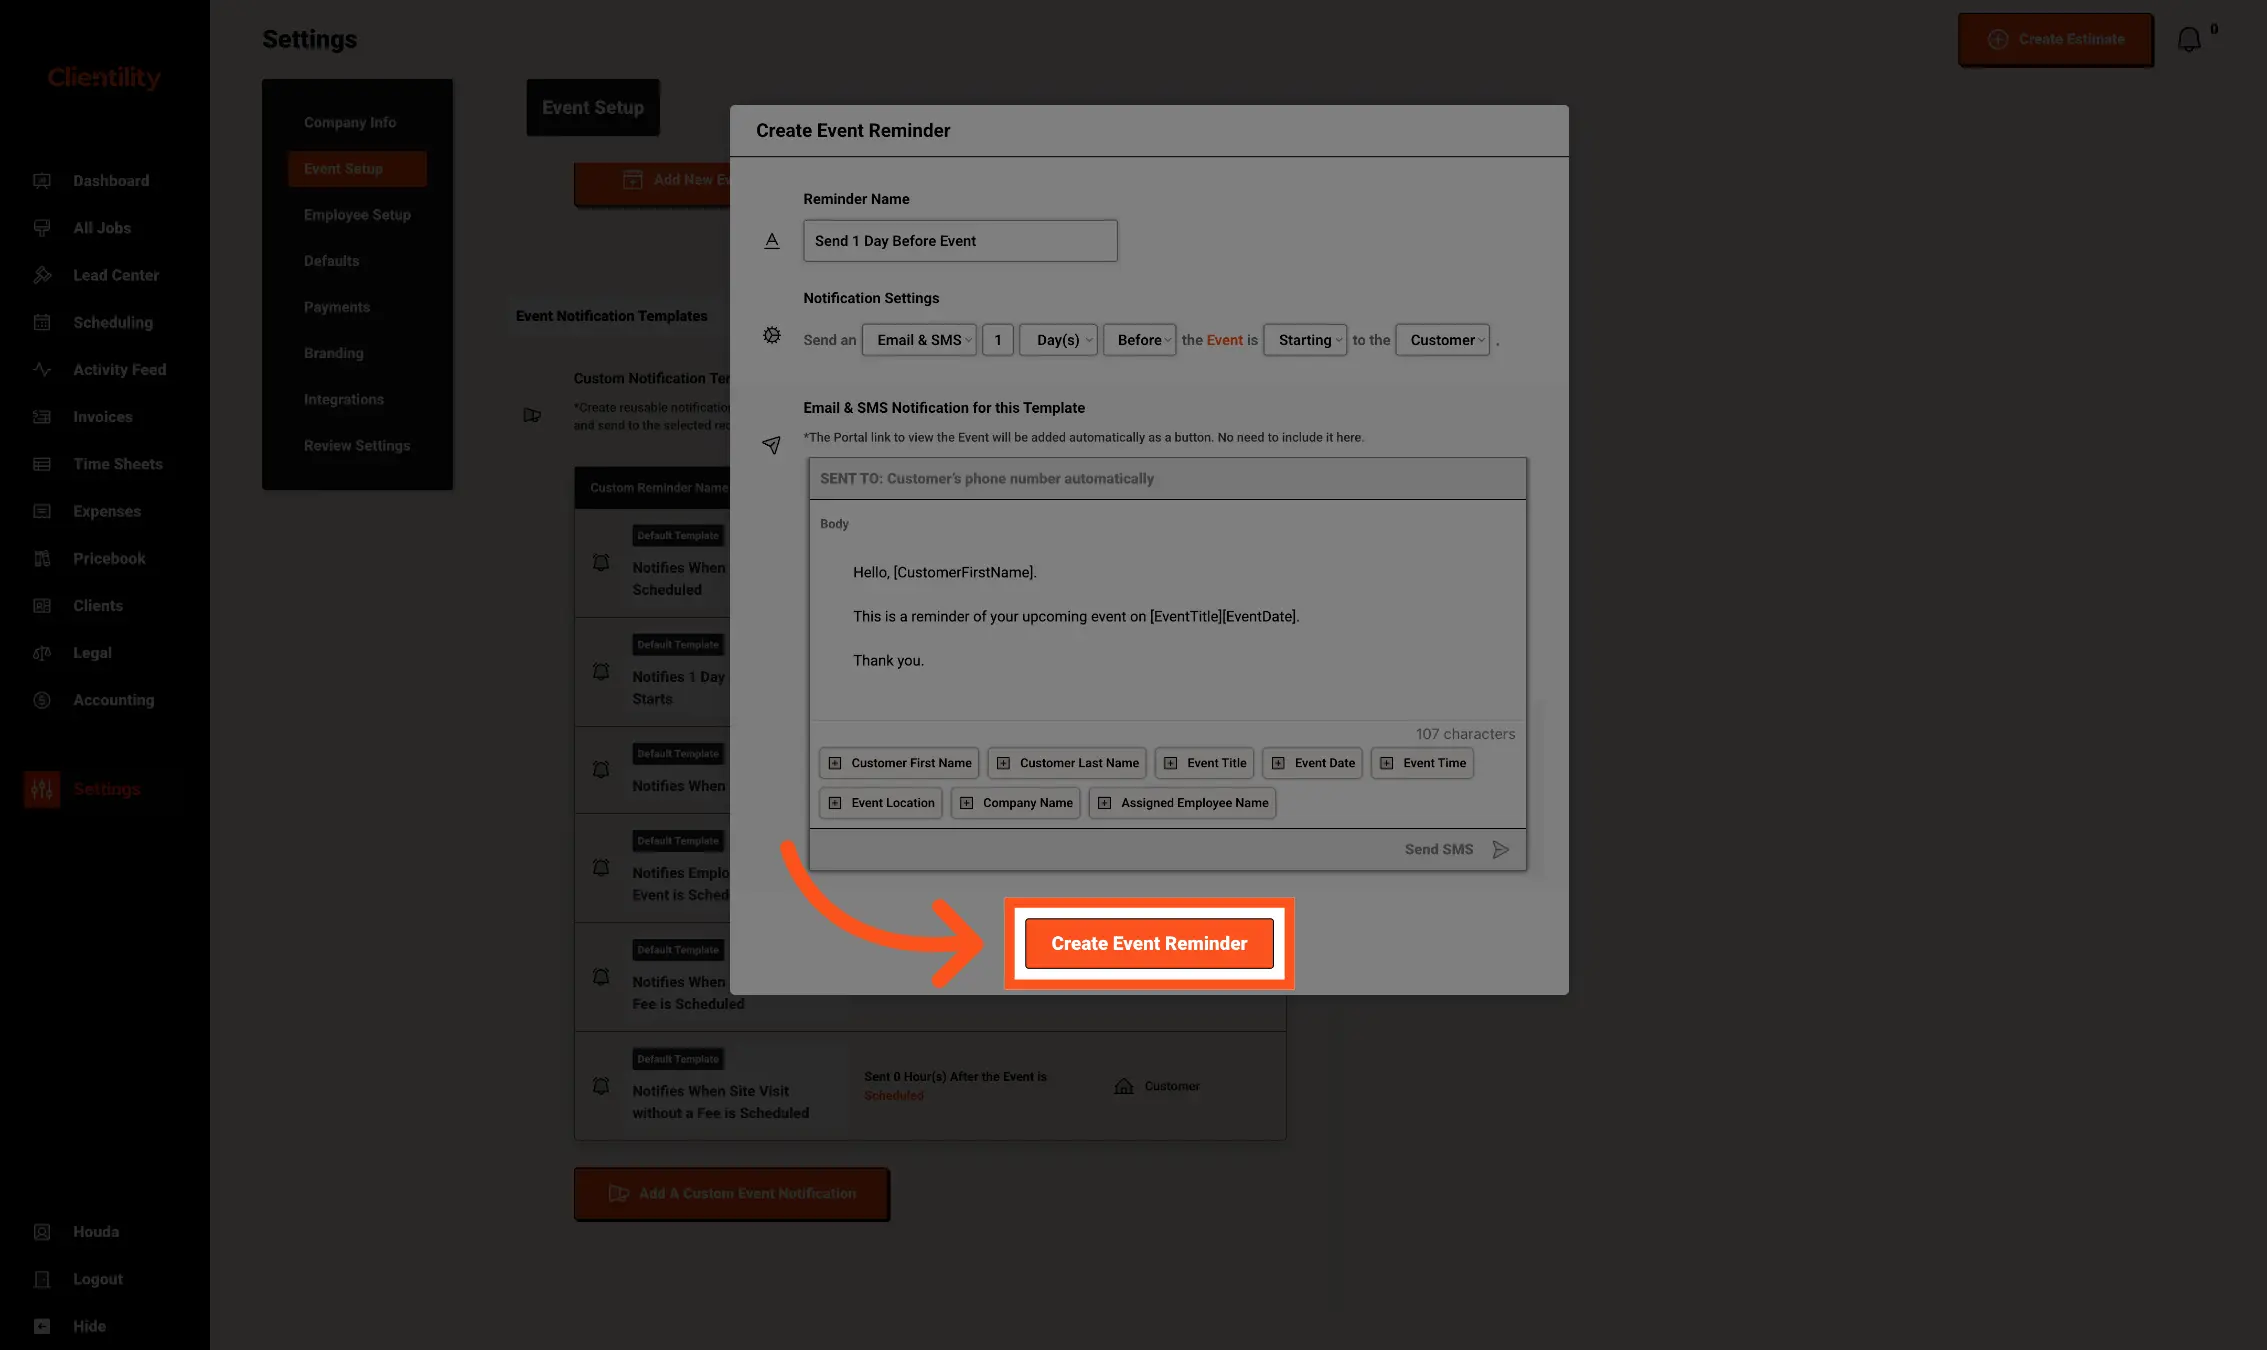
After adding the notification details, click Create Event Reminder.
This will save the custom notification template and make it available to attach to an Event Type. Once attached, Clientility can use this template to send the notification based on the timing and settings you selected.
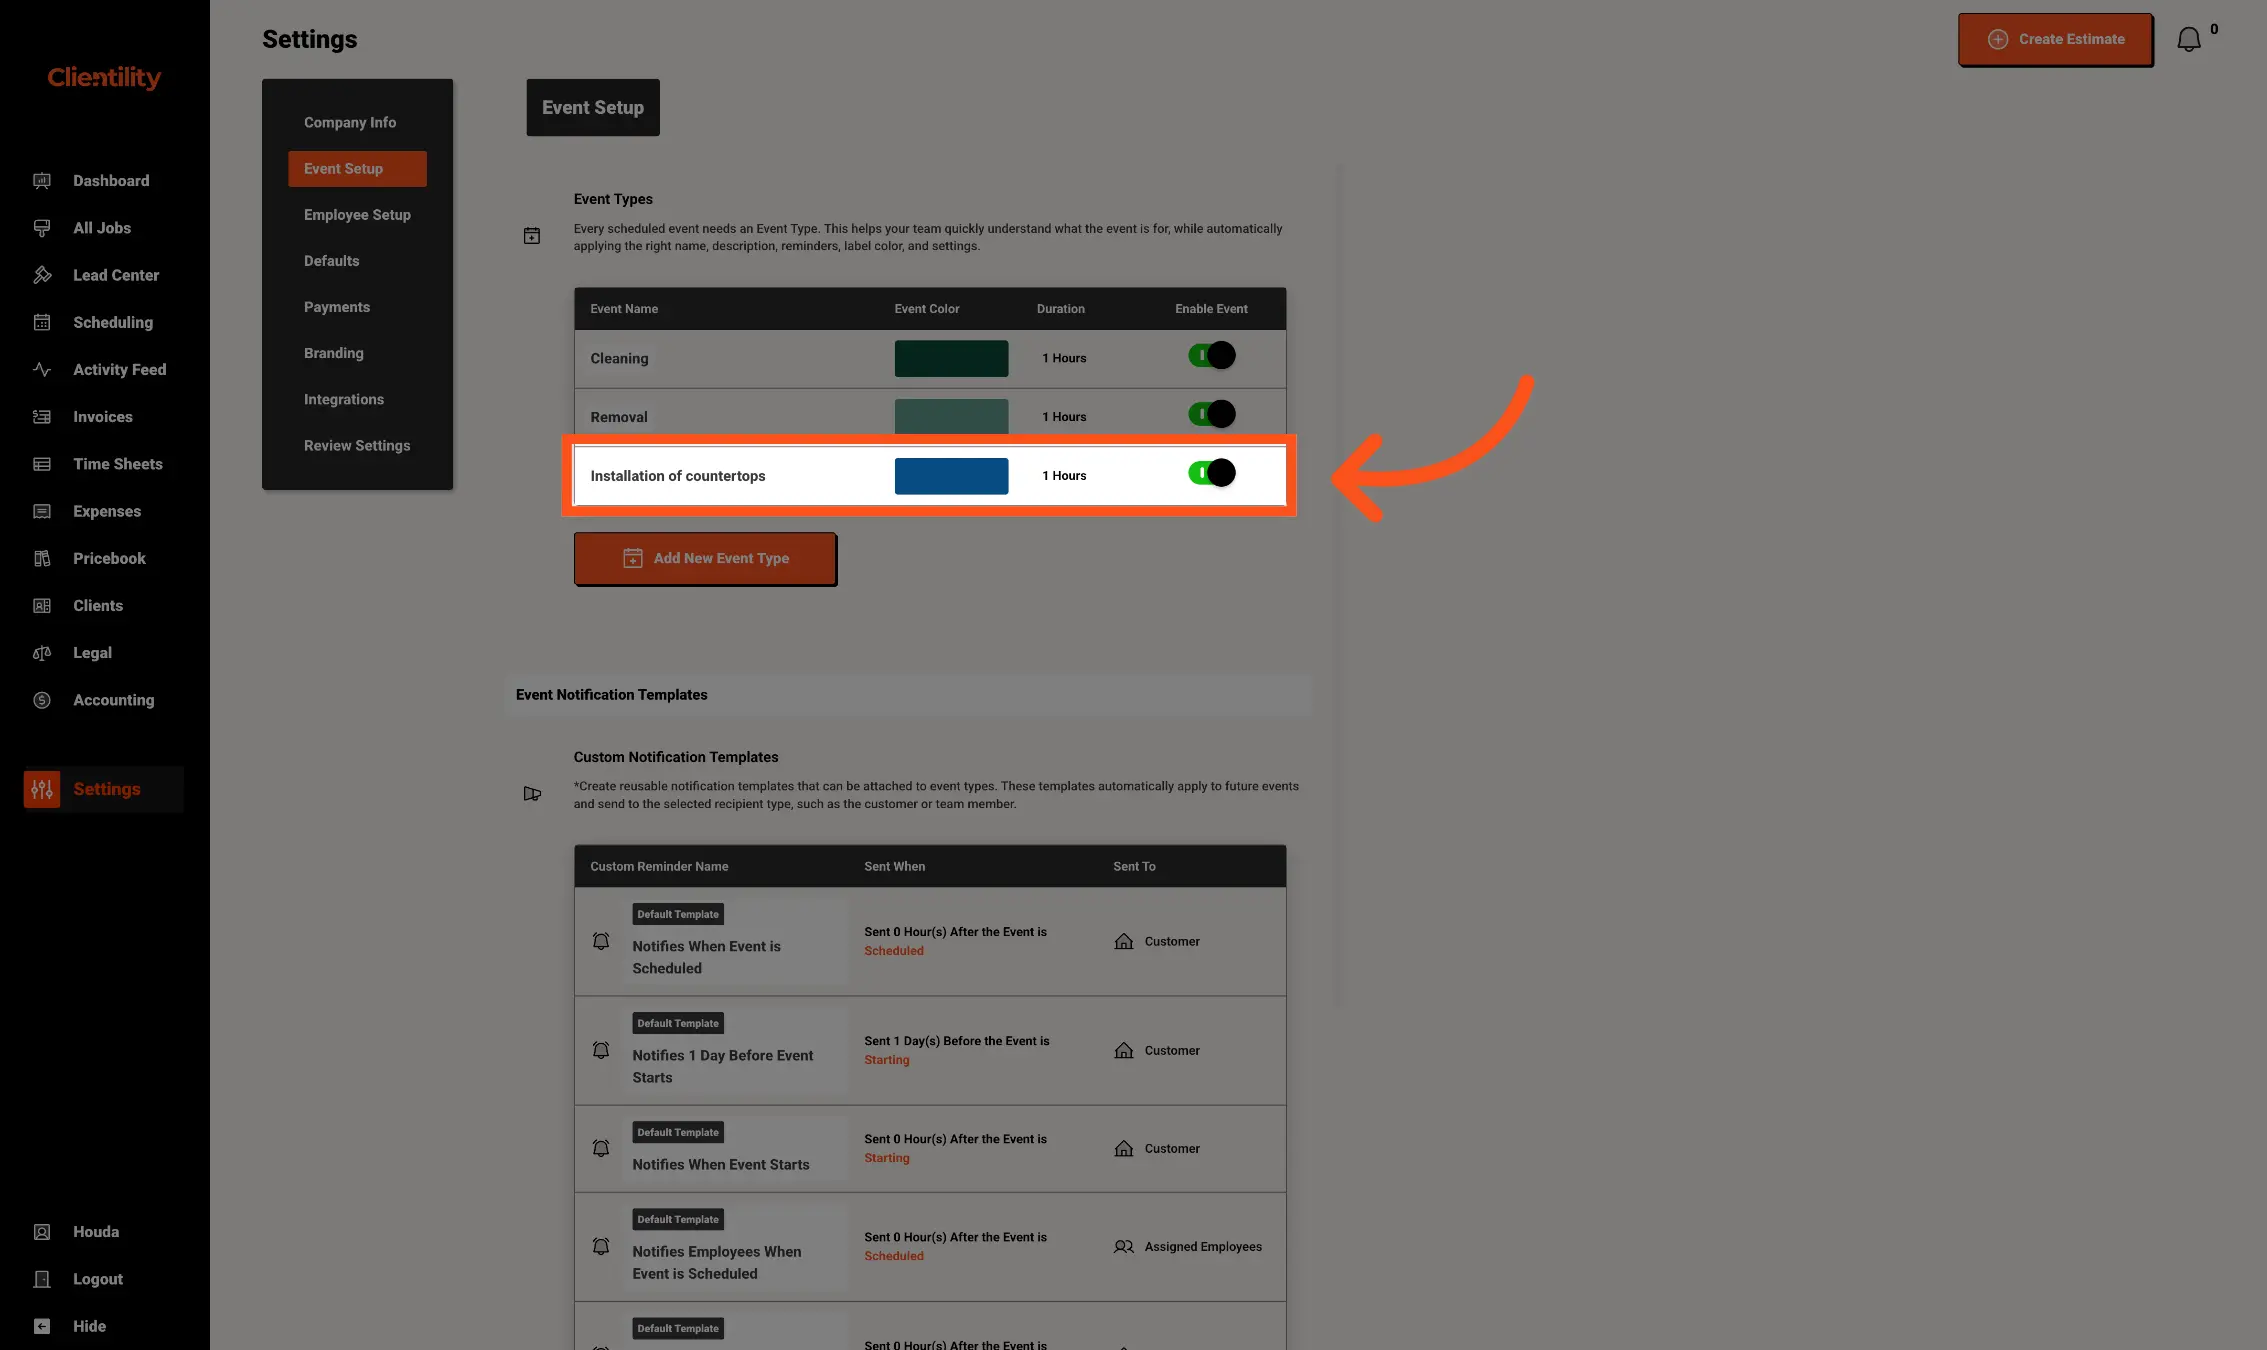
Go back to the Event Types section and click the Event Type you want to attach the notification to.
This is where you choose which type of event should use your custom notification template.
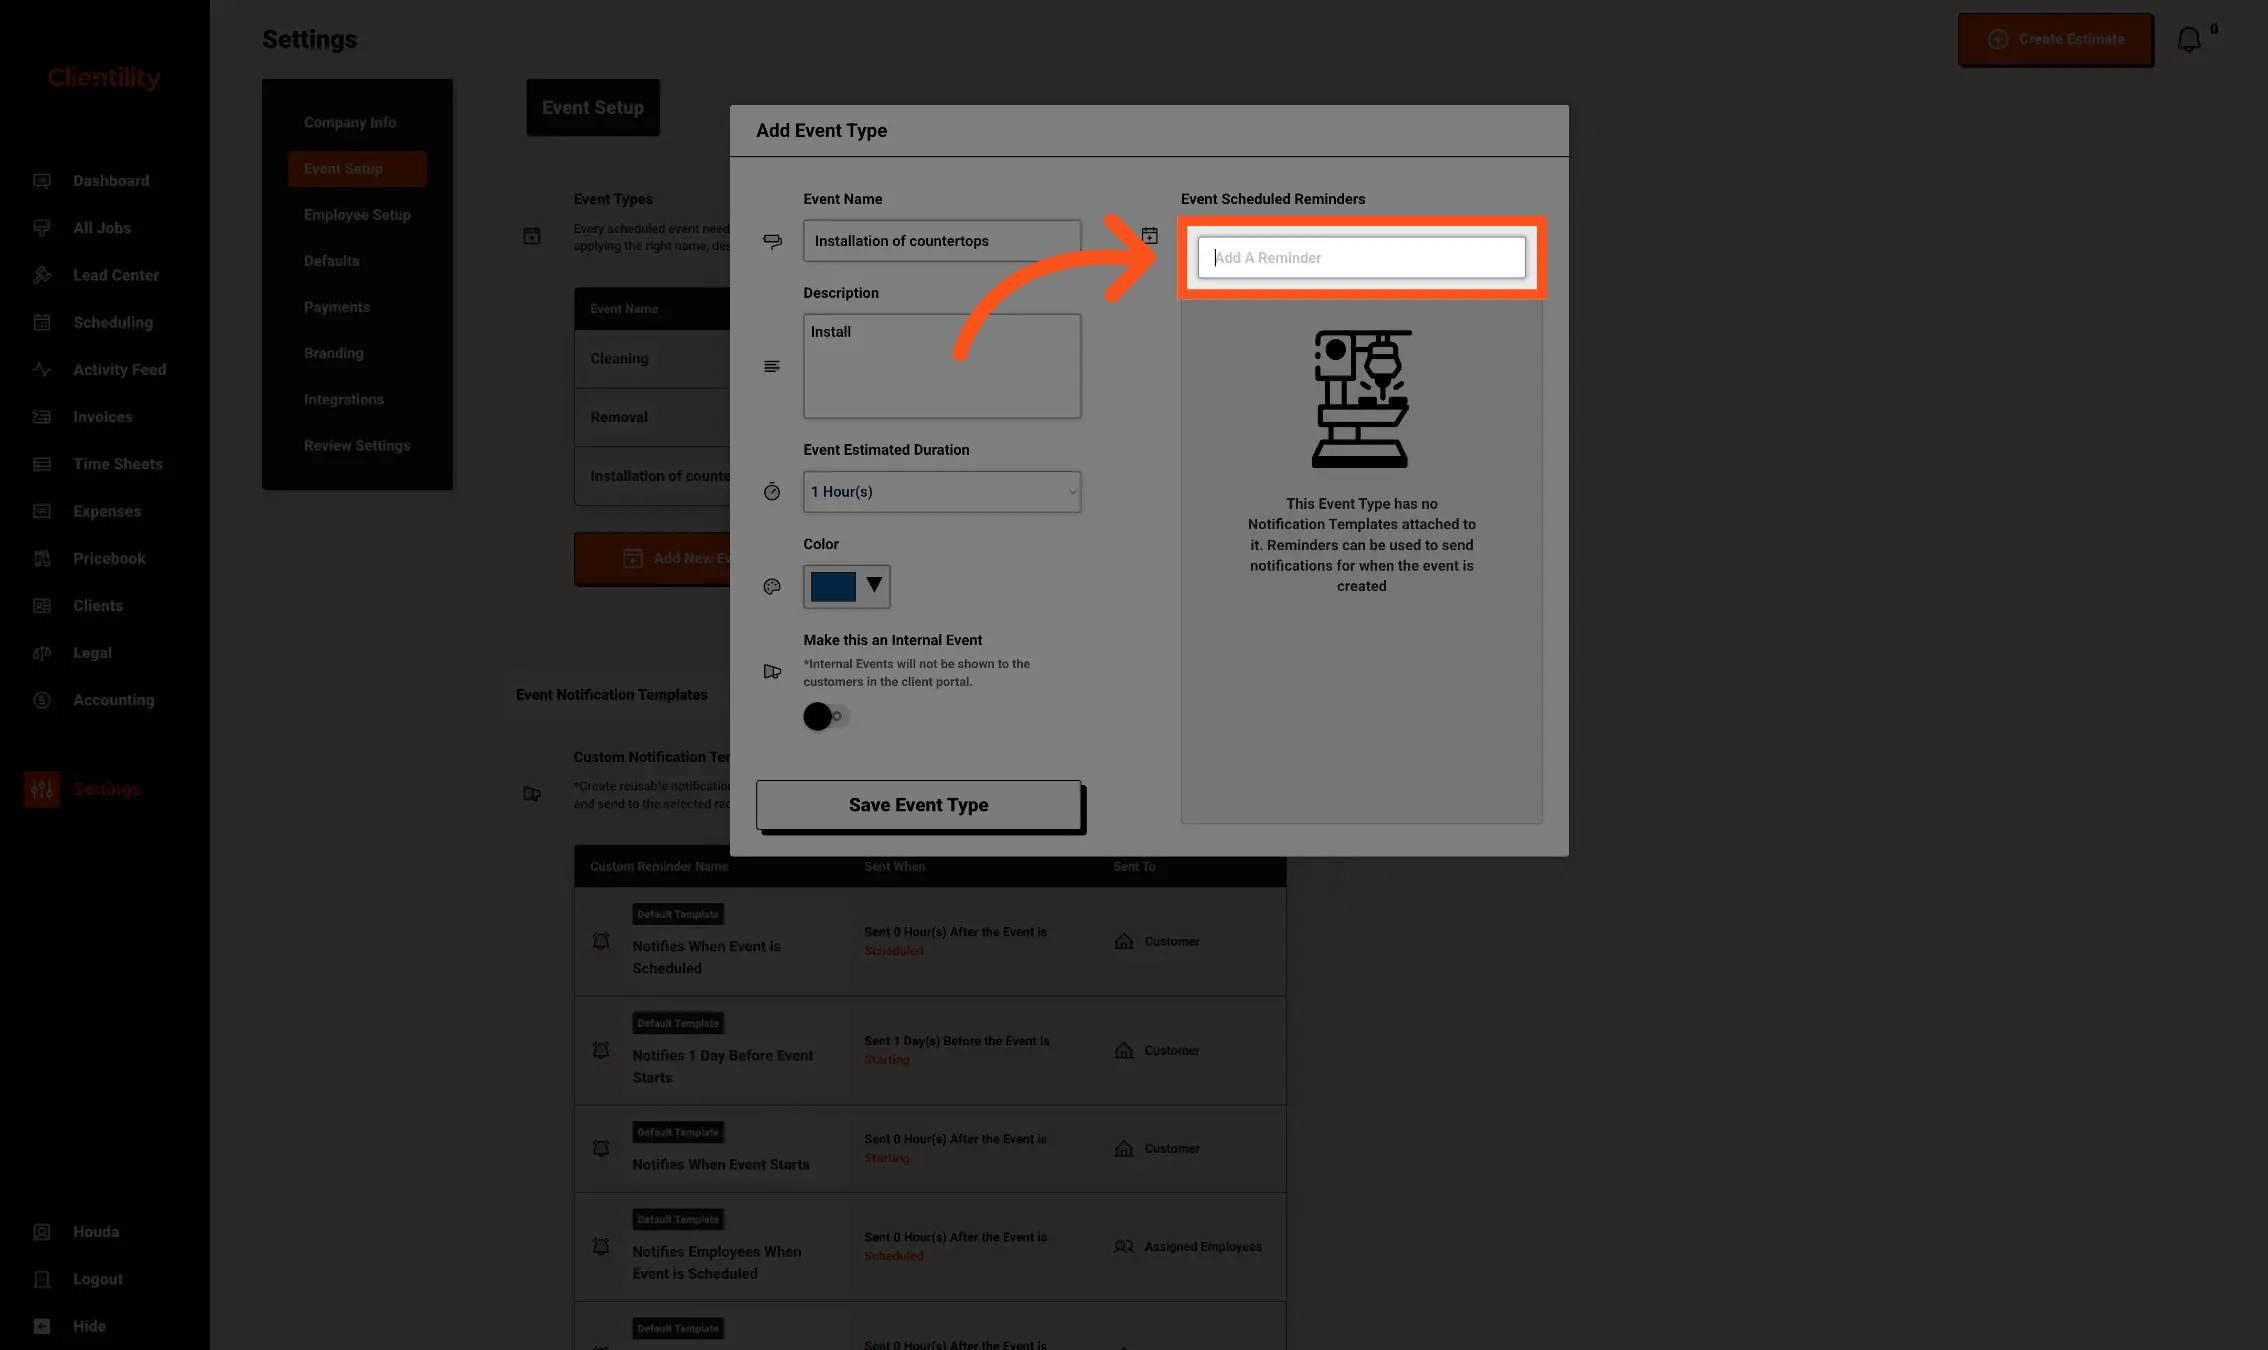
In the Event Type popup, go to the Event Scheduled Reminders section and click Add A Reminder.
This is where you attach your custom notification template to the selected Event Type. After it is added, the reminder can be used automatically when this type of event is scheduled.
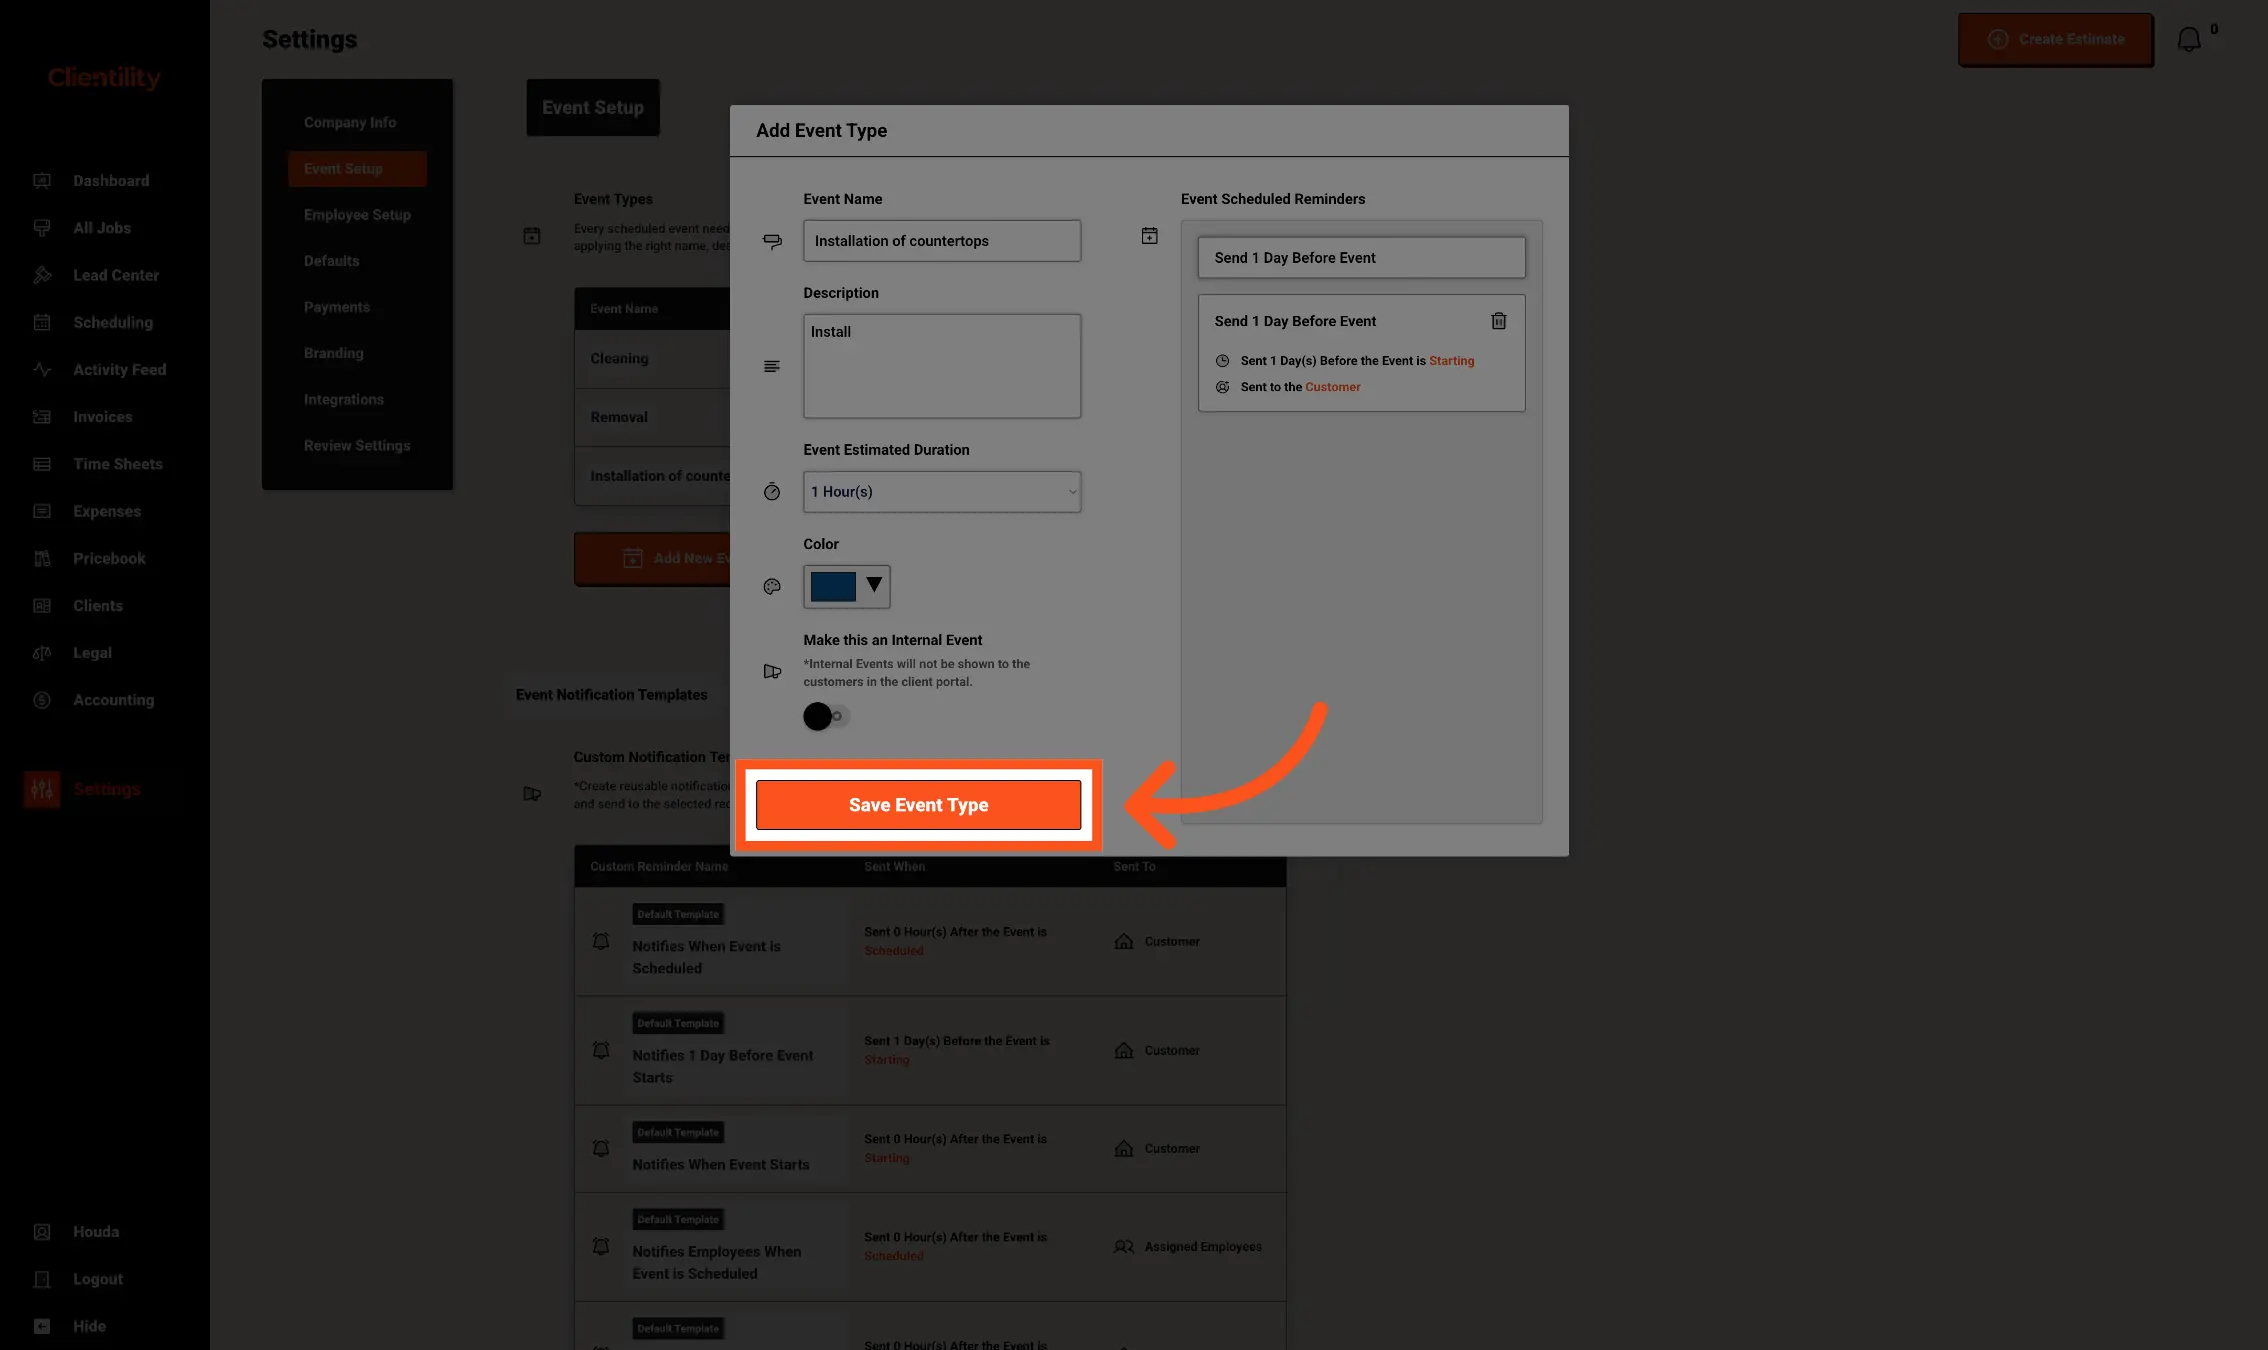
After adding the reminder, click Save Event Type.
This will save the Event Type with the custom notification attached. When this type of event is scheduled, Clientility will use the reminder settings you added to send the notification at the right time.
