

Menu
This guide explains how to customize your default Conversion Strategy settings in Clientility. These settings help you automatically follow up with customers after an estimate is sent, so you can improve your chances of getting the job approved.

Click Settings from the main sidebar to access your account configuration options.
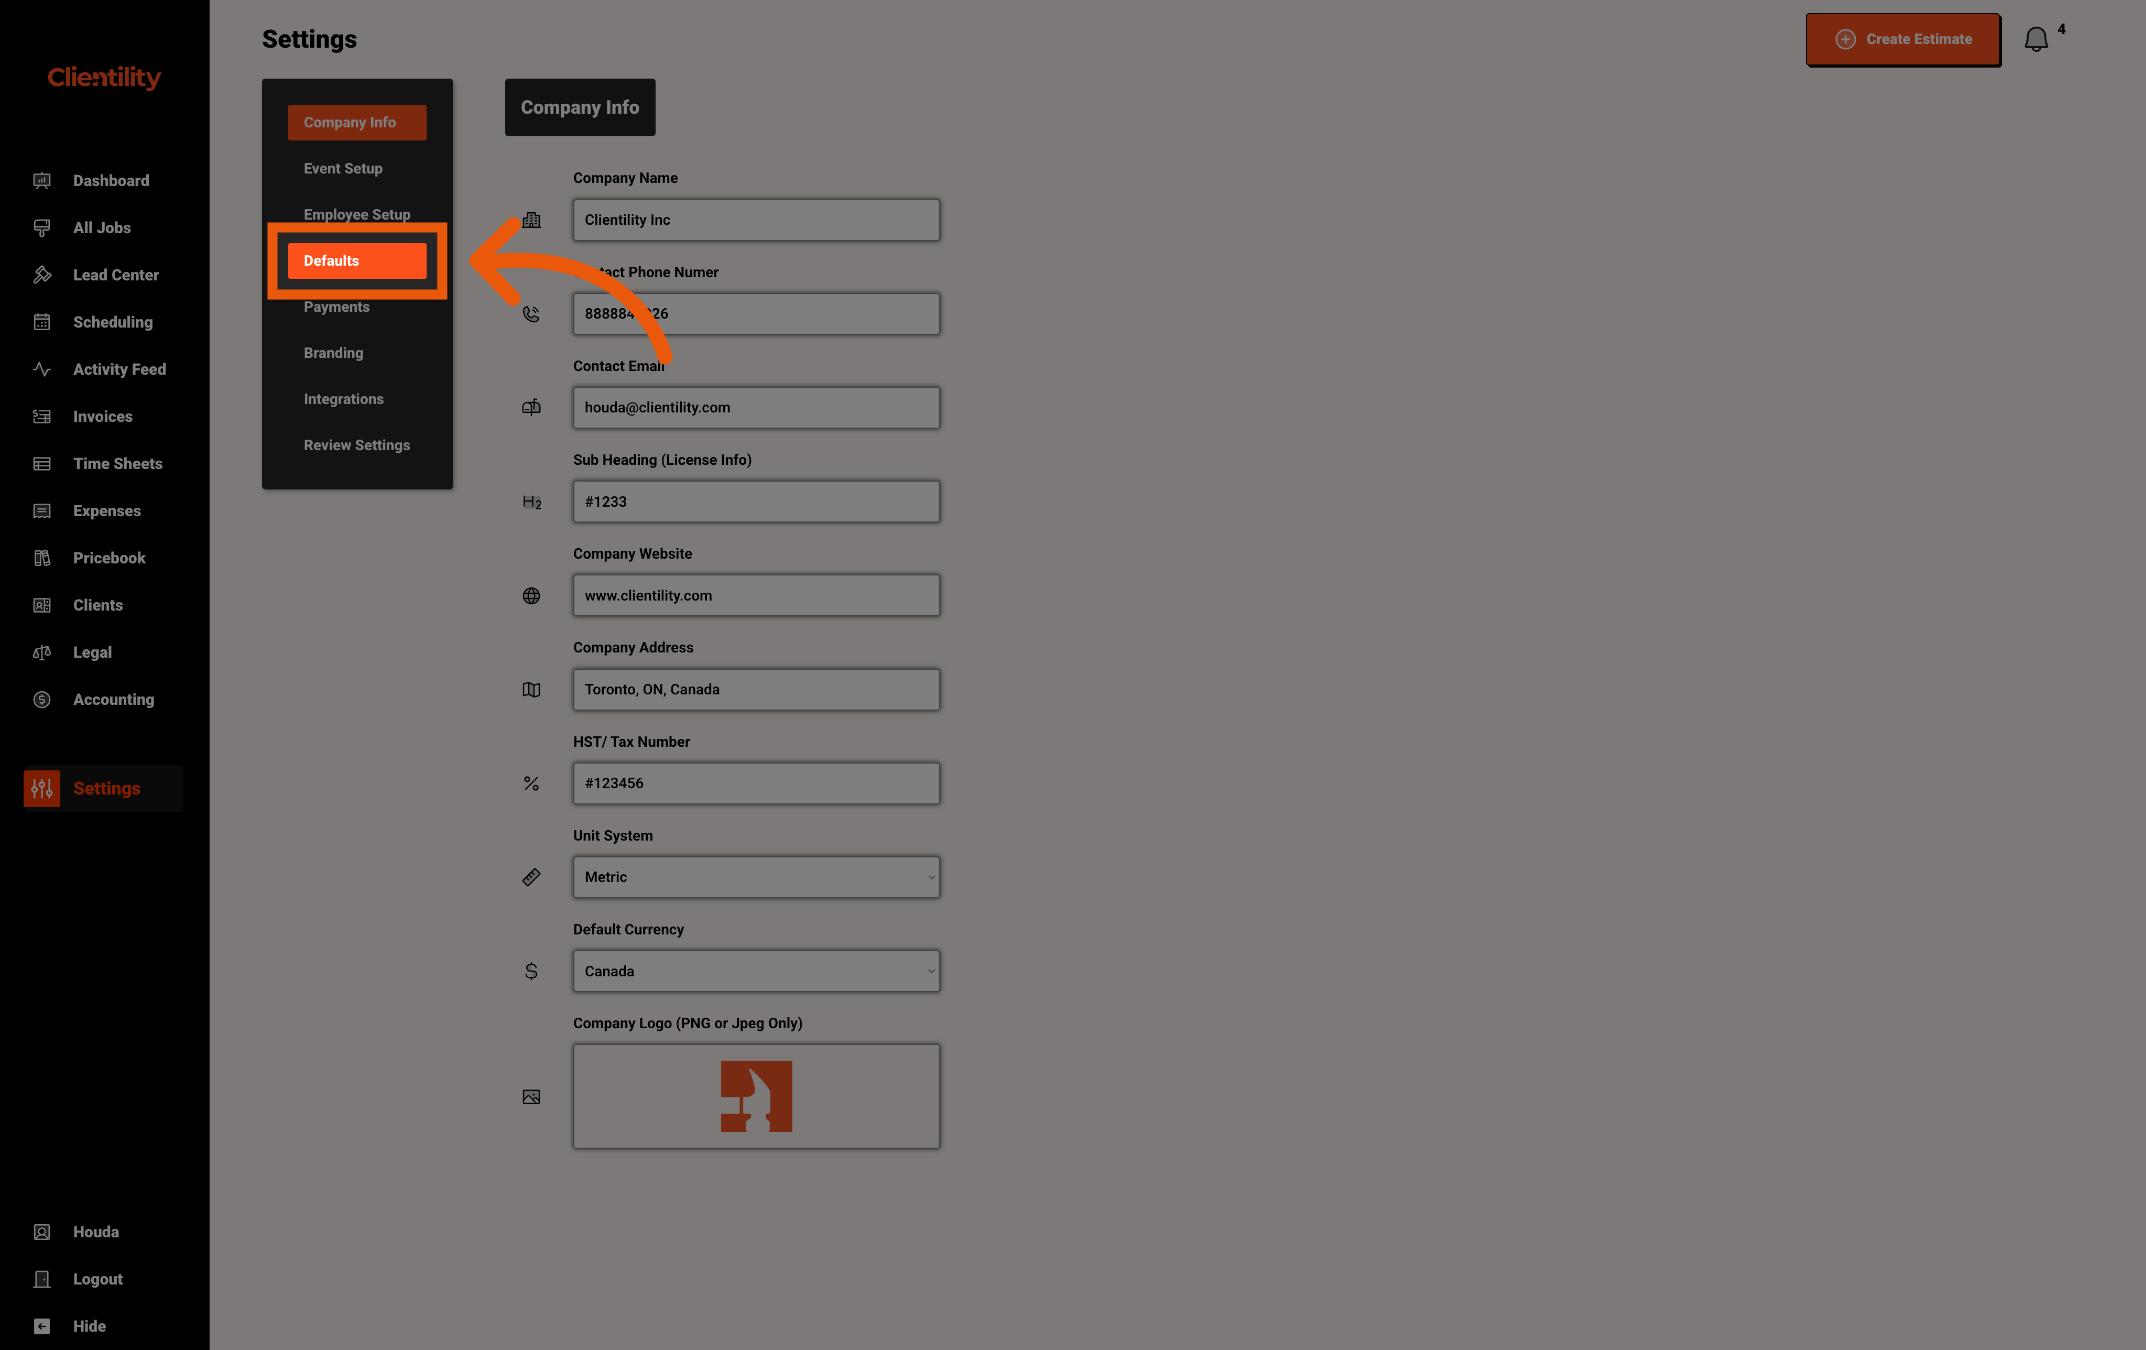
Click Defaults to access your default configuration settings.
This section is where you can manage preset values used across your account.
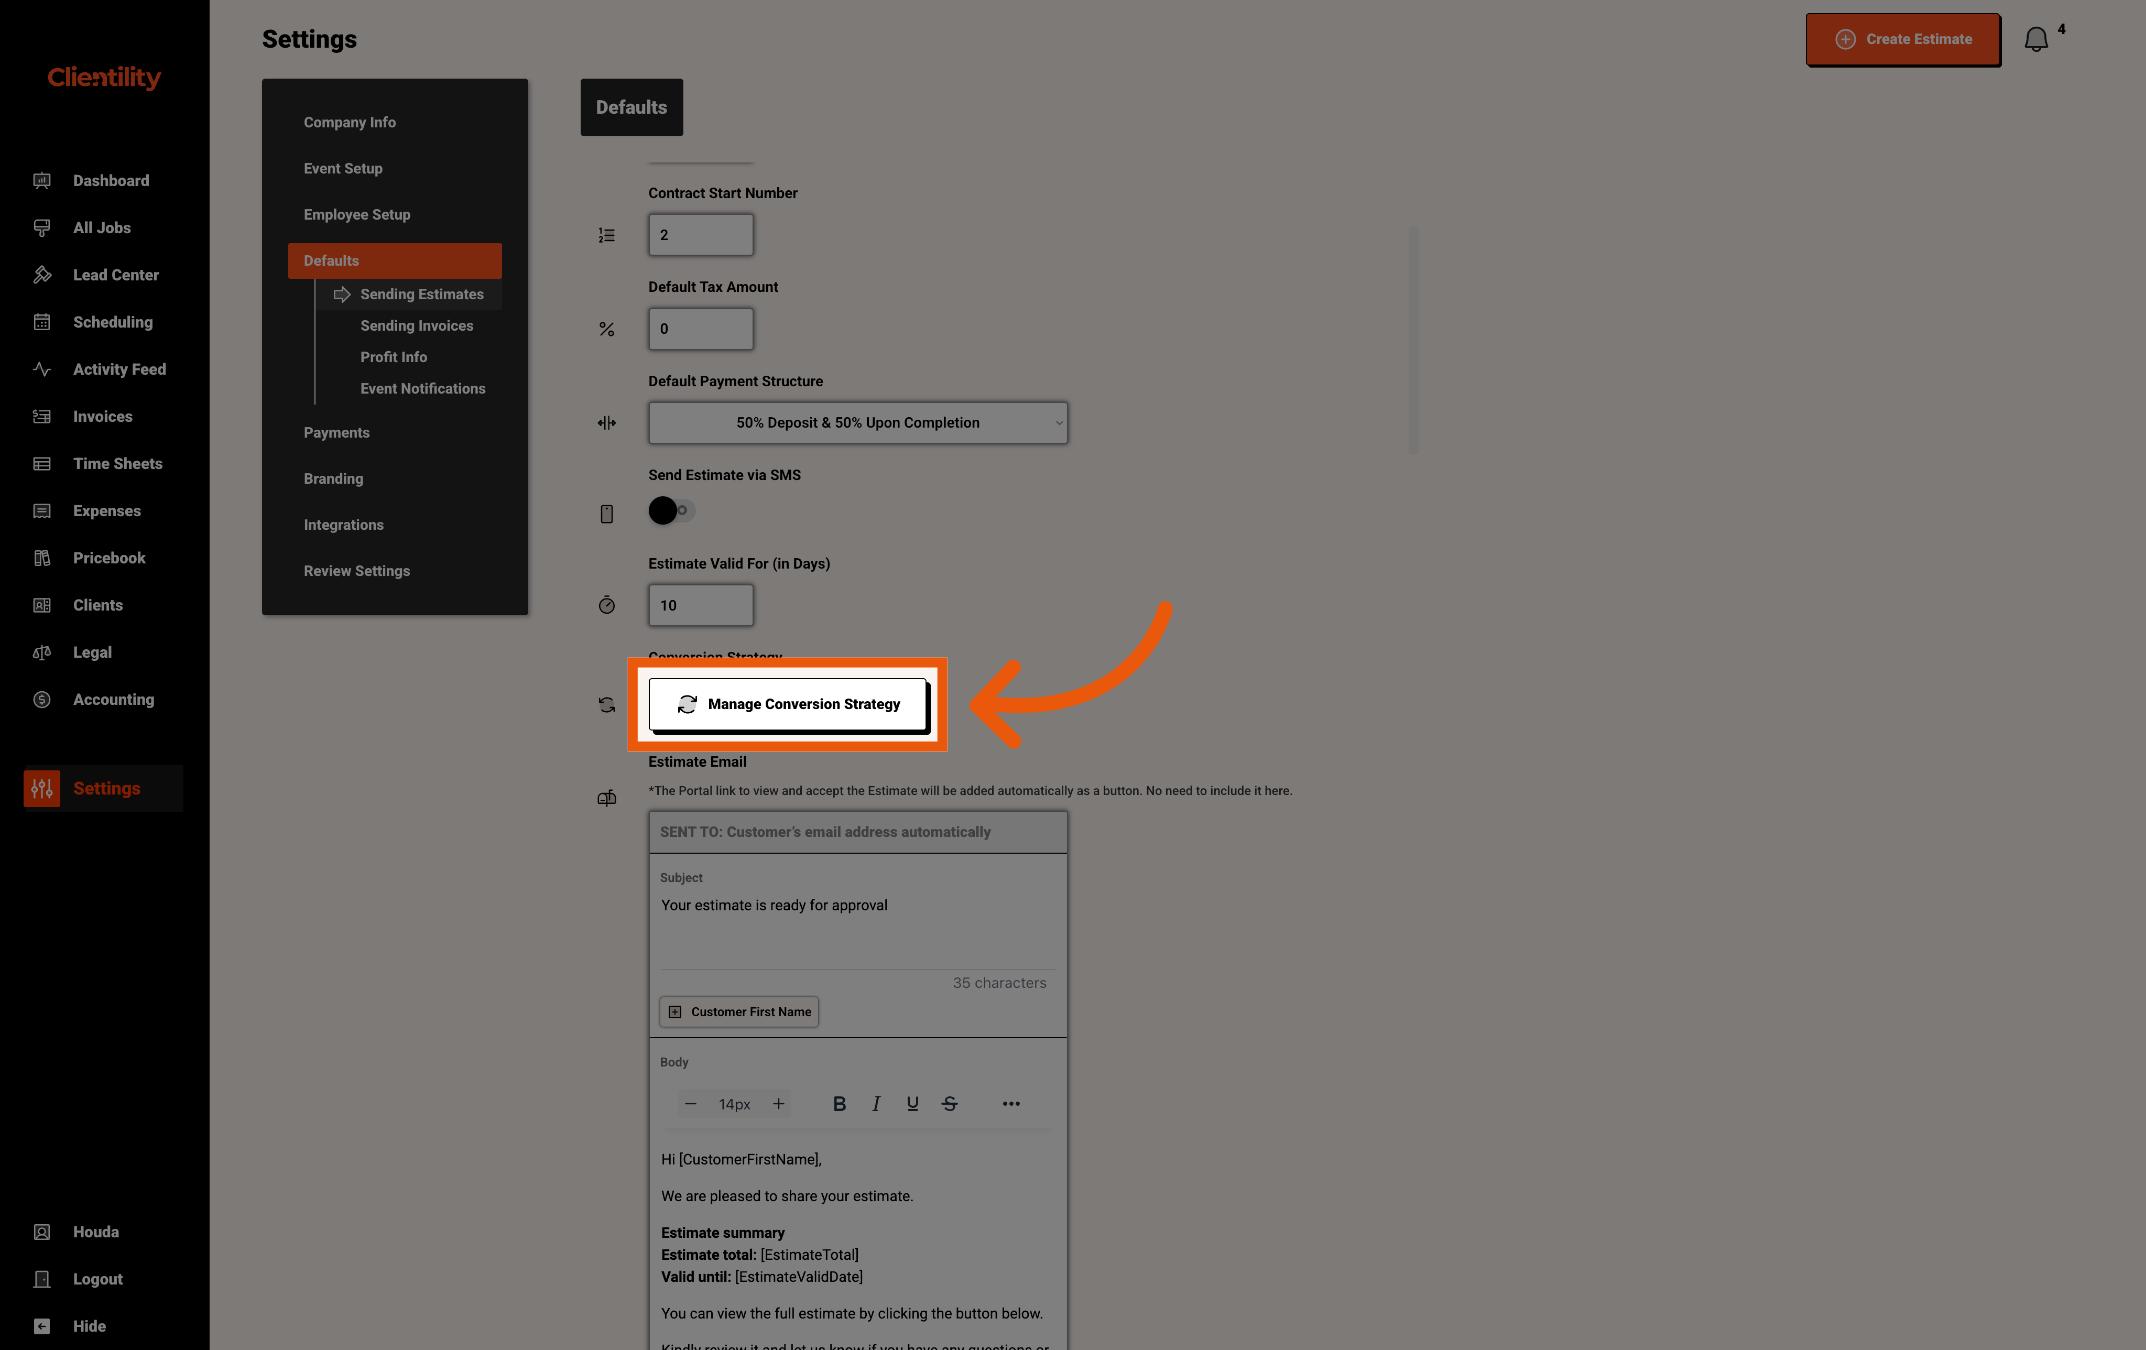
Scroll to the Conversion Strategy section.
This is where you can control the default follow-up settings used for new estimates.

Turn on Enable Conversion Strategy by Default if you want Clientility to automatically apply conversion strategies to new estimates.
You can also choose whether follow-ups should be sent by Email, SMS, or both.
Then enter how many days should be left between each follow-up.
For example, entering 1 means each follow-up will be sent 1 day apart.
Once done, click "Next."
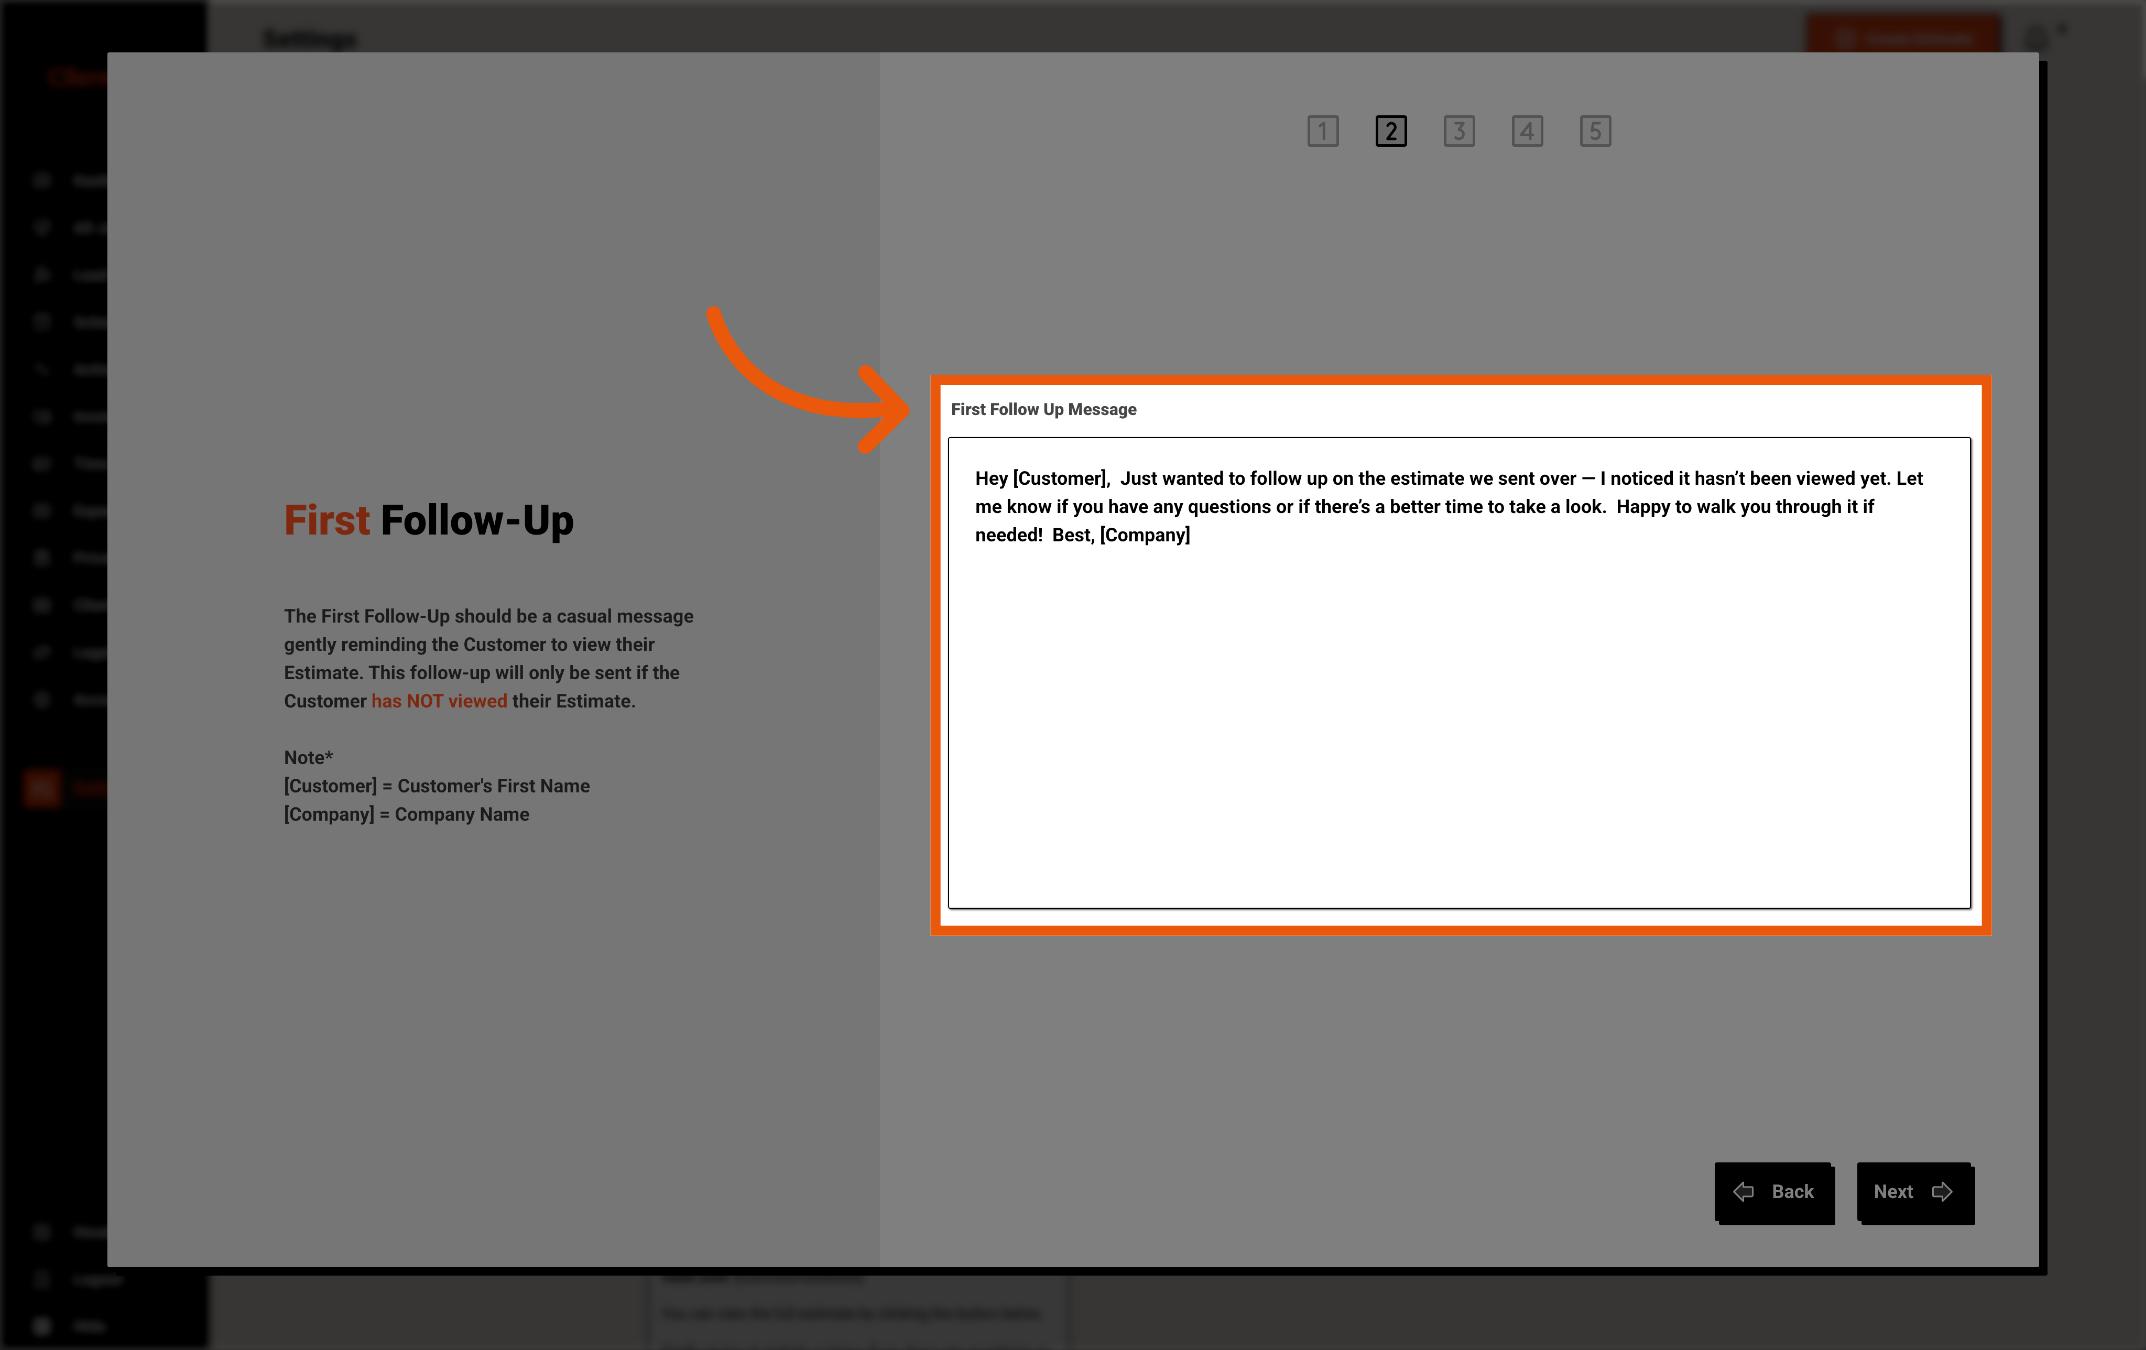
Customize the First Follow-Up Message that will be sent to customers who have not viewed their estimate yet.
You can use placeholders like [Customer] and [Company] to automatically personalize the message.
[Customer] will be replaced with the customer’s first name, and [Company] will be replaced with your company name.
Once done, click "Next."
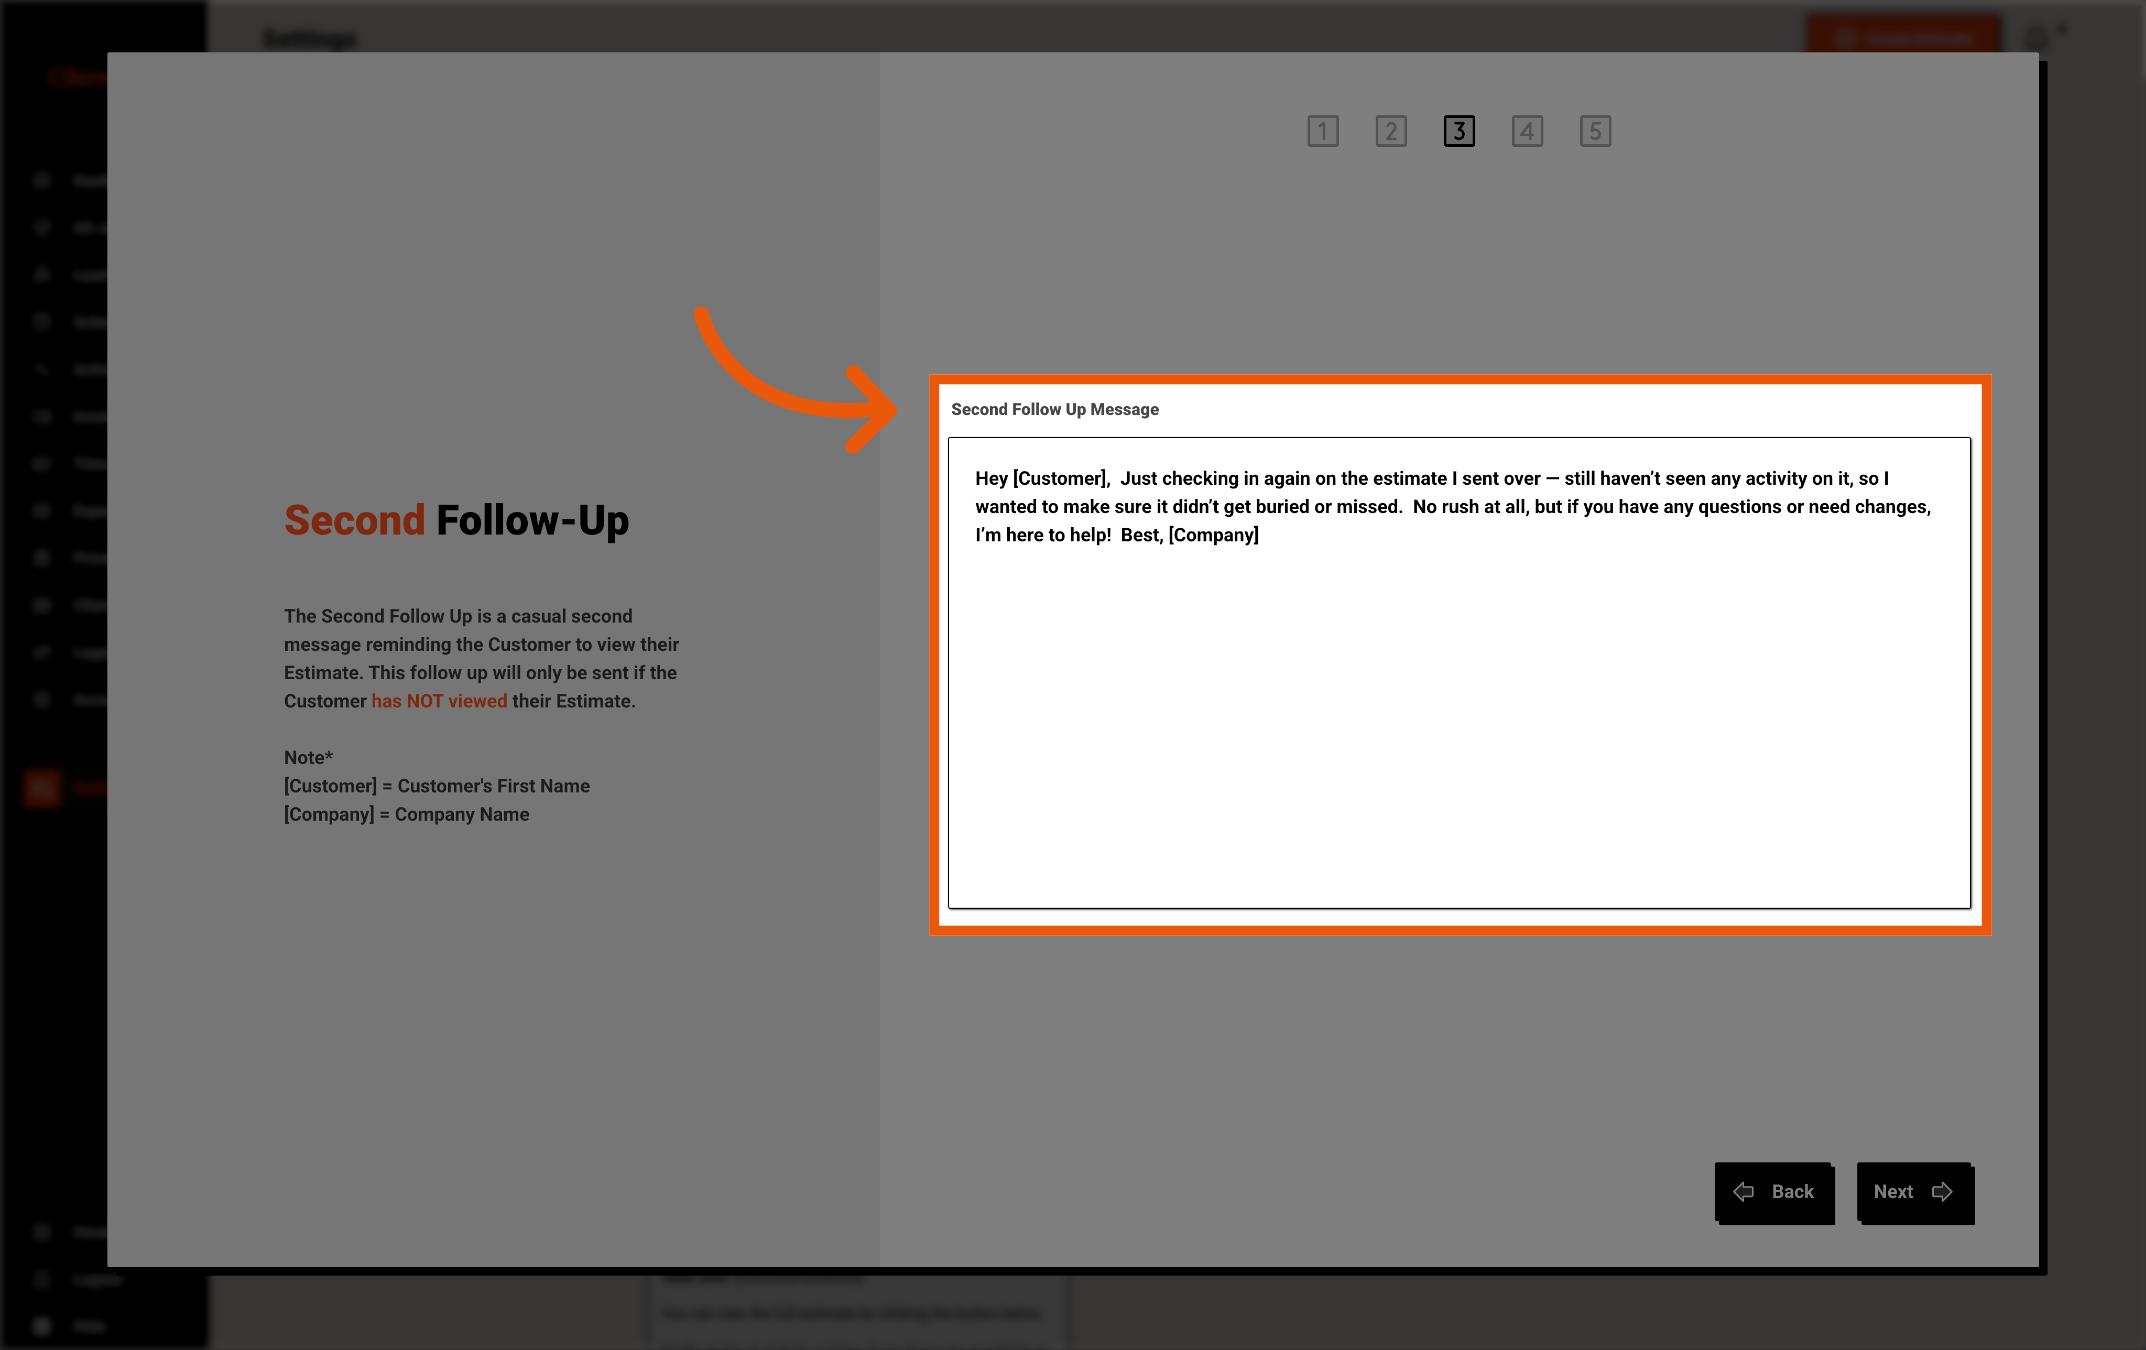
Customize the Second Follow-Up Message that will be sent if the customer still has not viewed their estimate. This message gives them another reminder in case they missed the first one.
You can use placeholders like [Customer] and [Company] to automatically personalize the message.
[Customer] will be replaced with the customer’s first name, and [Company] will be replaced with your company name.
Once done, click "Next."
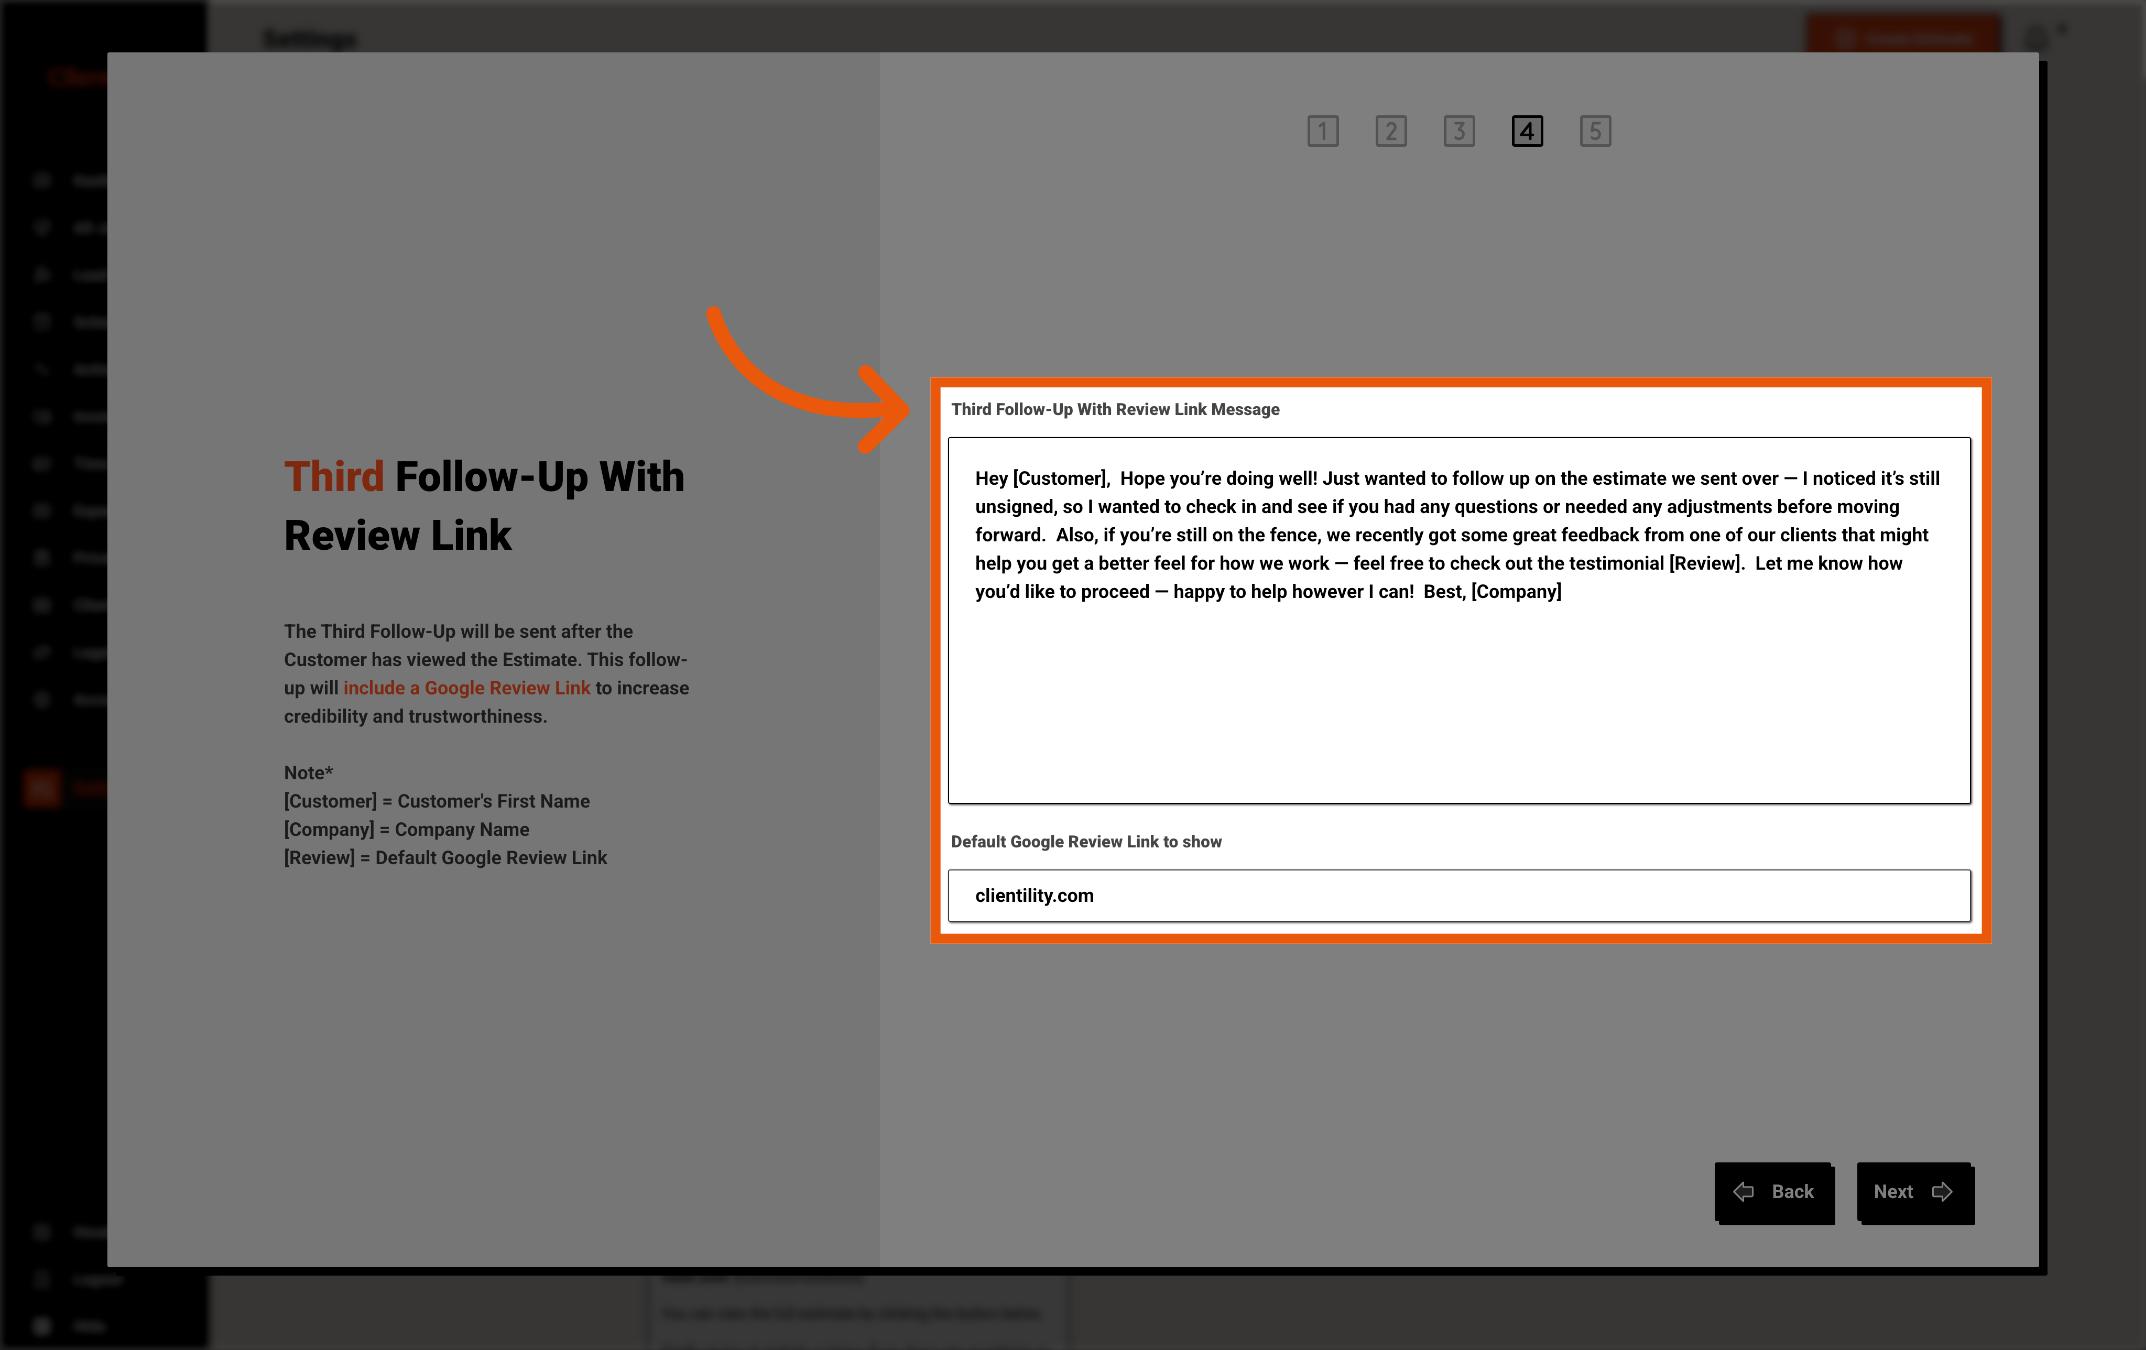
Customize the Third Follow-Up With Review Link Message that will be sent after the customer has viewed the estimate but has not signed yet.
This message can include your default Google review link to help build trust and give the customer more confidence before moving forward.
You can use placeholders like [Customer], [Company], and [Review] to automatically personalize the message.
[Customer] will be replaced with the customer’s first name, [Company] will be replaced with your company name, and [Review] will be replaced with your default Google review link.
Once done, click "Next."
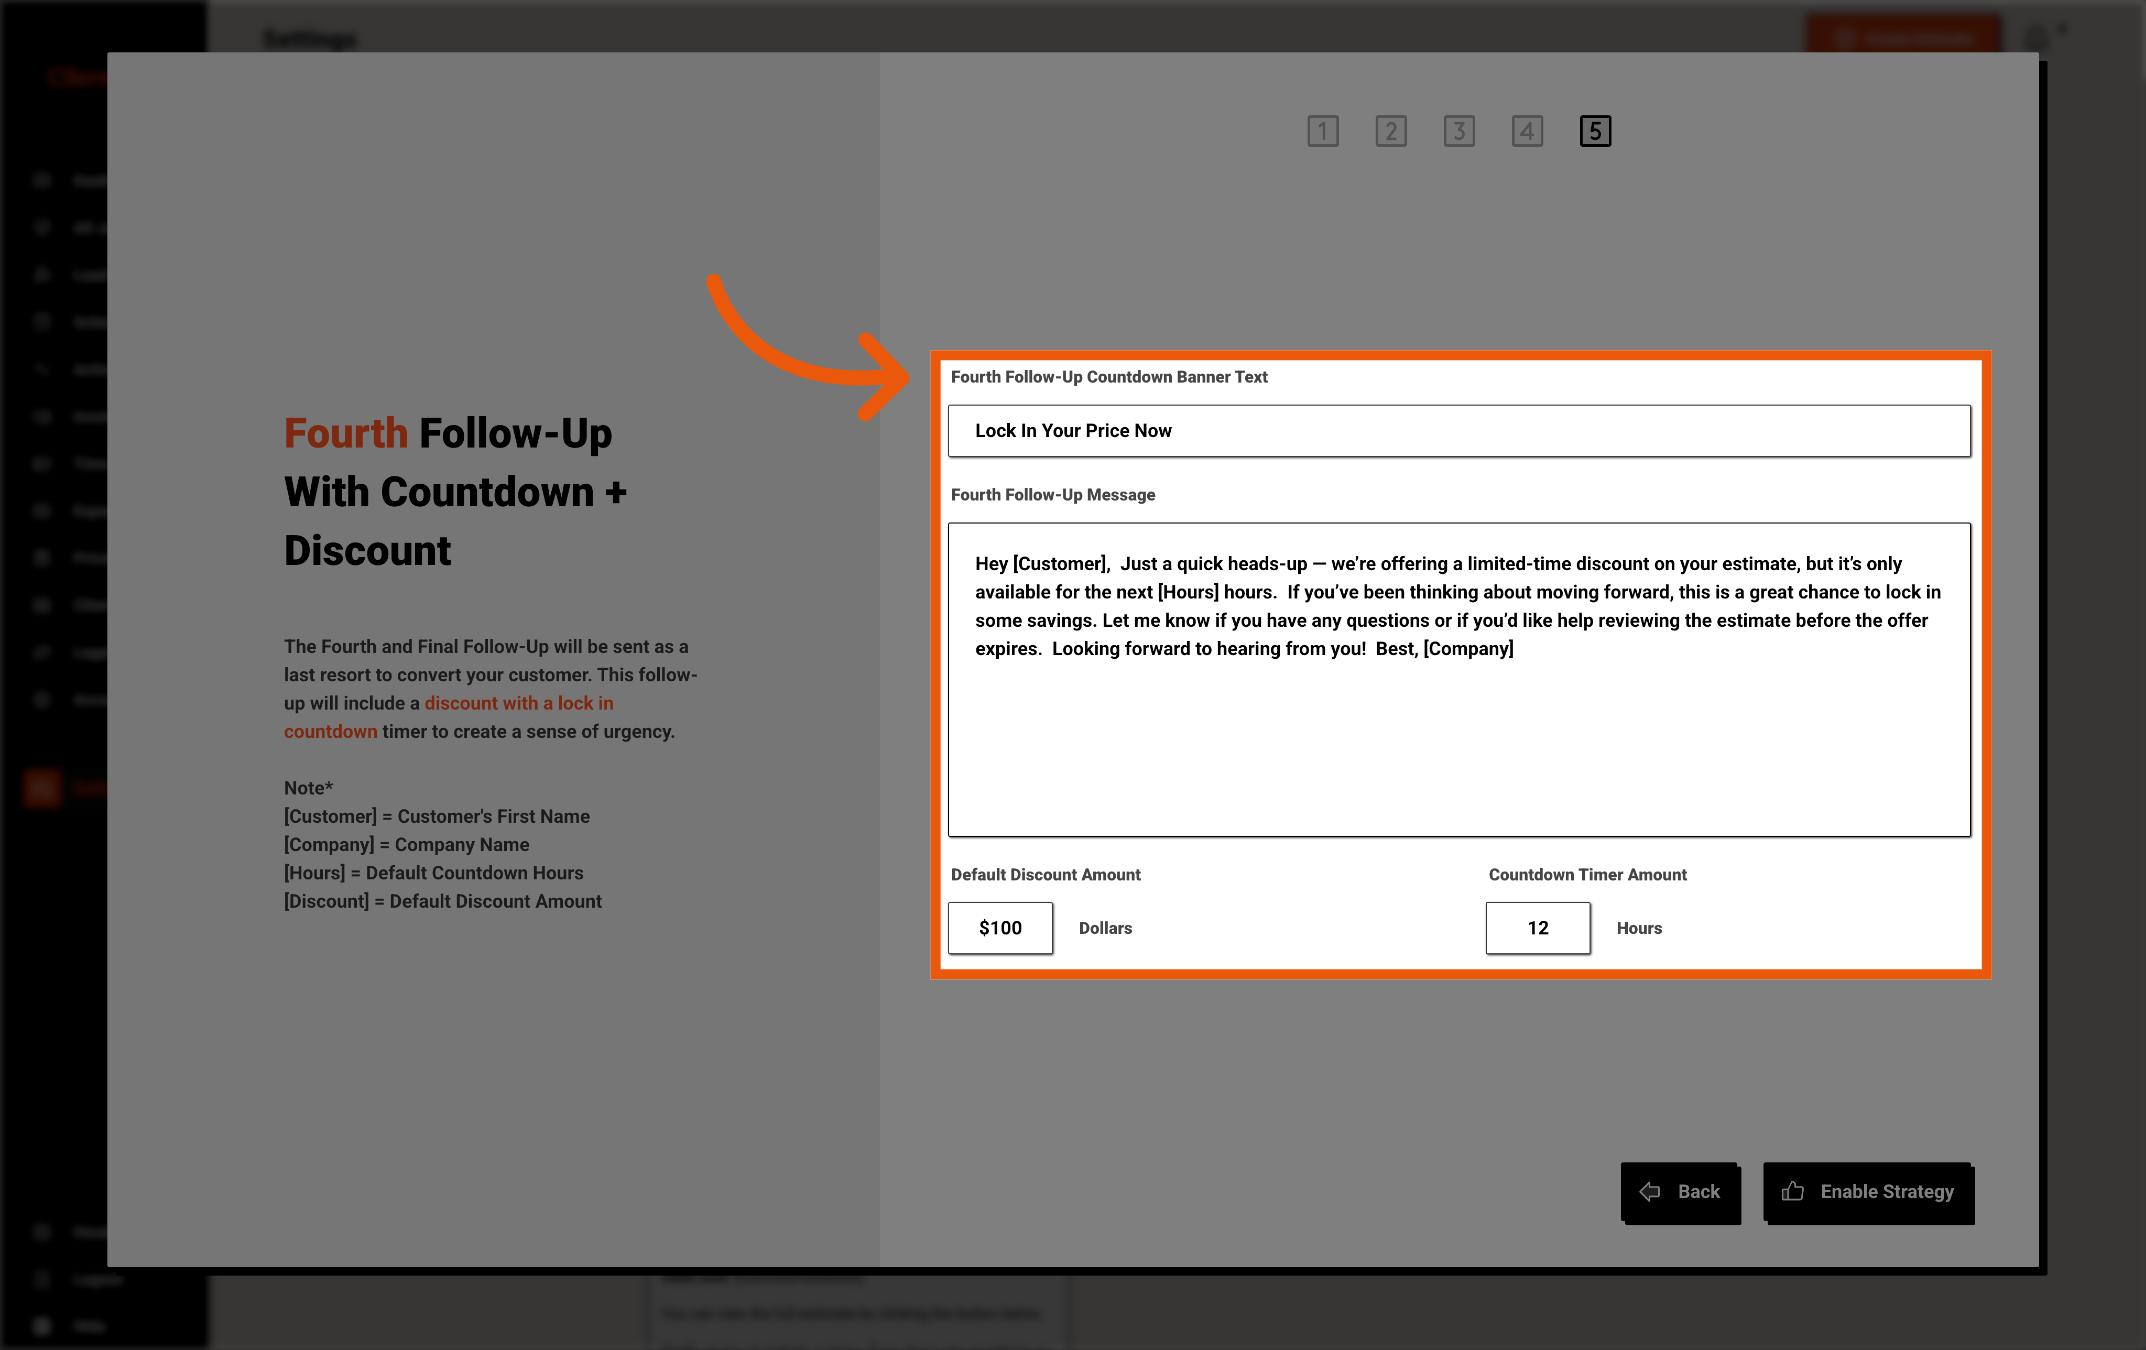
Customize the Fourth Follow-Up Message that will be sent as the final follow-up before the estimate expires.
This message can include a limited-time discount and countdown timer to encourage the customer to move forward before the offer ends.
Enter the default discount amount and how many hours the countdown should run for.
You can also customize the countdown banner text that appears with the offer.
You can use placeholders like [Customer], [Company], [Hours], and [Discount] to automatically personalize the message.
[Customer] will be replaced with the customer’s first name, [Company] will be replaced with your company name, [Hours] will be replaced with the countdown time, and [Discount] will be replaced with the default discount amount.
When everything looks good, click "Enable Strategy."
Note
Once your default Conversion Strategy is turned on, it will automatically be applied to all new estimates created moving forward.
You can still turn it off or customize it for each individual estimate before the estimate is approved. This includes editing the follow-up messages, changing when follow-ups are sent, updating the review link, and adjusting the discount amount or how long the offer is valid for.
