Menu
This guide explains how to control what each user can see and do. Clientility applies default permissions based on the user’s selected role. You can customize these defaults at any time in the Employee Setup tab.


Click Settings from the main sidebar to access your account configuration options.
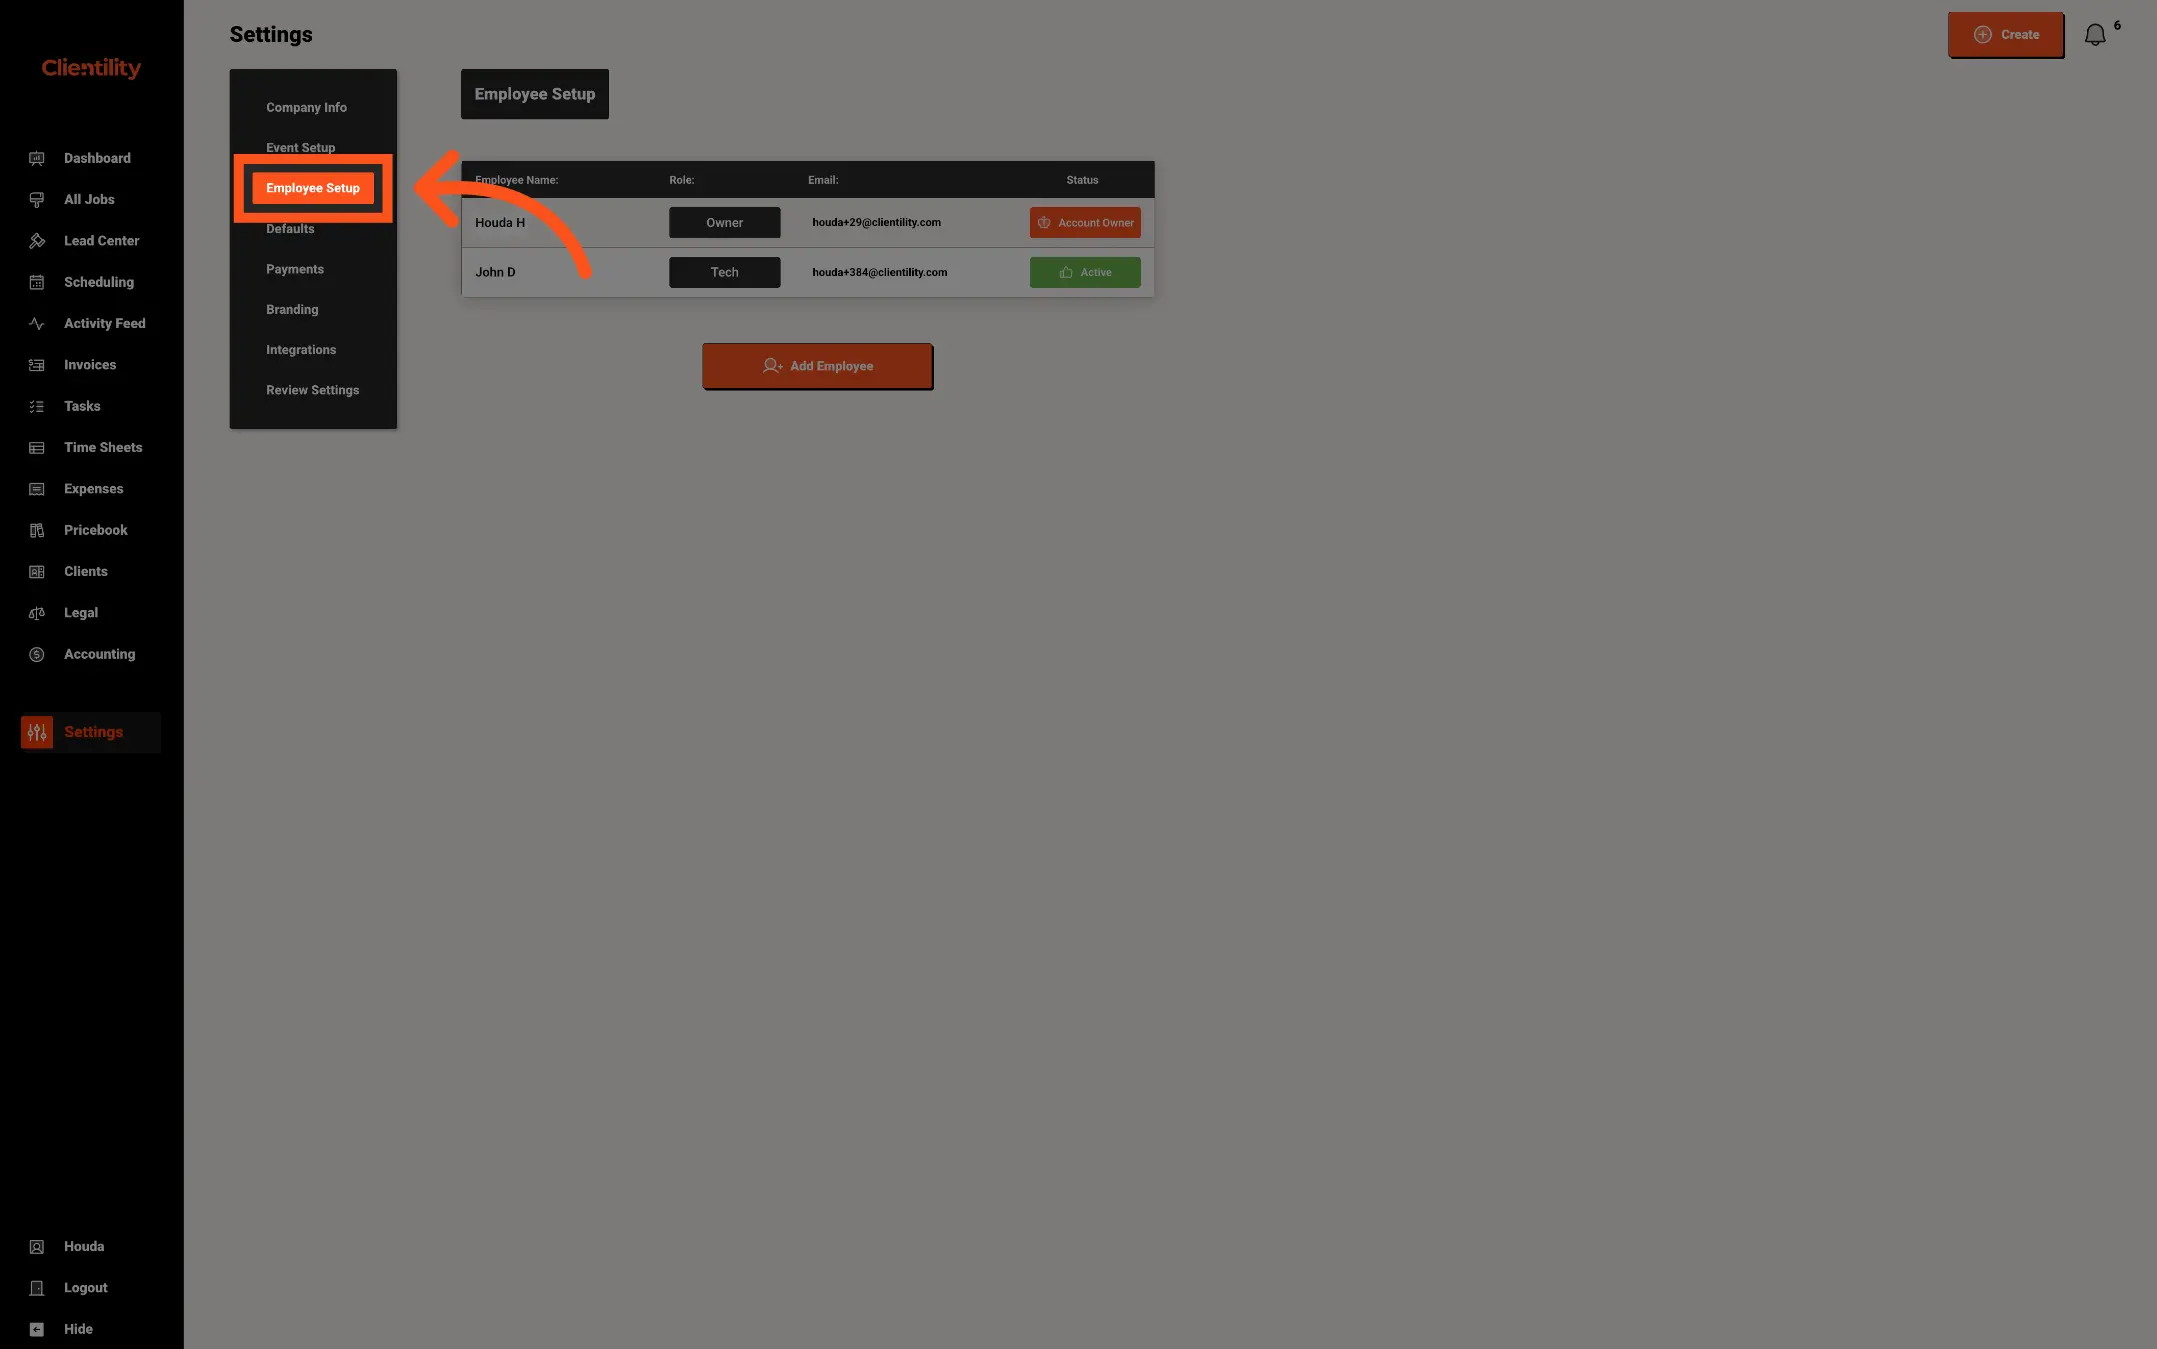
Go to Employee Setup and select the employee whose permissions you want to manage.

Once you select the employee, select User Permissions tab to view and customize the employee’s access.
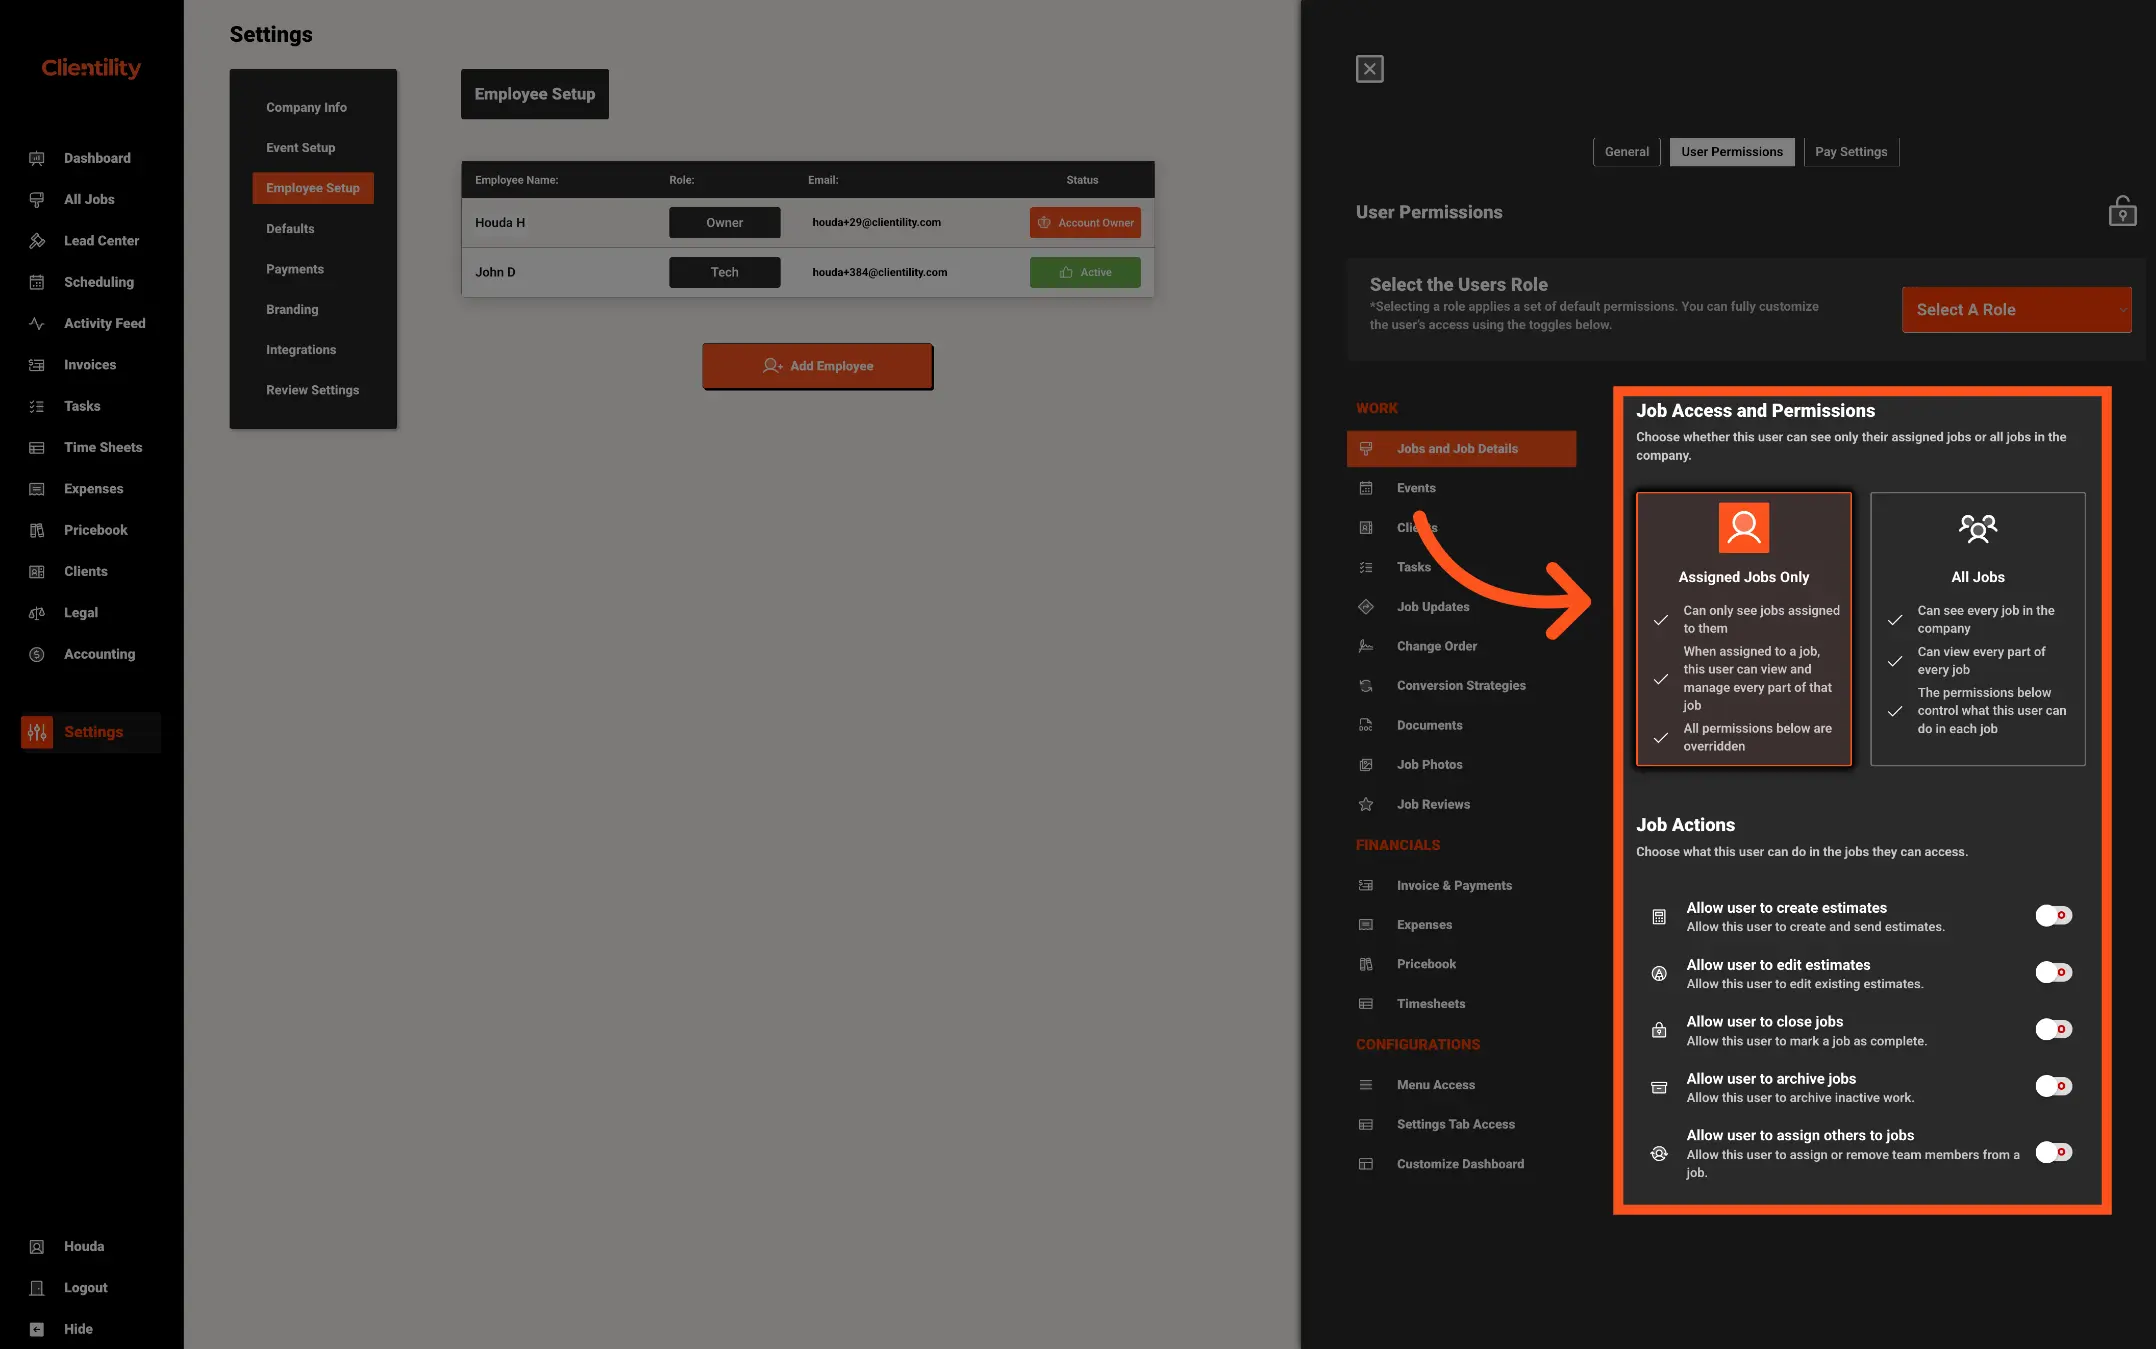
All permission sections have two parts:
Depending on the section, users can see only items assigned to or created by them, or all items in the company.

Choose whether the user can access only jobs assigned to them or all jobs in the company.
Choose Assigned Jobs Only if you only want the user to see jobs assigned to them.
When you assign a user to a job, they receive full access to that specific job. They can view and manage every part of it, and all permissions in User Permissions are overridden for that job.
This is useful for a manager who needs to take full ownership of a job. For example, assigning a manager to a job lets them see and manage all of its details, including invoices, payments, events, tasks, and other related information.
Note: Do not assign a technician directly to the whole job if they only need limited access. Instead, assign them to the specific items they need to work on, such as an event or task. Then use the individual permissions to control what they can see and do in Clientility.
Choose All Jobs when a user needs to see every job in the company.
This setting gives the user access to the full job list. It does not override their other permissions. You can use the individual permissions in User Permissions to decide which job details they can view and what actions they can take.
For example, you can allow a sales representative to see all jobs, but prevent them from viewing invoices and payments, or change orders.
This option is useful when a user needs company-wide visibility, but their access should still be limited to the parts of the platform relevant to their role.
Use these permissions to control the actions a user can take on the jobs they are allowed to access.
You can allow users to:
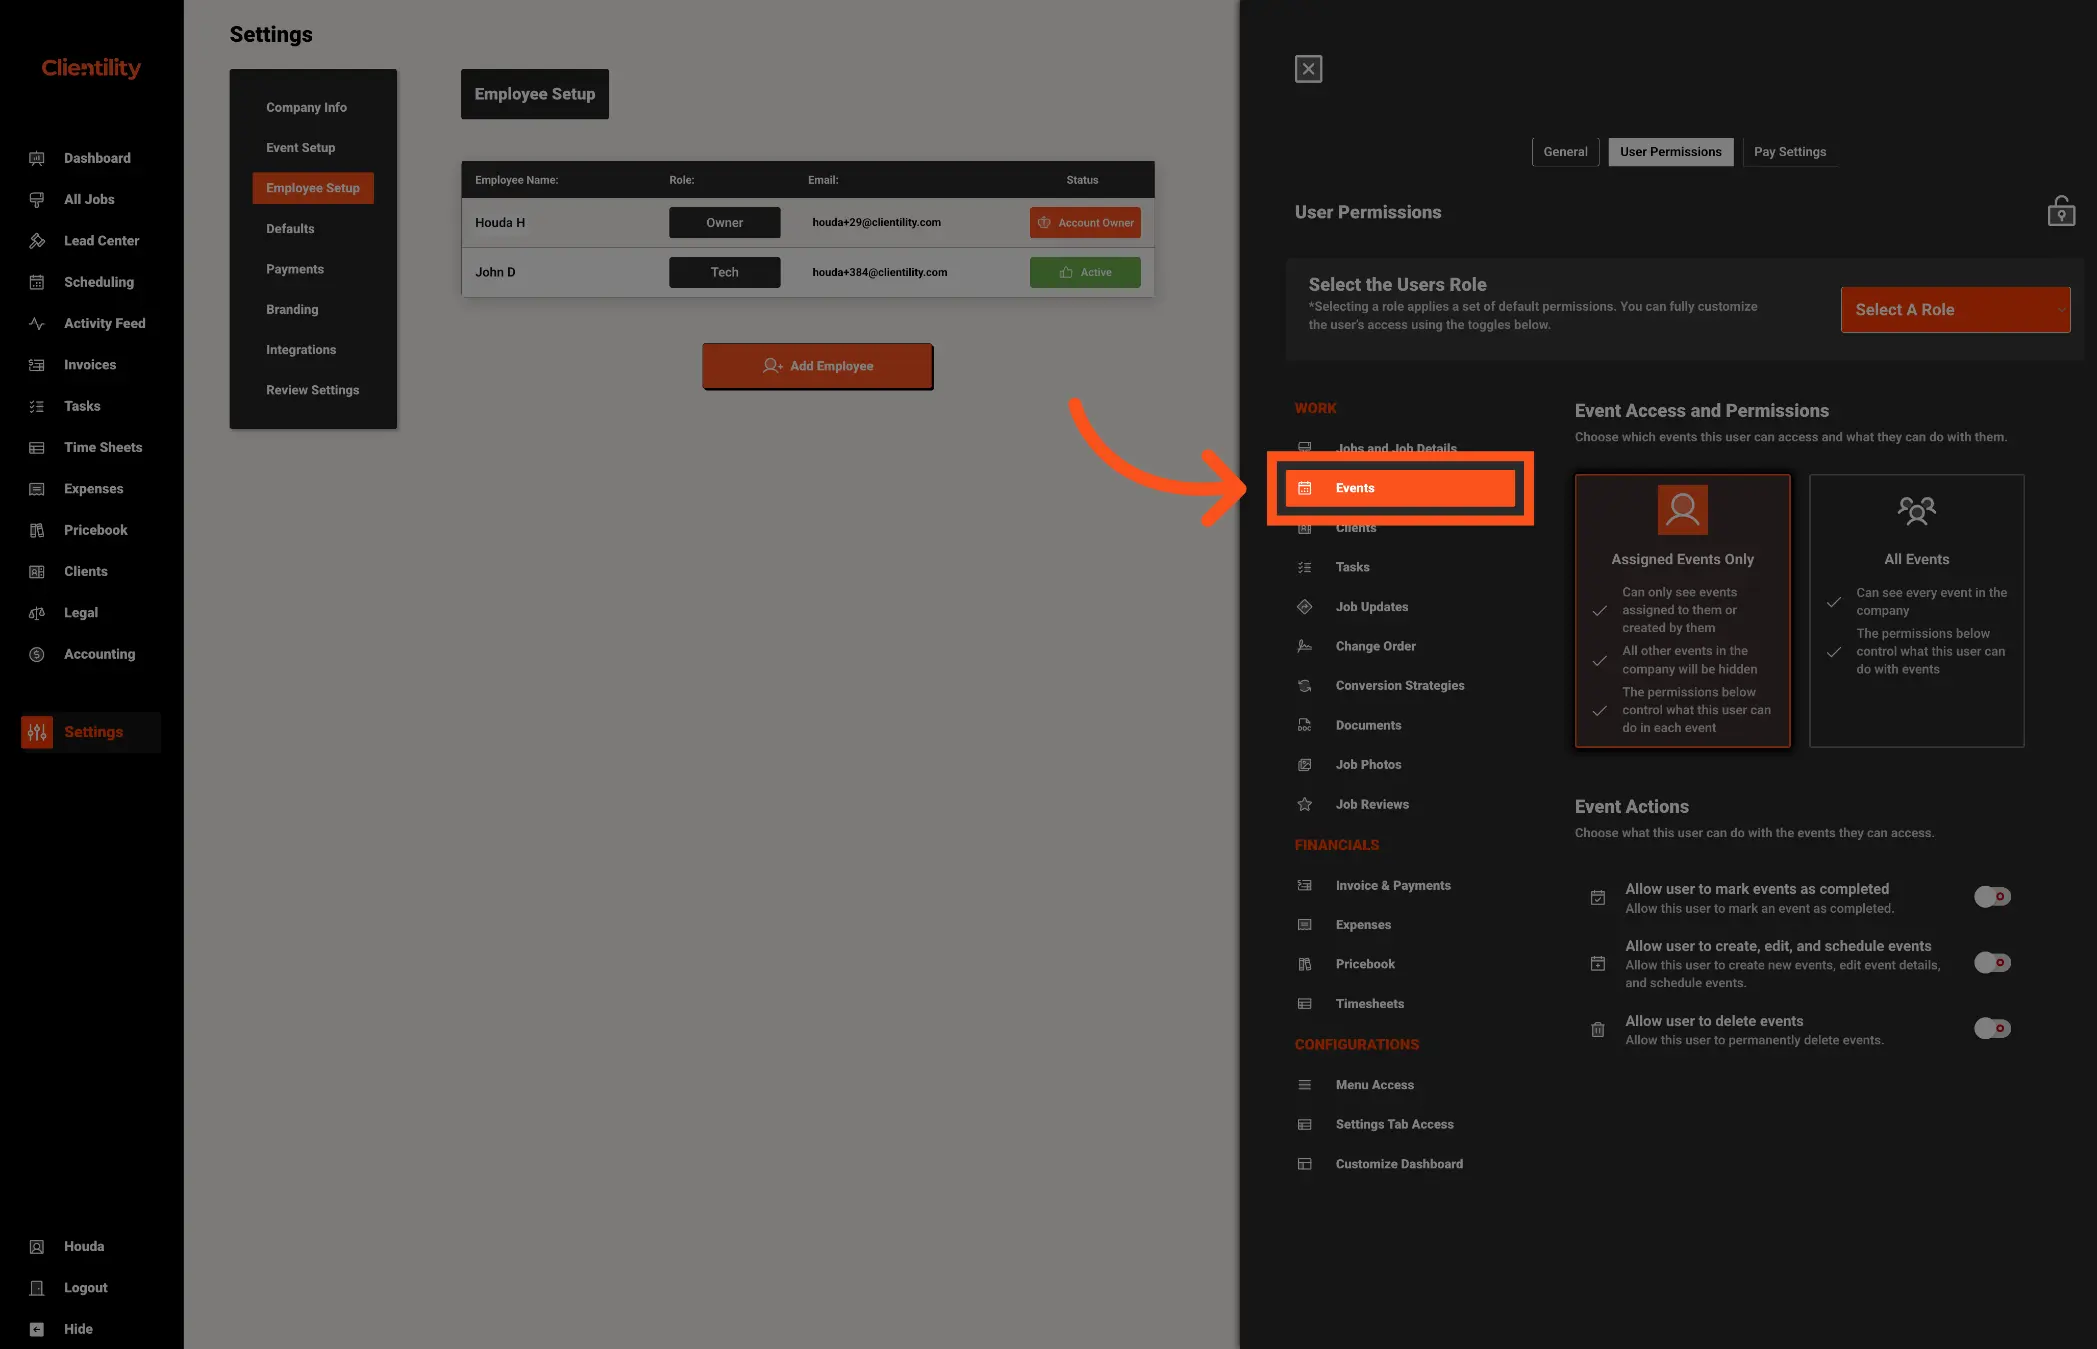
Choose whether the user can access only events assigned to or created by them, or all events in the company.
You can allow users to:
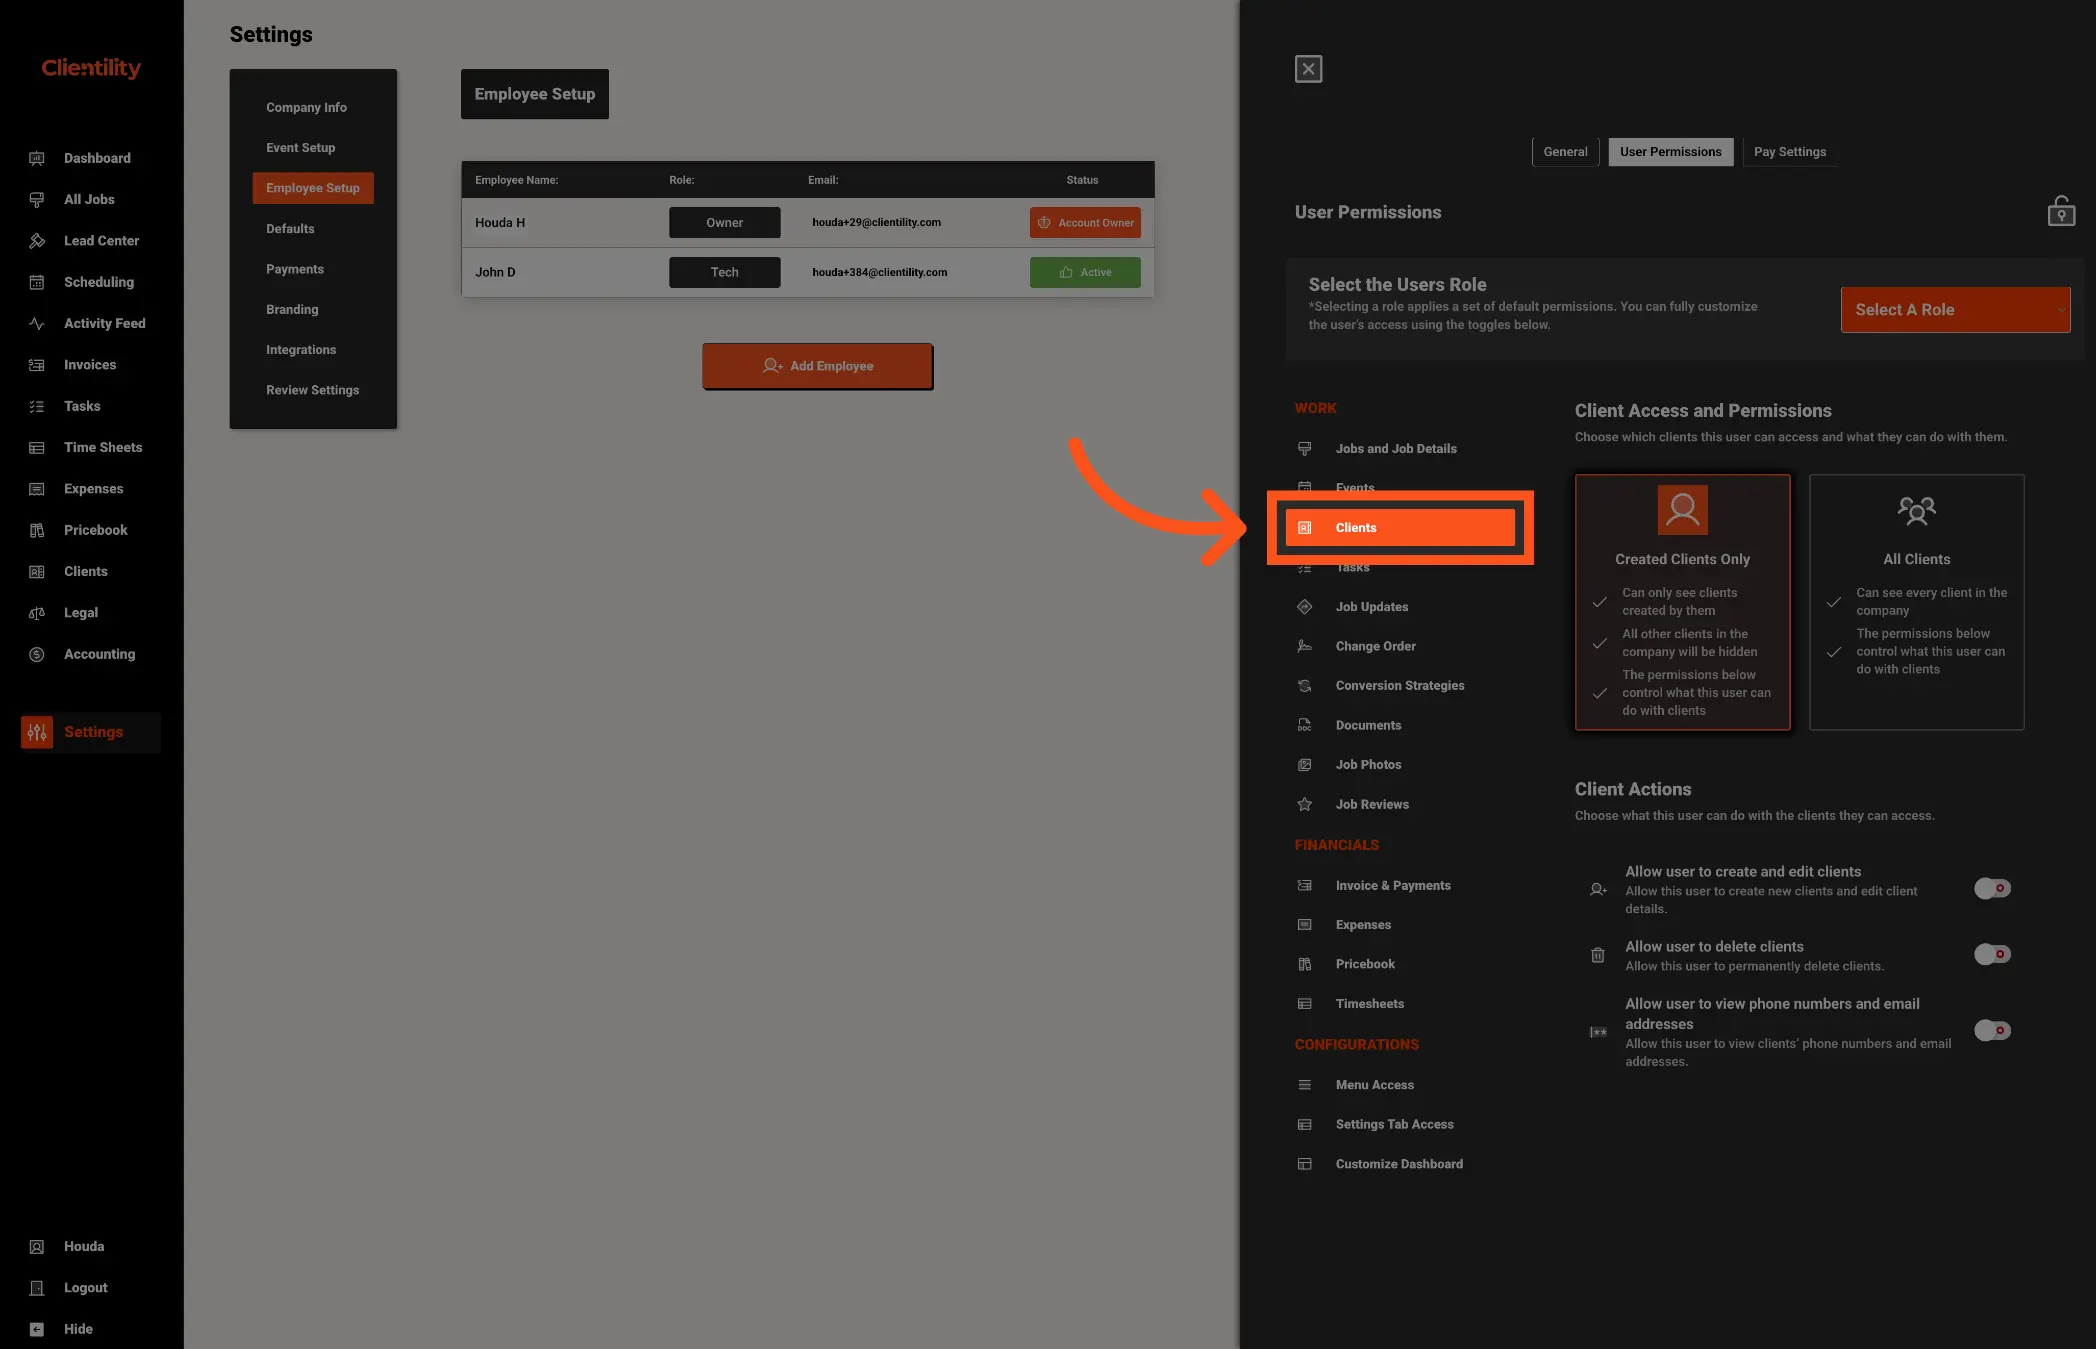
Choose whether the user can access only clients they created or all clients in the company.
You can allow users to:

Choose whether the user can access only tasks assigned to or created by them, or all tasks in the company.
You can allow users to:
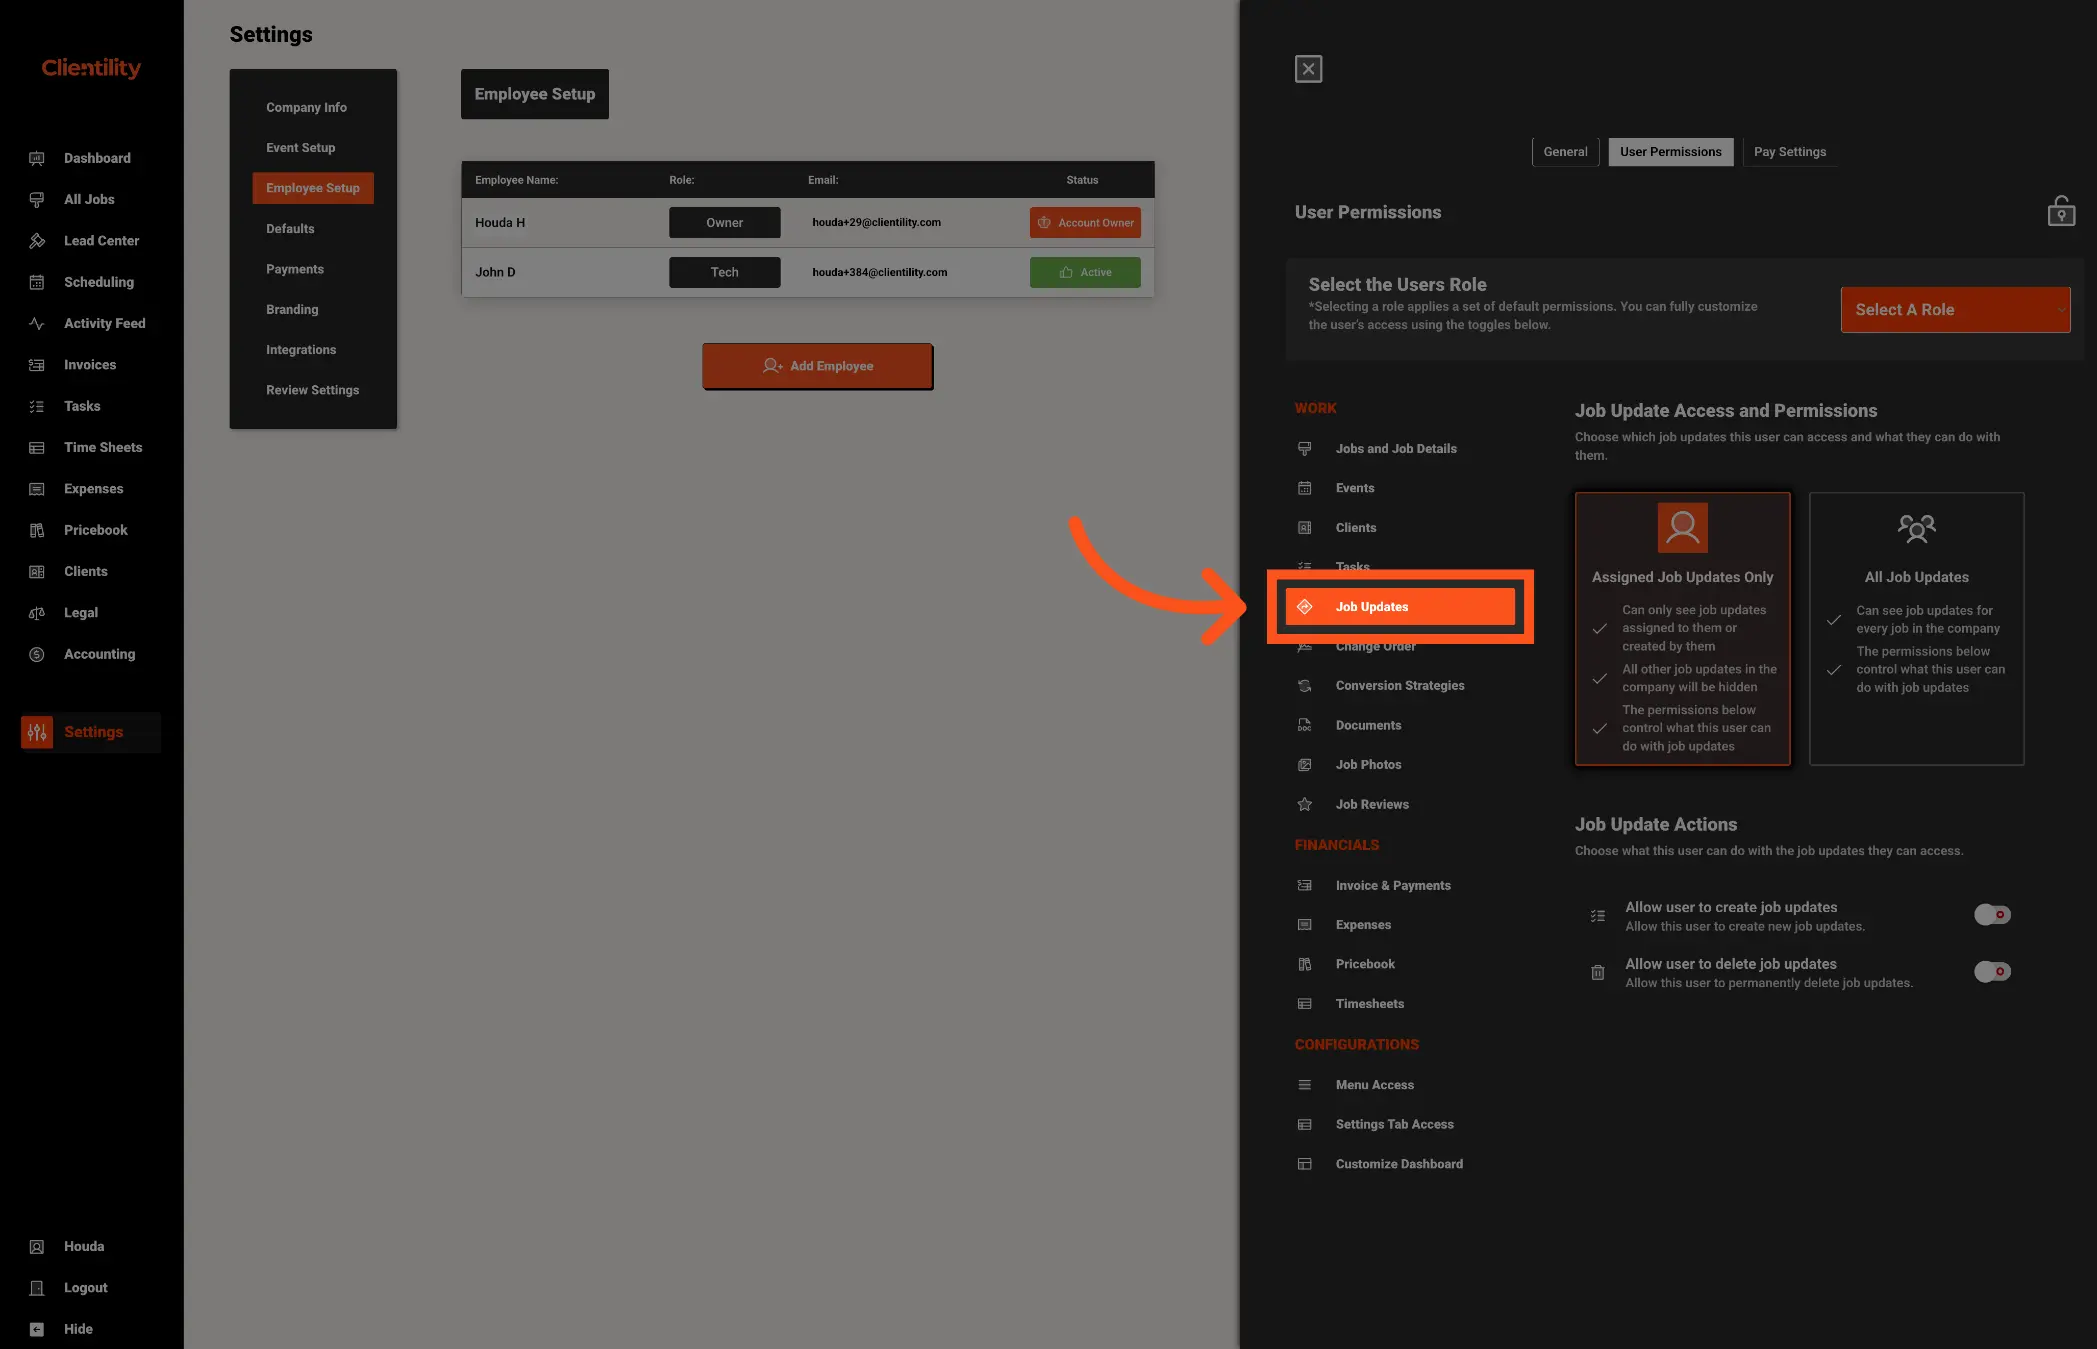
Choose whether the user can access job updates assigned to or created by them, or job updates for all jobs in the company.
You can allow users to:
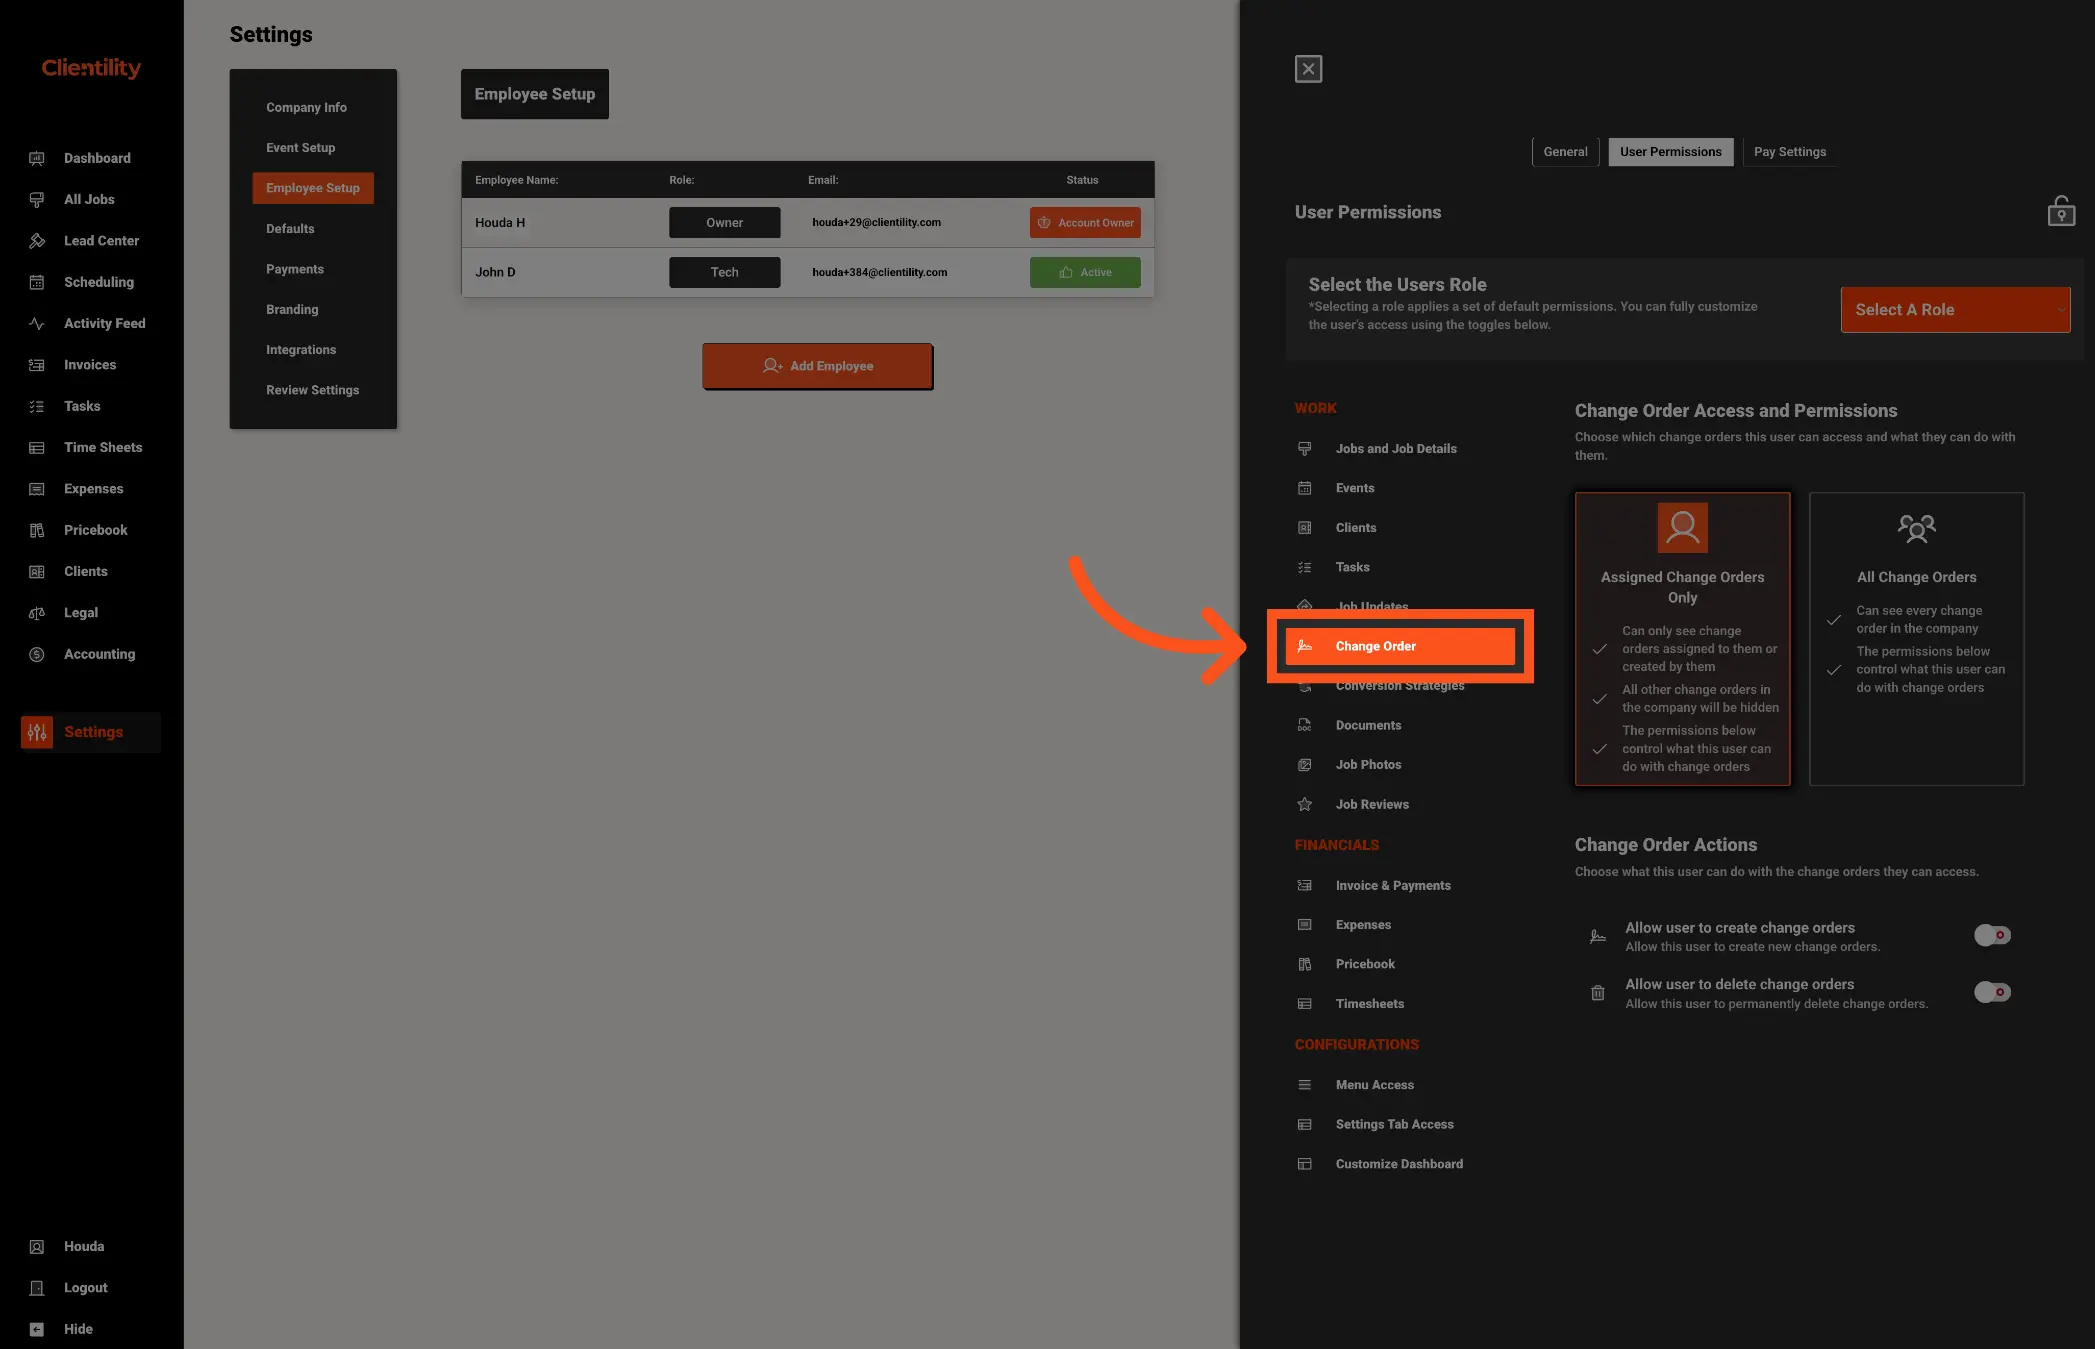
Choose whether the user can access only change orders assigned to or created by them, or all change orders in the company.
You can allow users to:
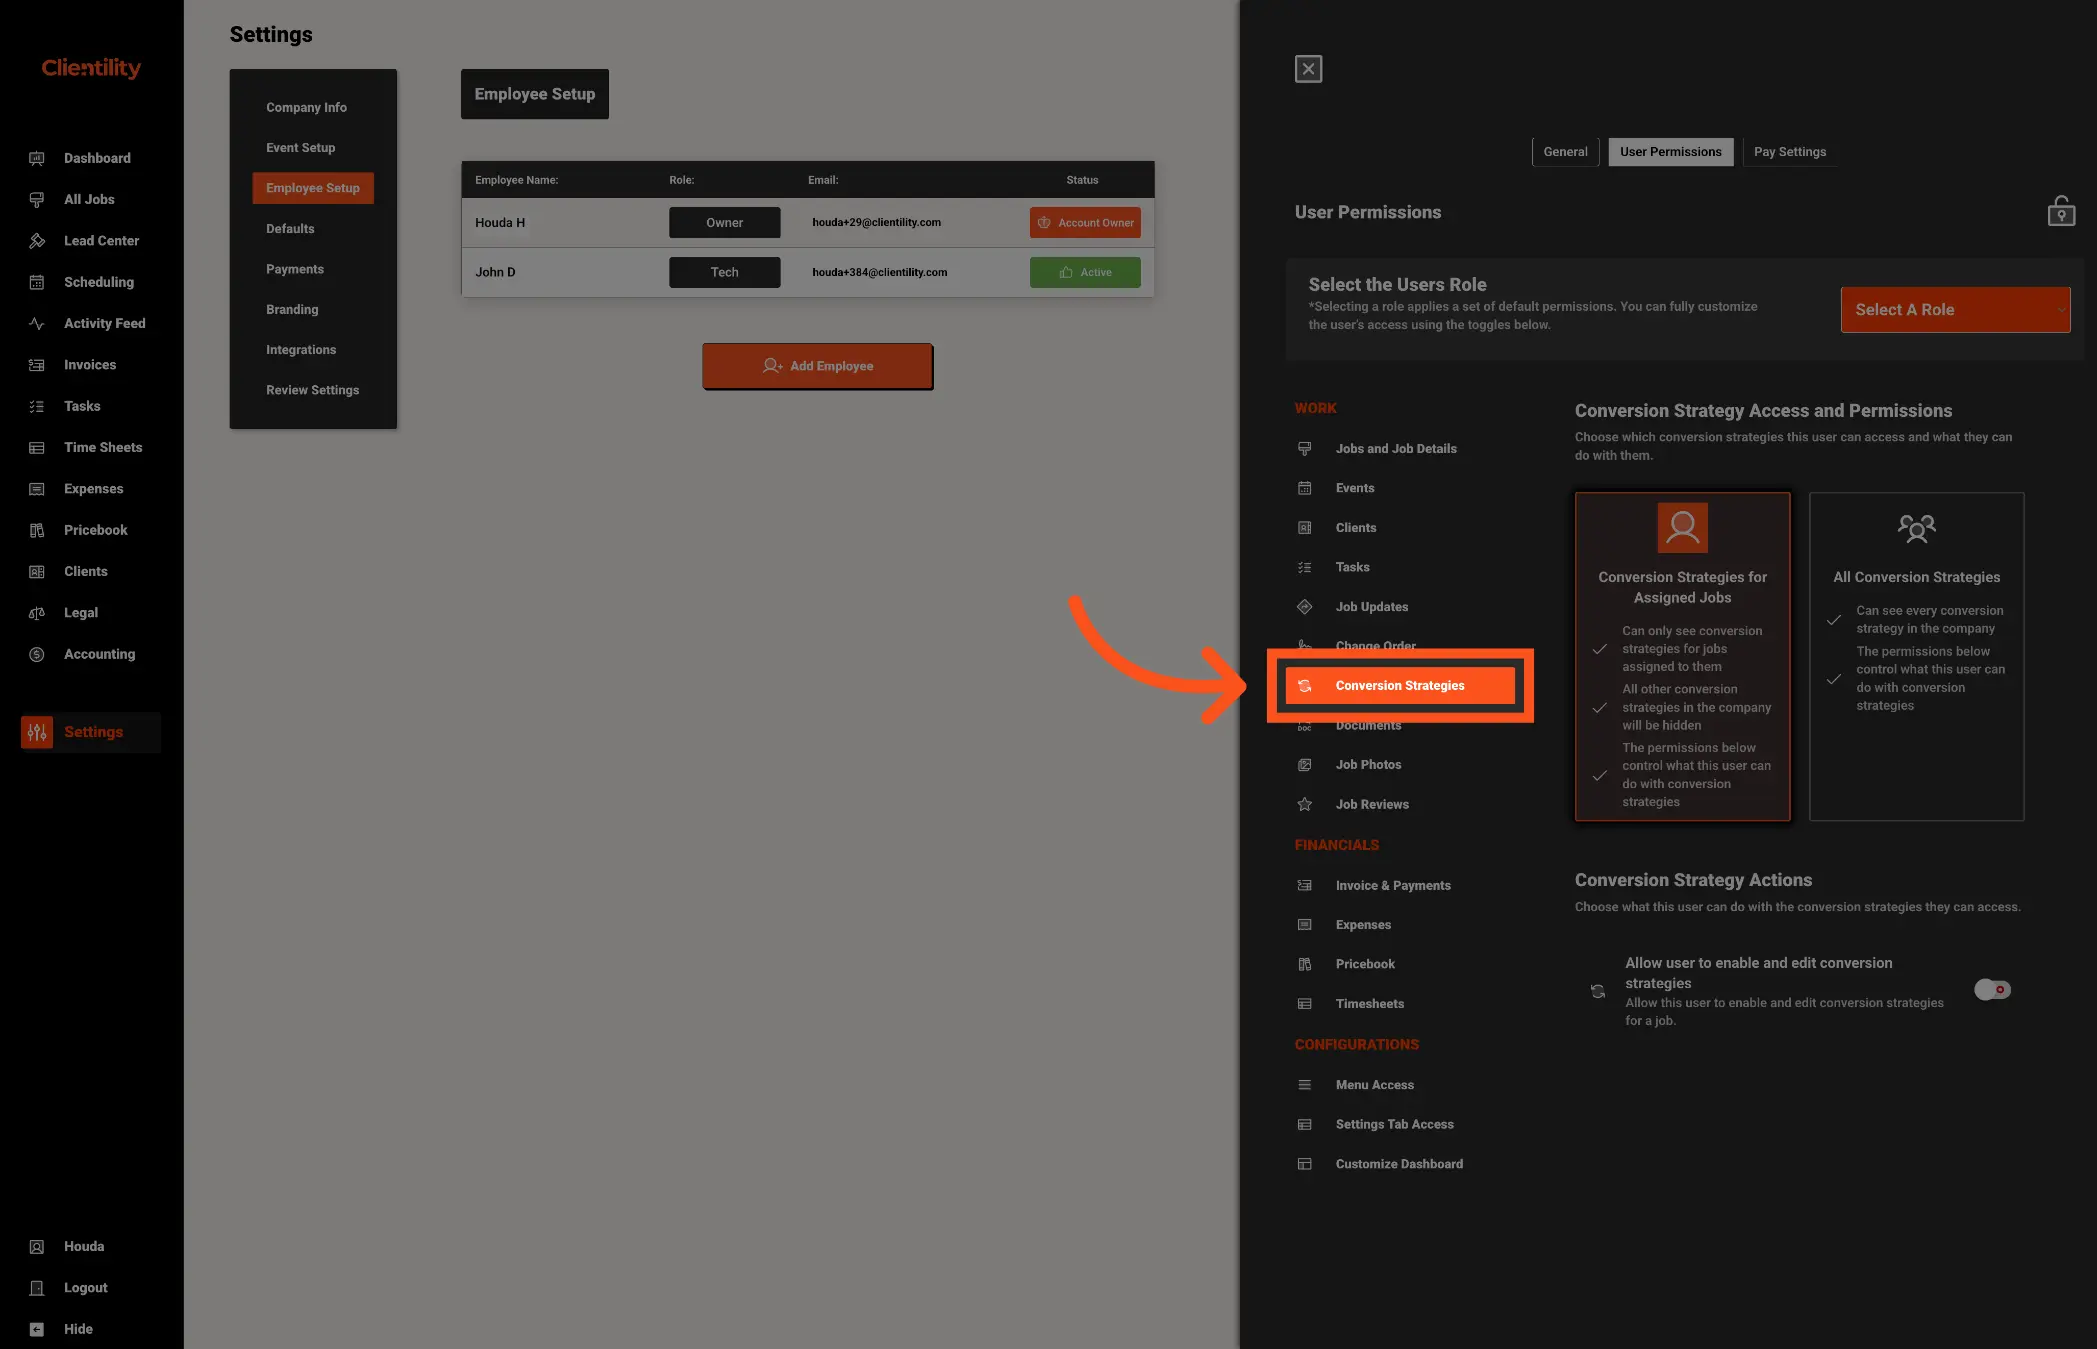
Conversion strategy access is based on the jobs a user is assigned to.
Choose Conversion Strategies for Assigned Jobs if the user should only see conversion strategies connected to jobs assigned to them. Conversion strategies for all other jobs will be hidden.
Choose All Conversion Strategies if the user needs to see conversion strategies for every job in the company.
You can allow users to:
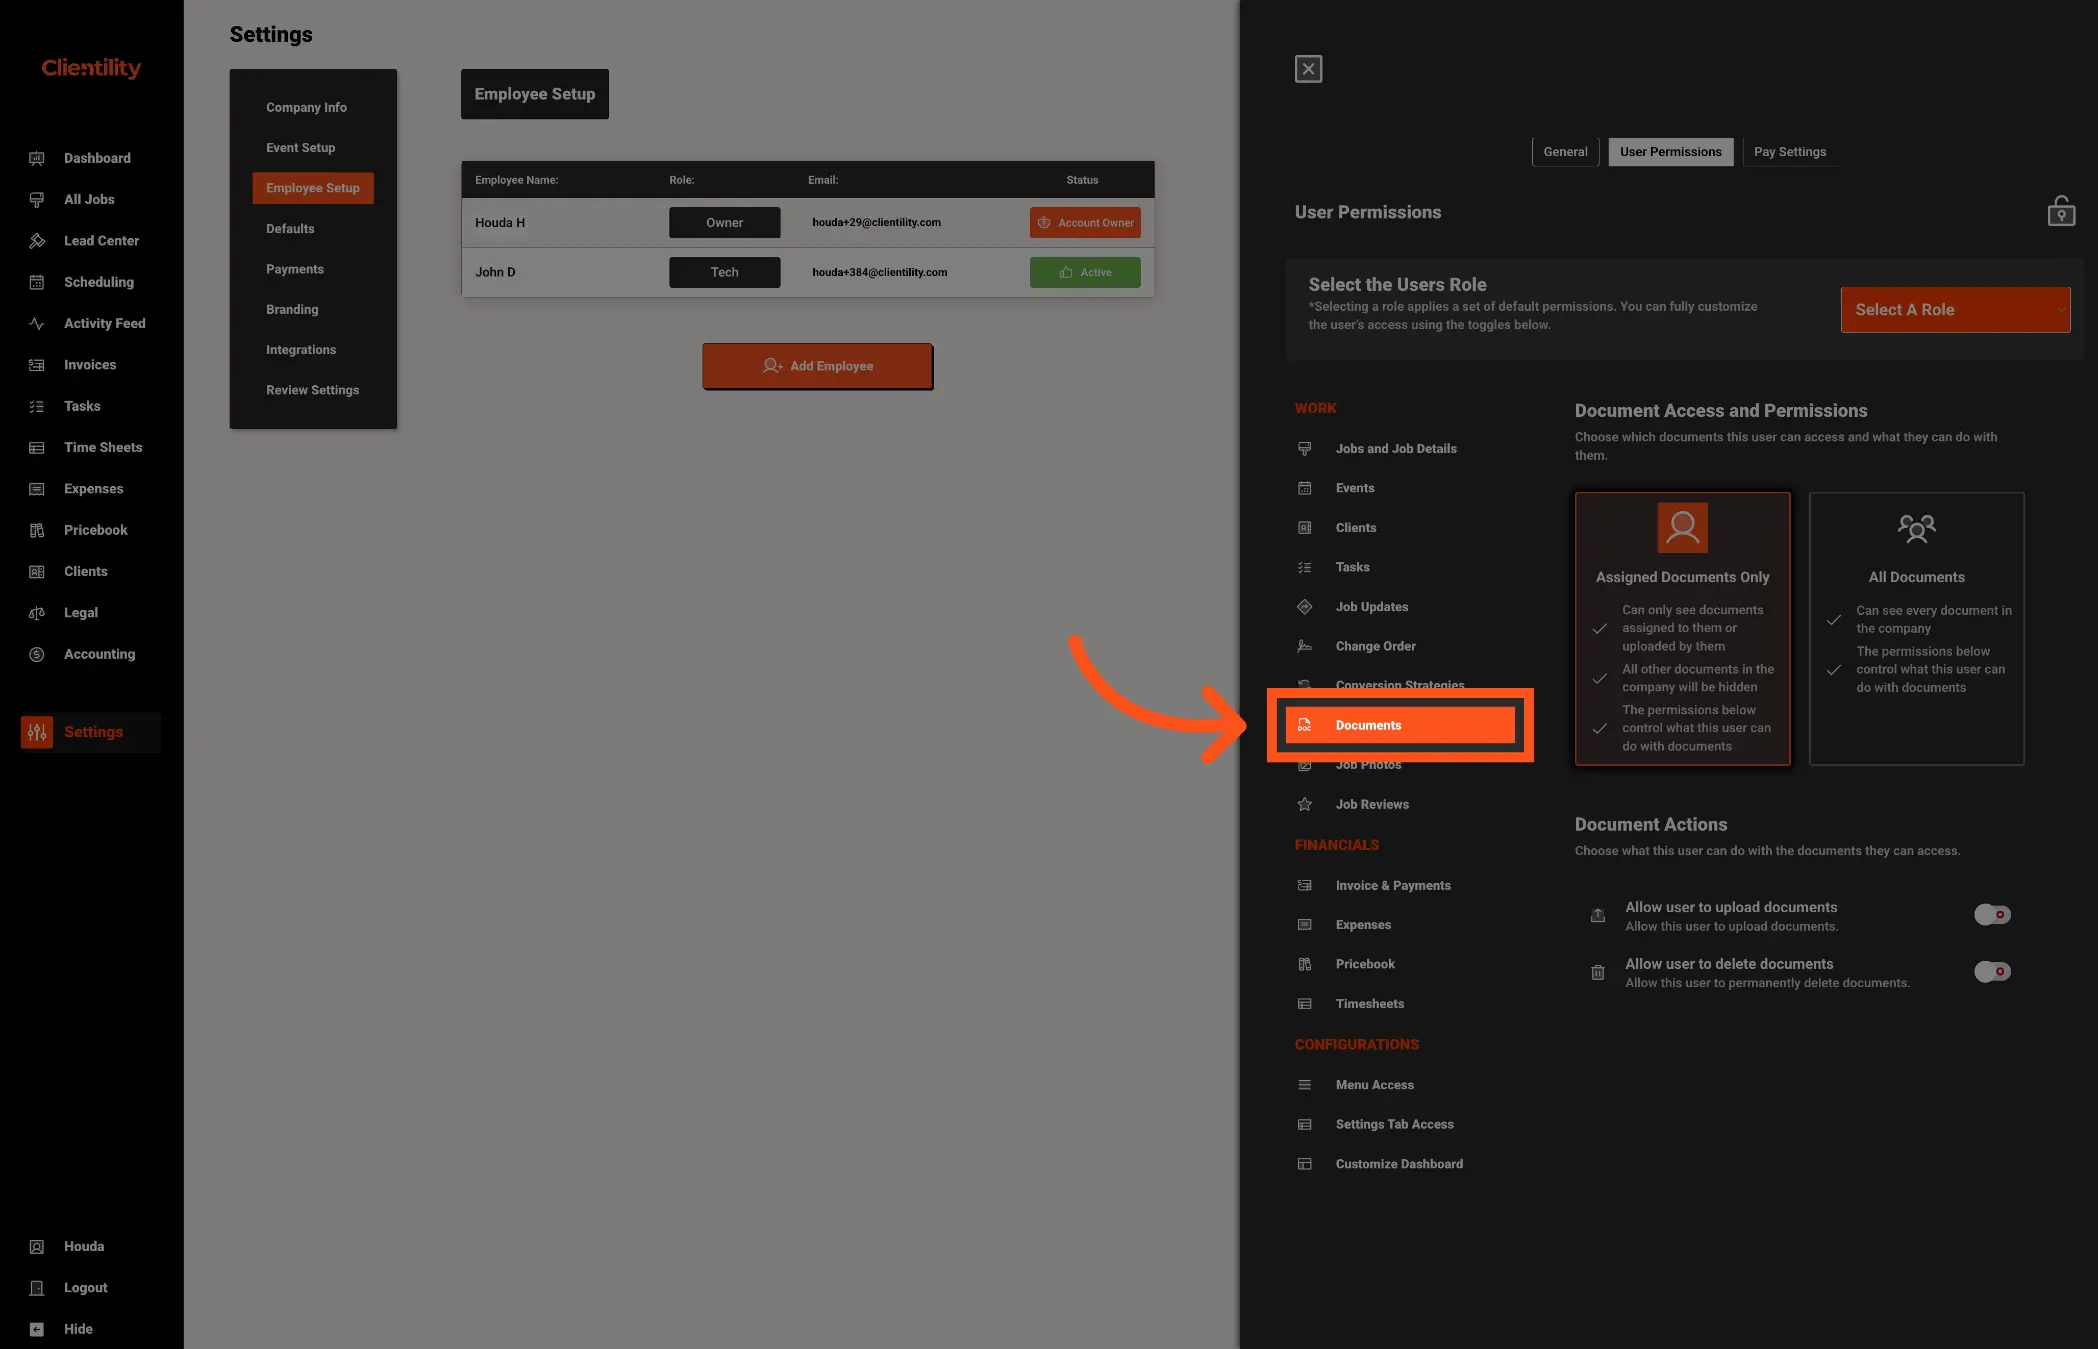
Choose whether the user can access only documents assigned to them or uploaded by them, or all documents in the company.
With All Documents, the user can see every document in the company.
You can allow users to:
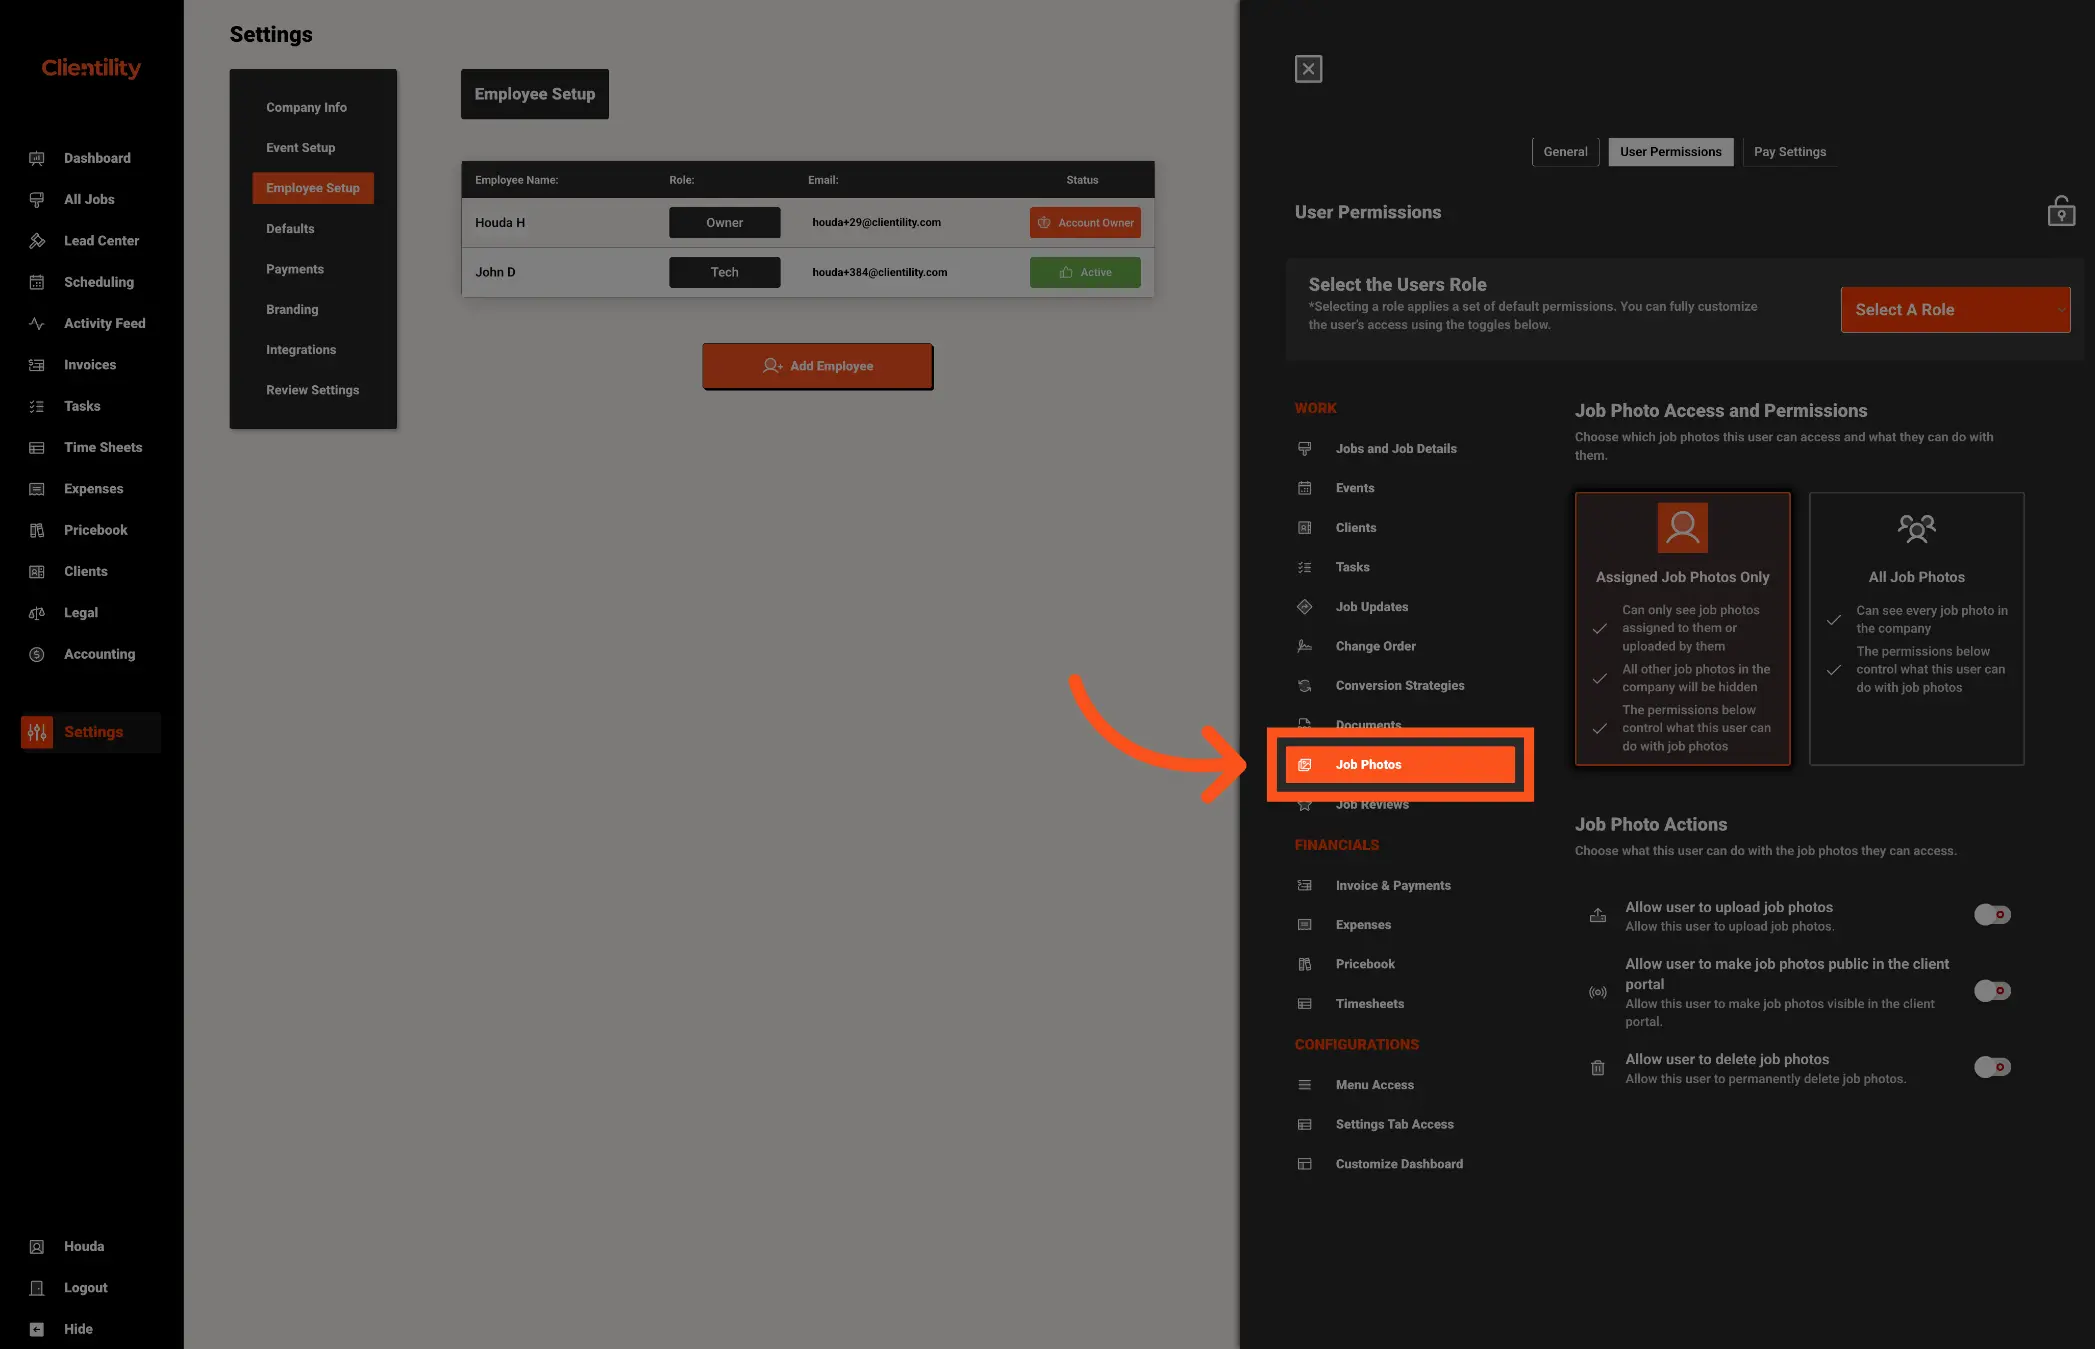
Choose whether the user can access only photos assigned to them or uploaded by them, or all photos in the company.
With All Job Photos, the user can see every job photo in the company.
You can allow users to:
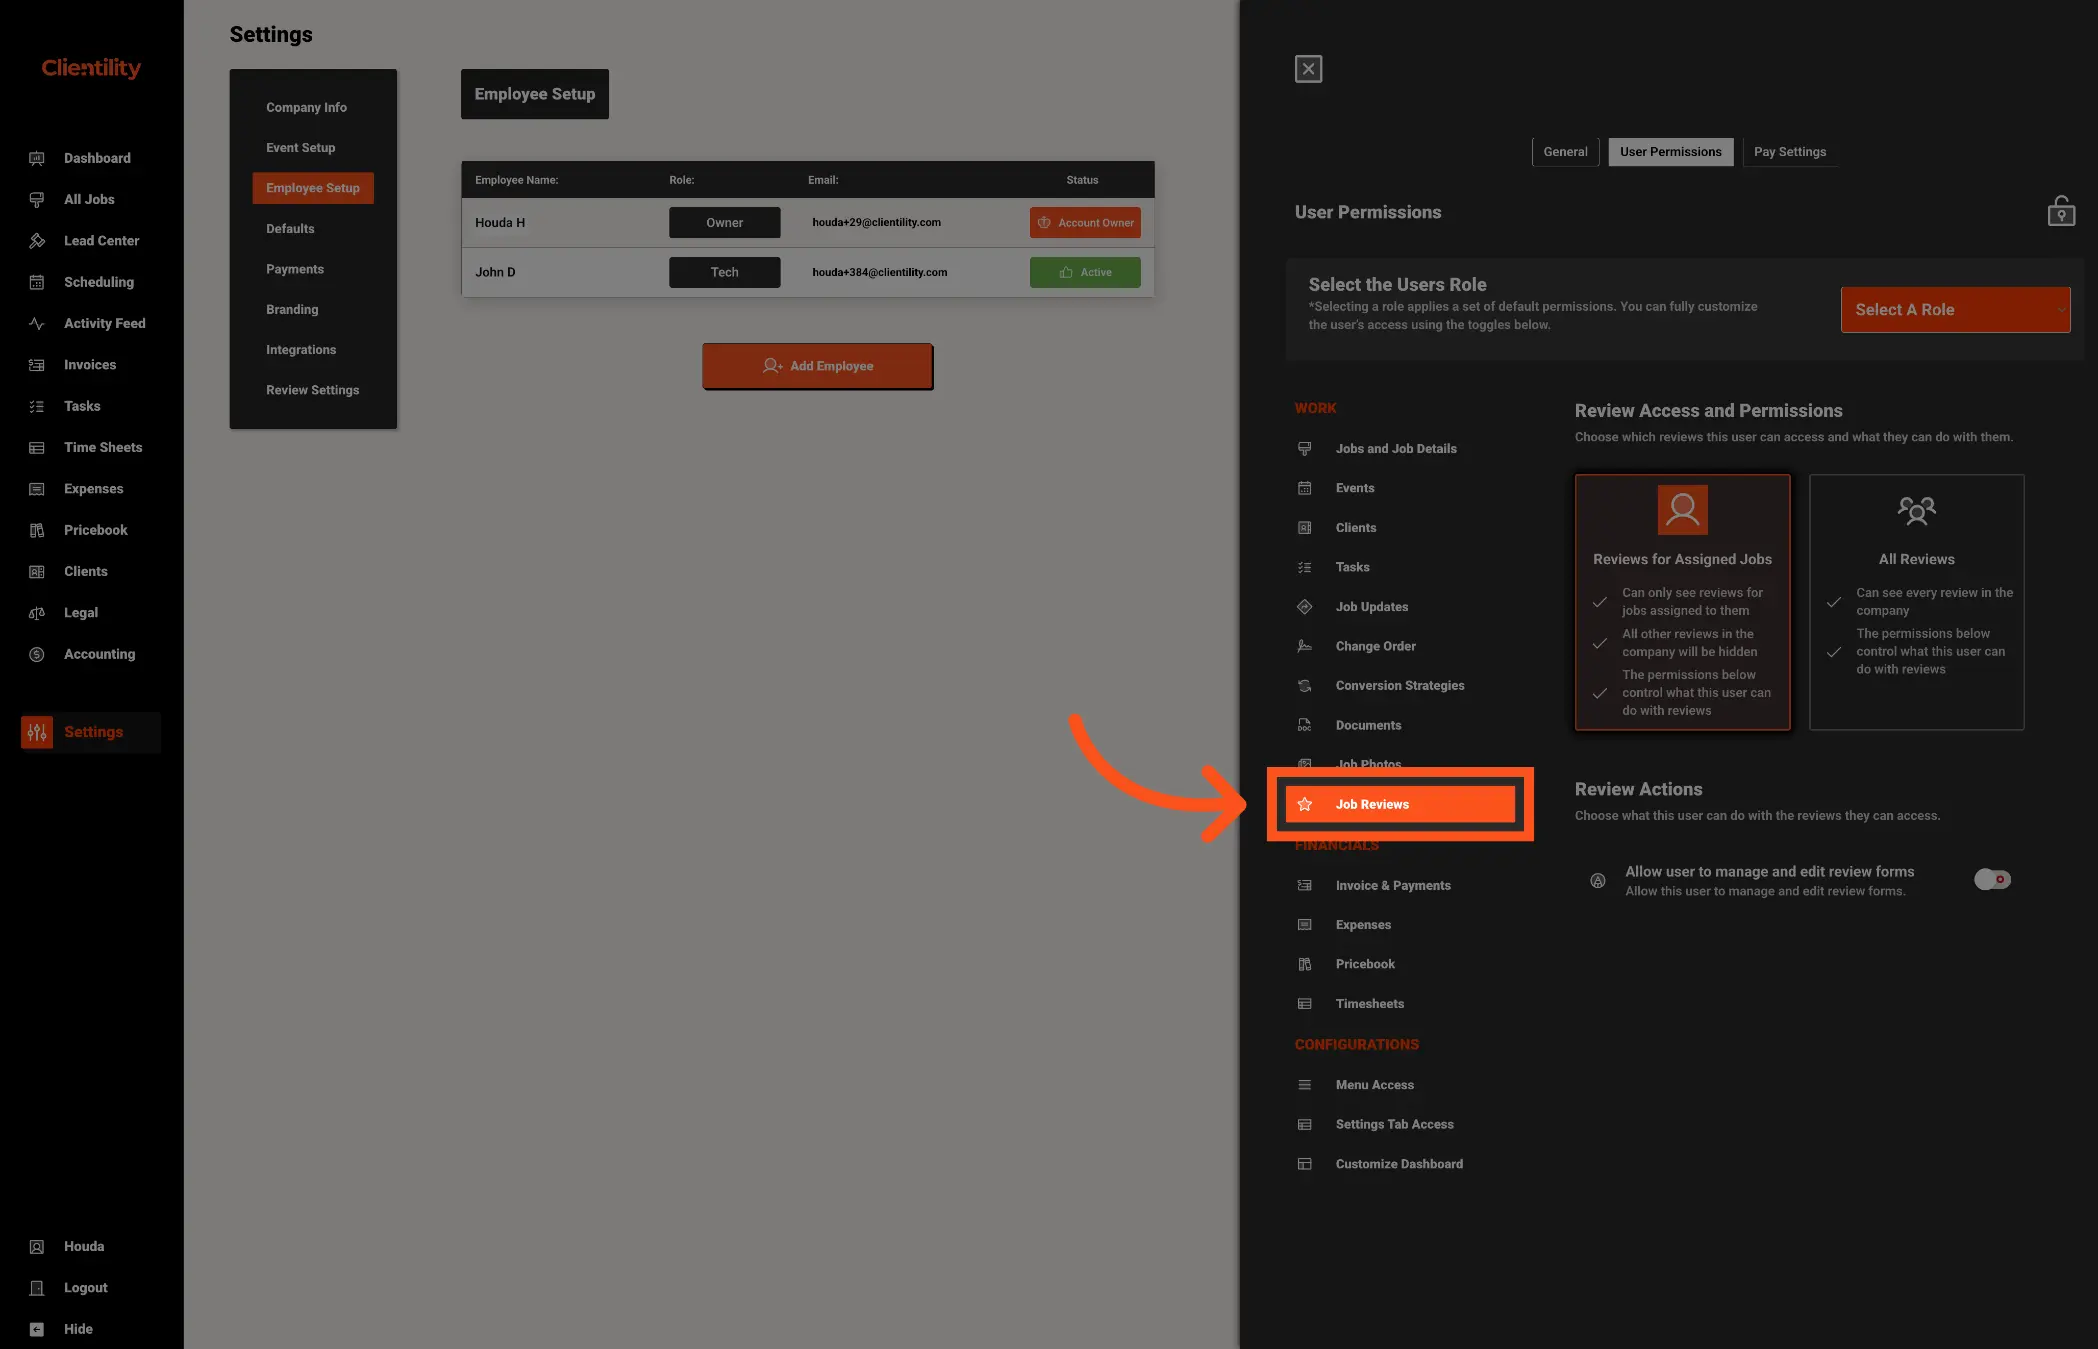
Review access is based on the jobs a user is assigned to.
Choose Reviews for Assigned Jobs if the user should only see reviews for jobs assigned to them. Reviews for all other jobs will be hidden.
Choose All Reviews if the user needs to see reviews for every job in the company.
You can allow users to:
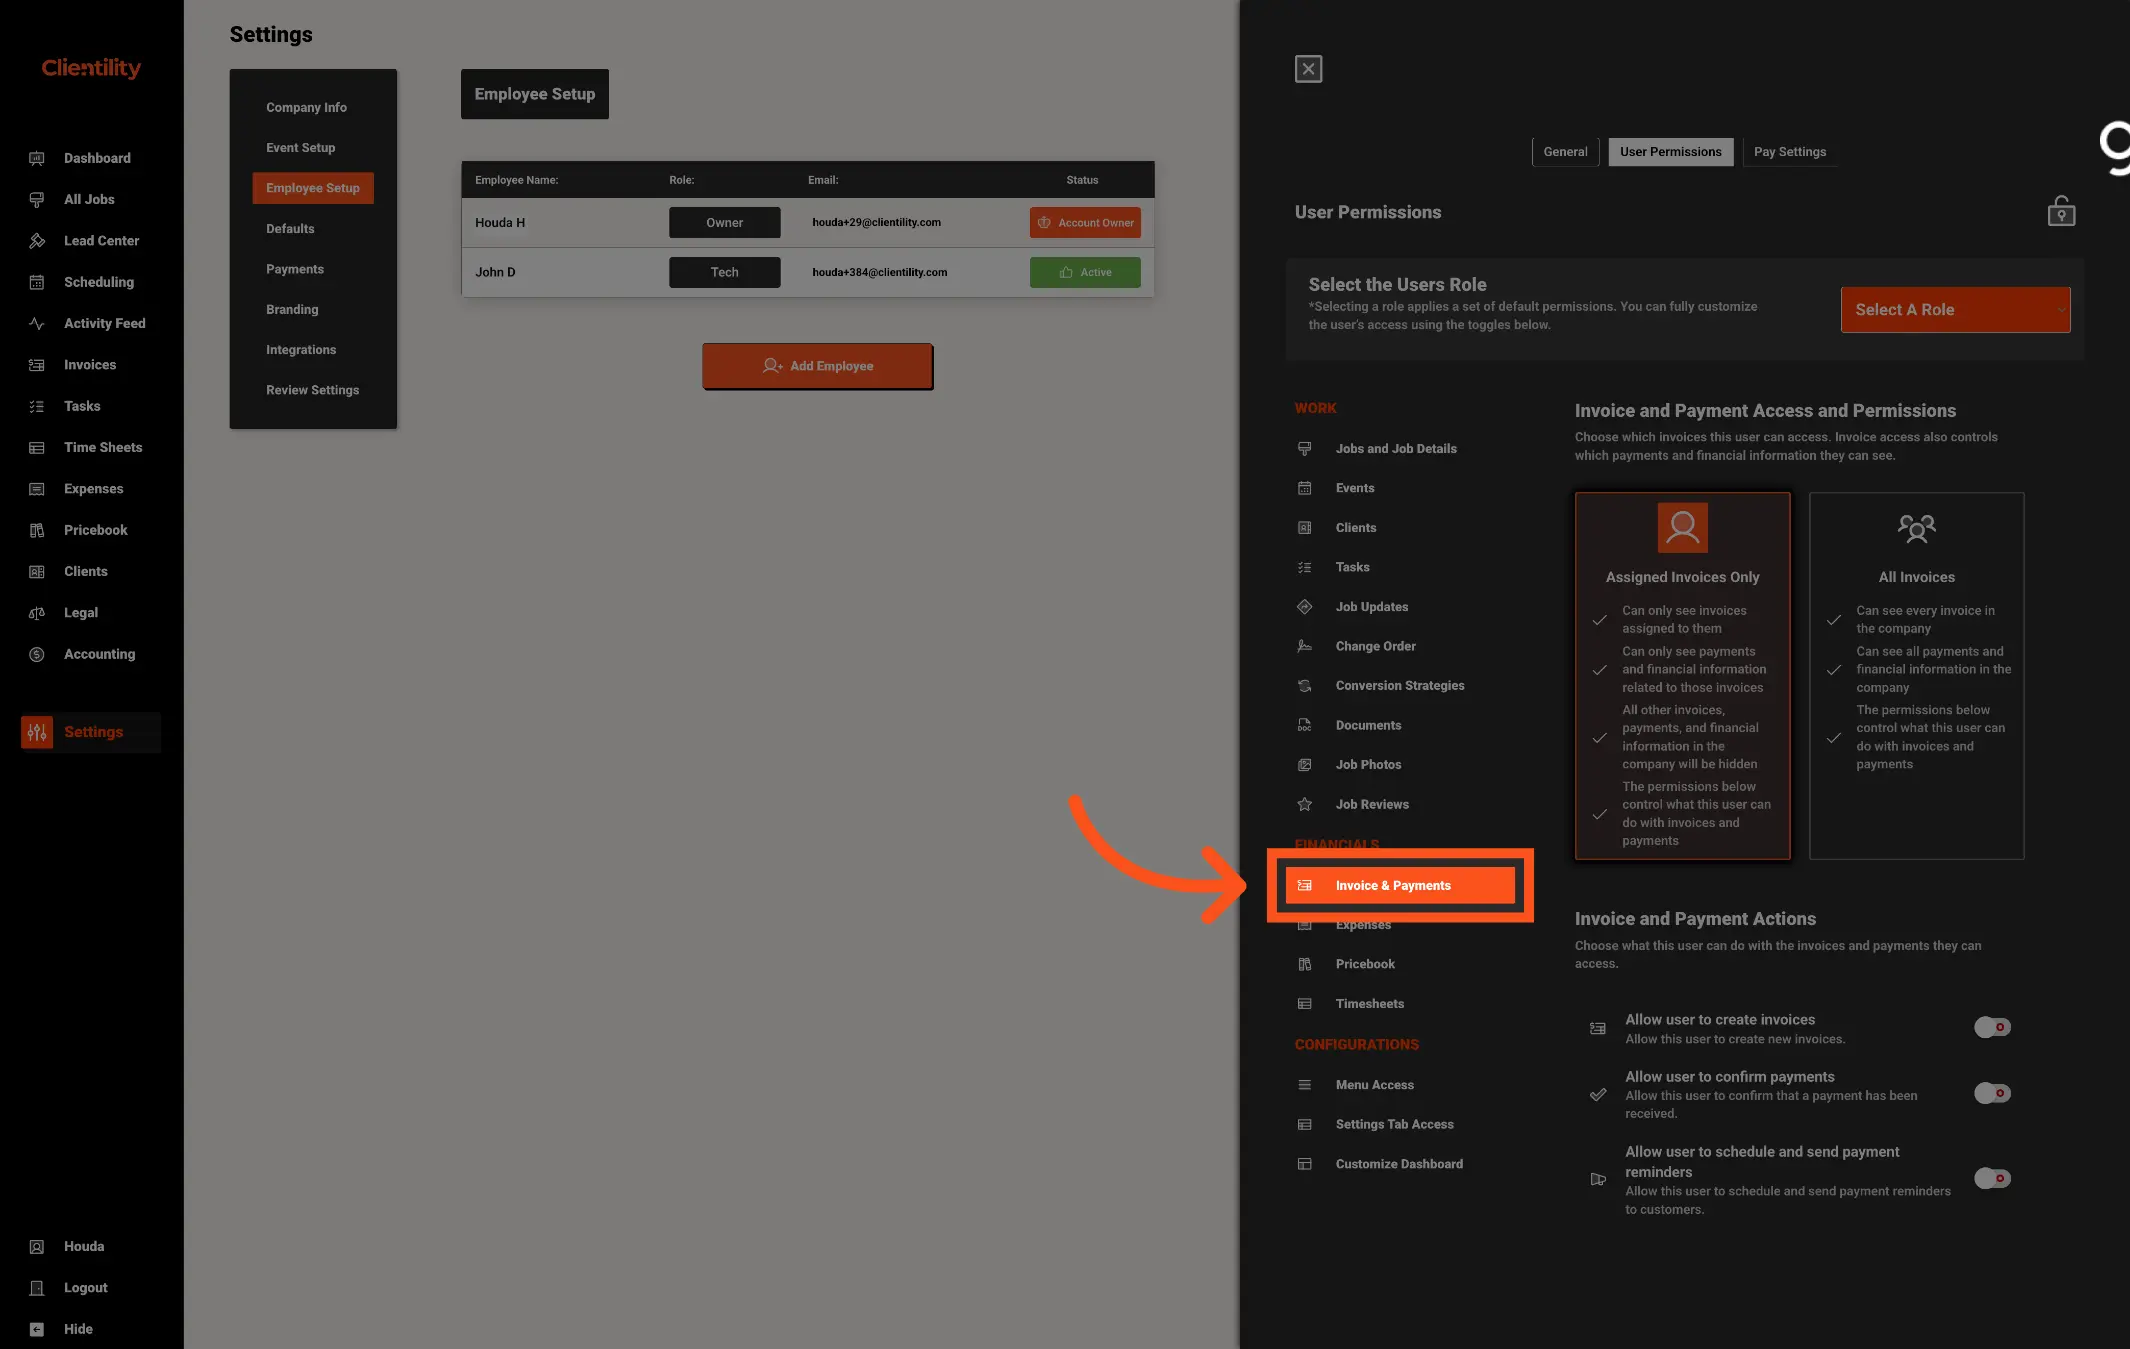
Invoice access controls which invoices, payments, and financial information a user can see.
Choose Assigned Invoices Only if the user should only see invoices assigned to them. They will also see only the payments and financial information related to those invoices. All other invoices, payments, and financial information in the company will be hidden.
Choose All Invoices if the user needs to see every invoice in the company. This also gives them visibility of all payments and financial information.
If you do not want a user to see a specific invoice, payment, or related financial information, do not assign that invoice to them.
Invoice and payment access controls more than the Invoices section. If a user is not assigned to invoices and payments, payment details and financial information are hidden throughout Clientility. To allow a user to see payments and related financial information, assign them to the relevant invoices and payments.
Example: If a technician only needs to see specific parts of a job, assign them to those items instead of assigning them to the entire job. For example, you can assign them to a task or event. If they also need to see an invoice or payment, assign them to the relevant invoice.
Note: When you assign a user directly to a job, they receive full access to that job and all related information. This includes invoices, payments, and financial details. See Step 5: Jobs and Job Details for more information.
Use these permissions to control what the user can do with the invoices and payments they can access.
You can allow users to:

Choose whether the user can access only expenses they created or all expenses in the company.
Choose Created Expenses Only if the user should only see expenses they created. All other expenses in the company will be hidden.
Choose All Expenses if the user needs to see every expense in the company.
Use this permission to control whether the user can create expenses.
You can allow users to:
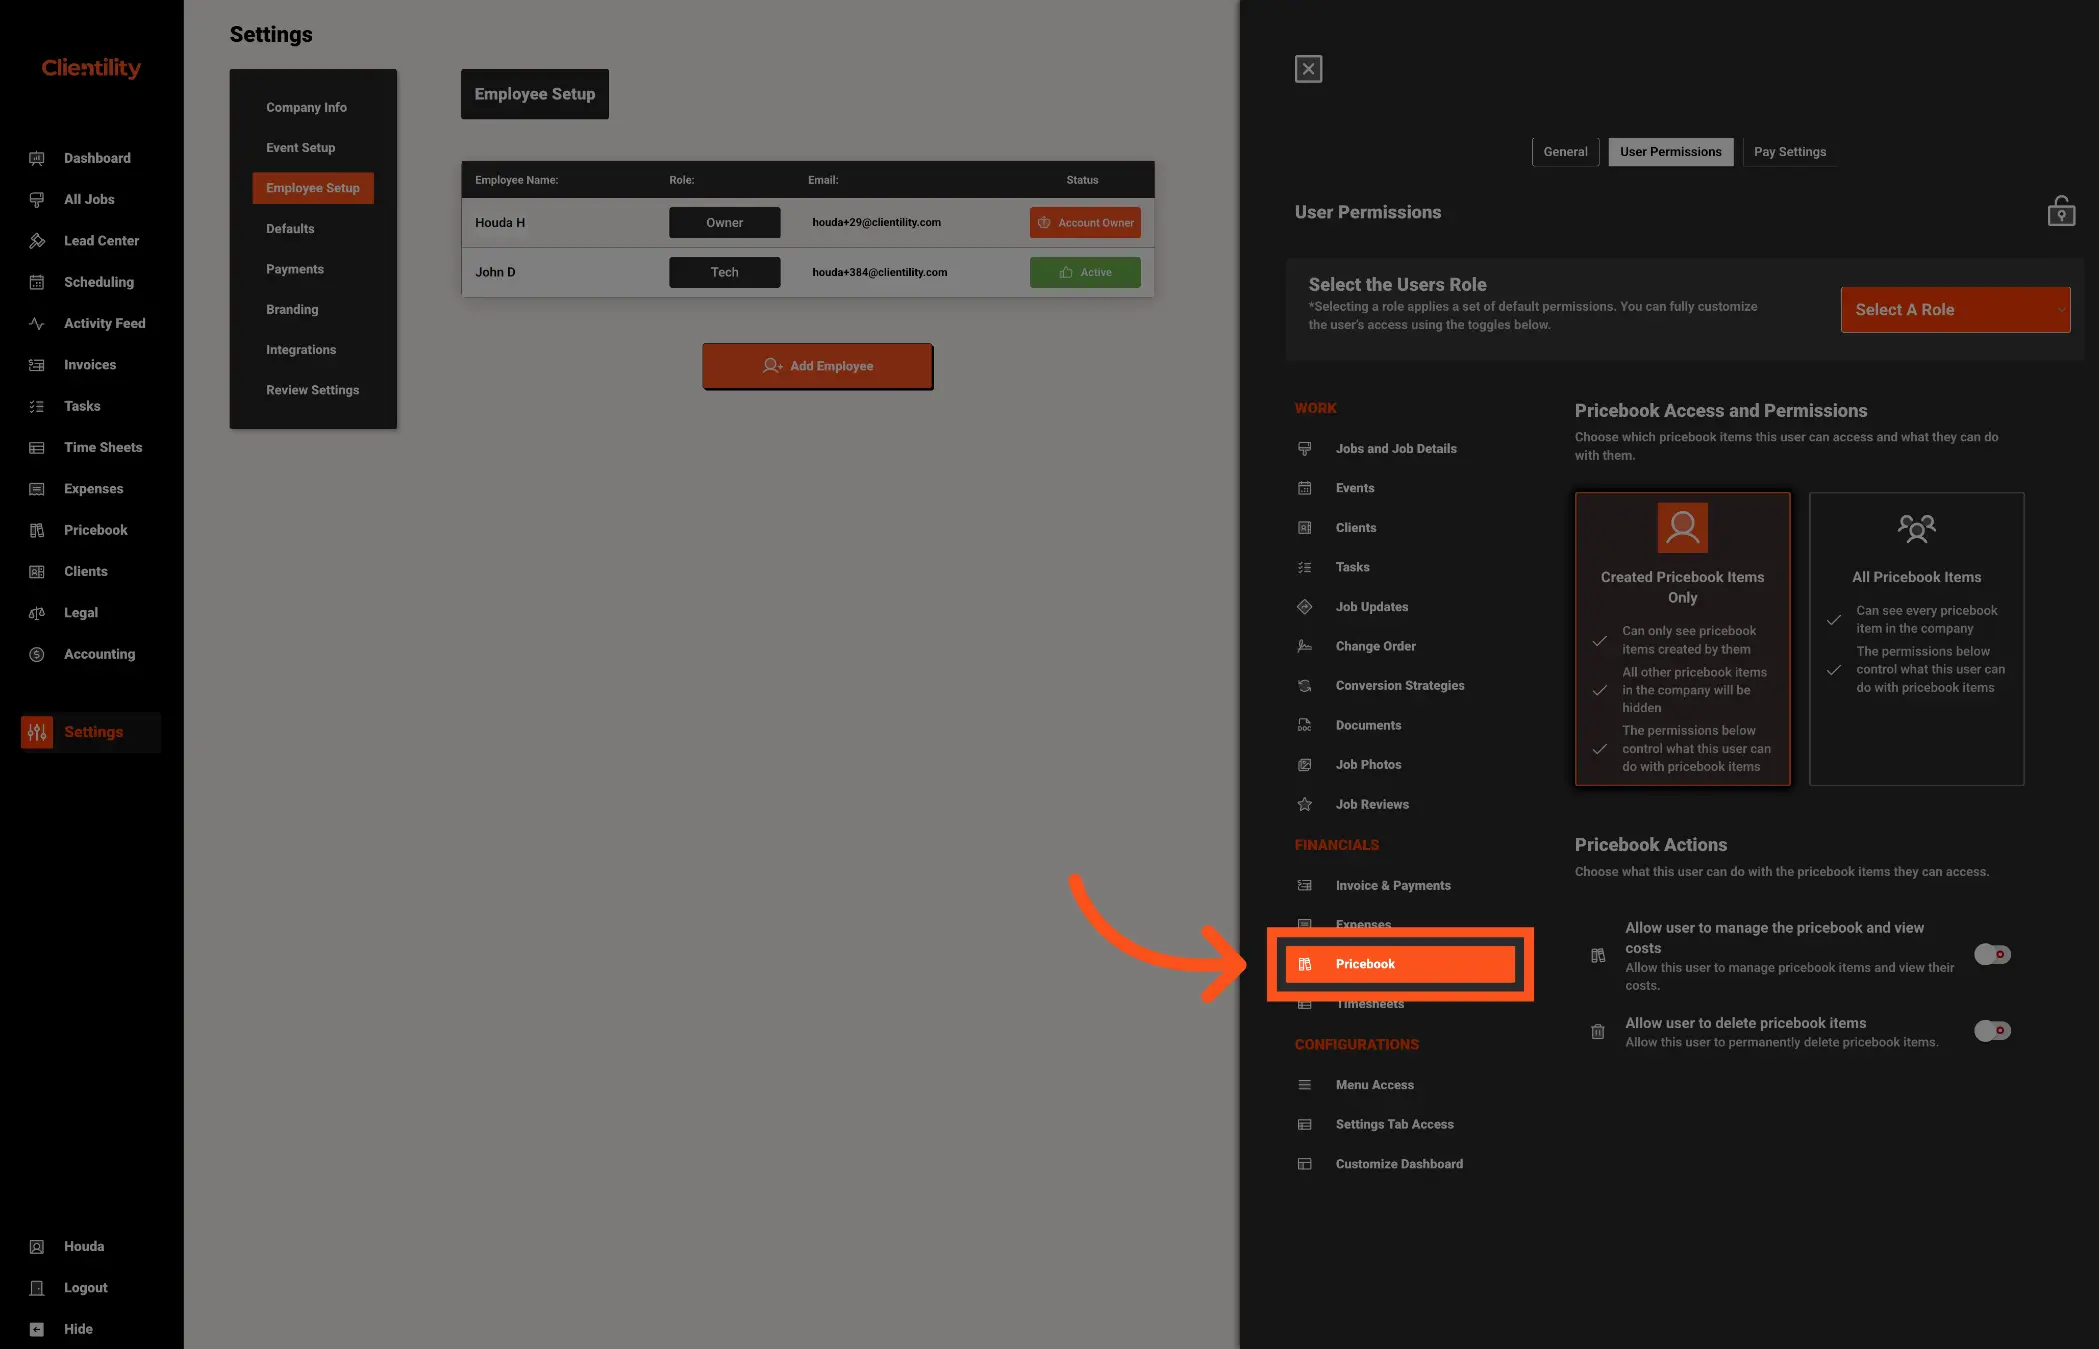
Choose whether the user can access only pricebook items they created or all pricebook items in the company.
Choose Created Pricebook Items Only if the user should only see pricebook items they created. All other pricebook items in the company will be hidden.
Choose All Pricebook Items if the user needs to see every pricebook item in the company.
Use these permissions to control what the user can do with the pricebook items they can access.
You can allow users to:
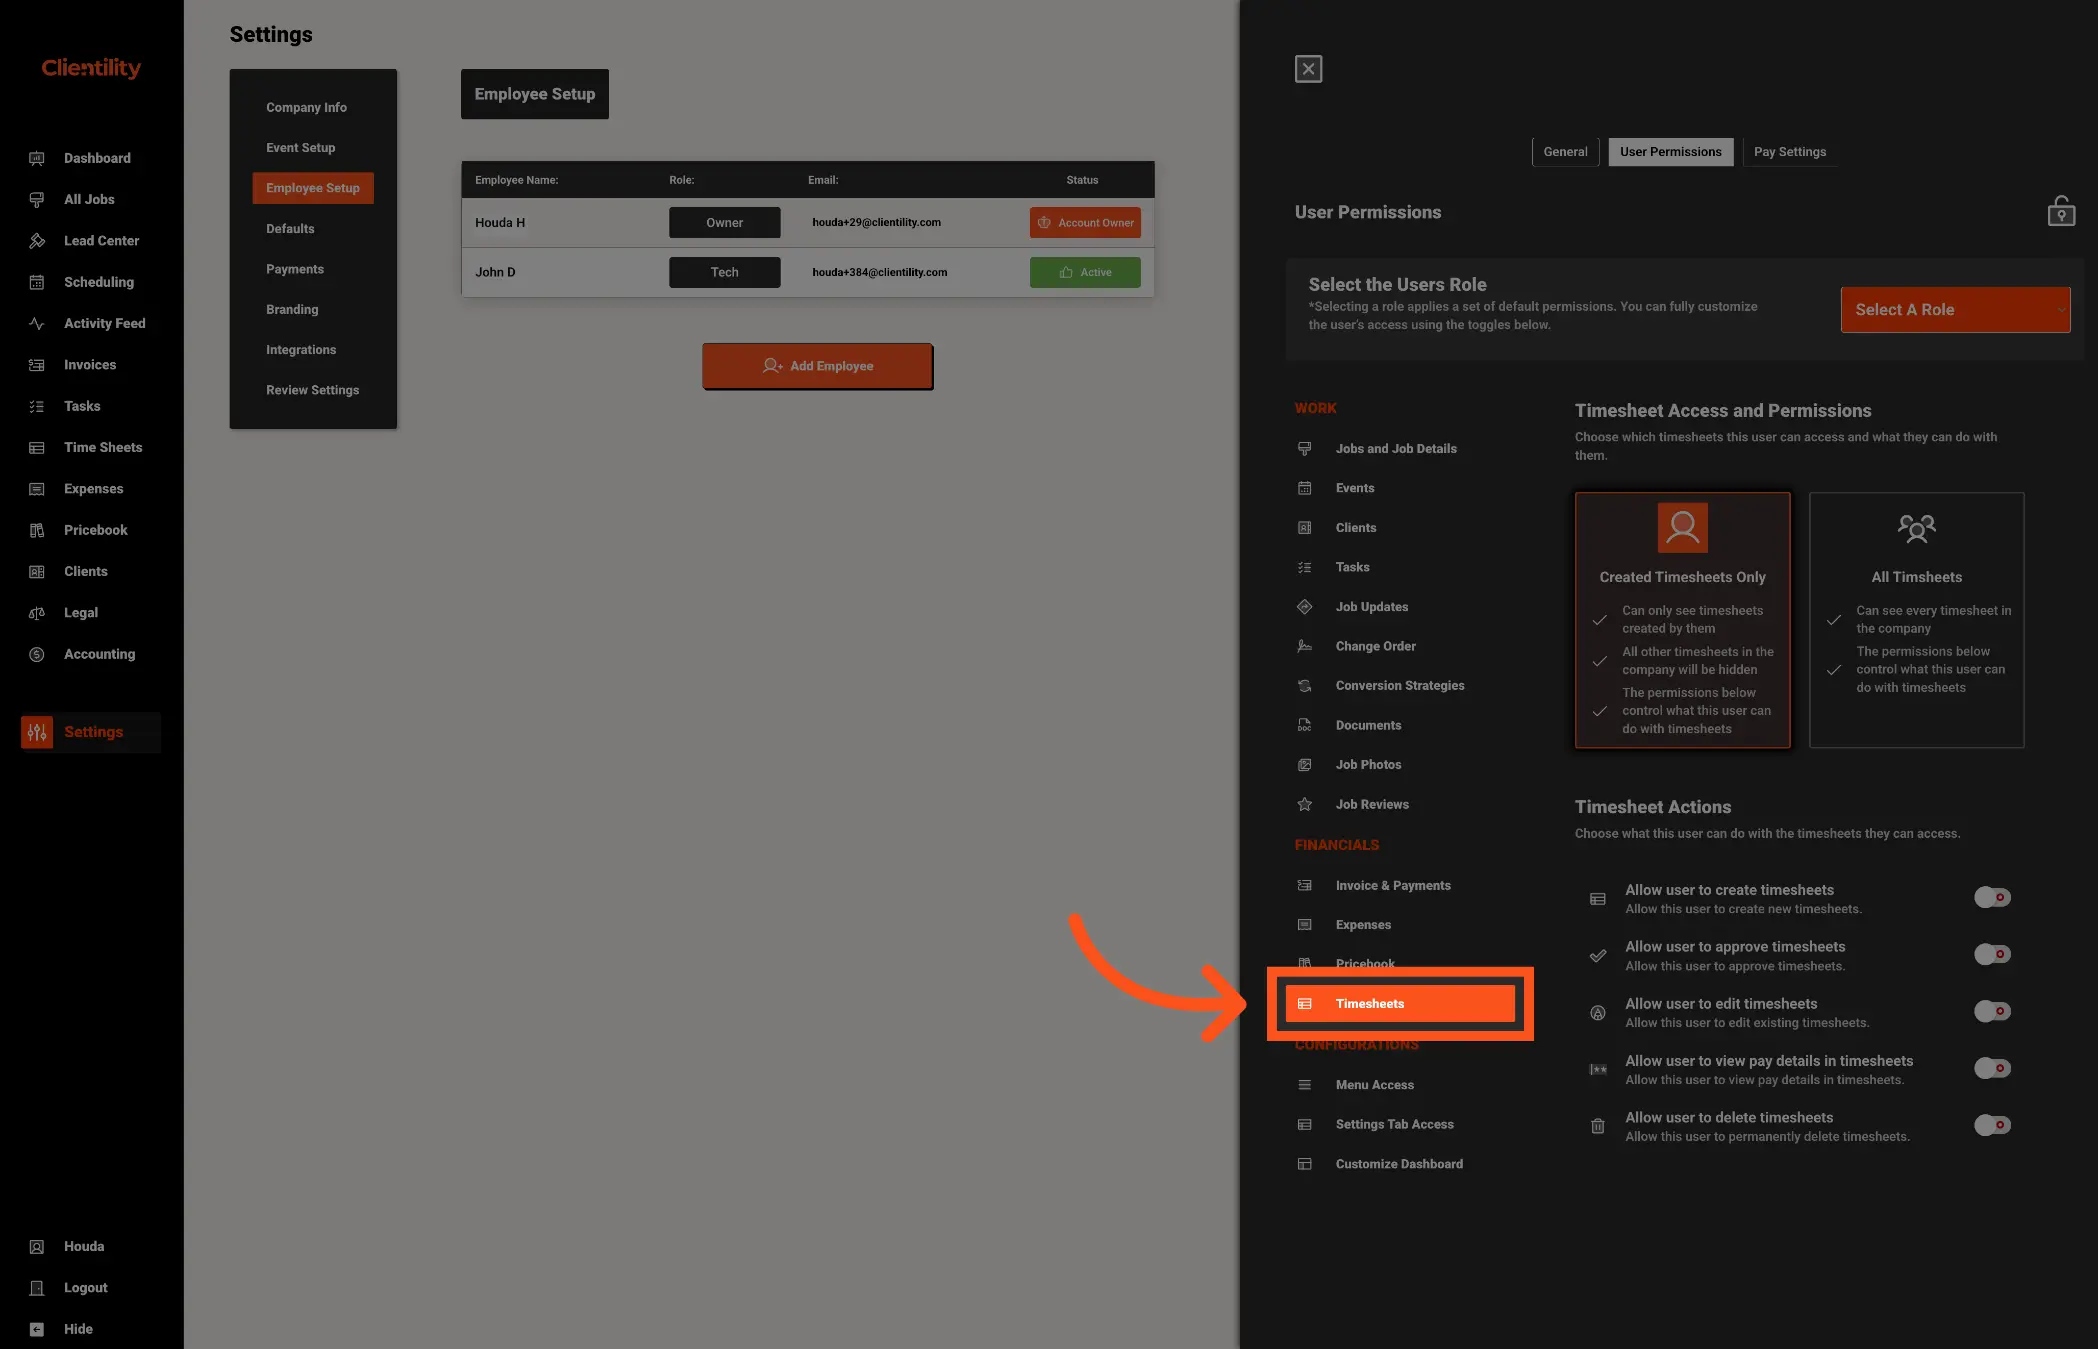
Choose whether the user can access only timesheets they created or all timesheets in the company.
Choose Created Timesheets Only if the user should only see timesheets they created. All other timesheets in the company will be hidden.
Choose All Timesheets if the user needs to see every timesheet in the company.
Use these permissions to control what the user can do with the timesheets they can access.
You can allow users to:

Use Menu Access to choose which tabs appear in the user’s main Clientility menu sidebar.
Turning a tab off hides that tab from the user’s menu. It does not remove their access to related items elsewhere in Clientility. Access to those items is controlled separately through the individual permissions.
For example, turning off the Scheduling tab hides the Scheduling tab, but it does not automatically hide events. If a sales representative does not need to work with events, turn off the Scheduling tab and do not assign any events to them.
The same applies to tasks. Turning off the Tasks tab removes it from the sidebar, but tasks may still appear elsewhere if the user is assigned to them. If tasks are not part of a team member’s workflow, turn off the Tasks tab and do not assign tasks to them.
Use Menu Access to create a simpler workspace that only shows the areas each user needs for their role.
You can control access to the following tabs:

Use Settings Tab Access to control which sections of Settings a user can open.
Turn on only the settings tabs the user needs for their role. For example, you may allow an office manager to access Company Info, while keeping Integrations only to an administrator.
This permission controls access to the settings tabs only.
You can control access to:

Use Customize Dashboard to choose which widgets appear on a user’s dashboard.
Turn a widget on to show it on the user’s dashboard, or turn it off to remove it. Choose only the widgets that are useful for the user’s role and daily workflow.
You can choose from the following widgets: